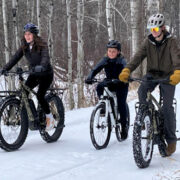
Roger DeBrito got out with his family to shoot video of them riding their e-bikes on a winter day. Here we go!
Roger is a CyclingSavvy instructor and founder of Journeys from Home Montana, a program to develop independent mobility skills for children walking and bicycling. He is a long-time year-round cyclist. He describes his winter bicycling career, and his family’s e-bikes:
Born in Minnesota, and winter commuting in Montana since 1976, I have taken my share of “falls” in the winter. It takes a very skilled and conscientious cyclist to ride in winter. Studs are a must in my book. The new fat, soft tired bikes do very well also. We have 5 E-bikes in our stable.
One Extra-cycle, front-wheel conversion. The extra length of the wheelbase helps in winter. The front-wheel drive is awesome, pulling instead of pushing.
Two Mid-Drive fat tire hunting bikes. I pull sleds with these! Great on snow and in the snowmobile ski tracks. Not so good on hard-pack snow and ice. The drive system, even in low, jumps and is difficult to control. Most e-bikes do not have a walk/creep mode that works on ice and hard-pack snow.
One Terra Trike (tandem) 10 feet long, with a rear wheel conversion. Sitting four inches off of the ground and having three wheels under me is my most confident vehicle on ice and packed snow.
One 16″ kid’s e-bike, is fun because you can drag your feet on the ice.
In an earlier post on this blog, I described savvy strategies to navigate a small, single lane traffic circle. I’ll now take the discussion up a level and describe a modern roundabout. I shot the video below in Montreal, Quebec, Canada, while on a bicycle tour with a friend. The location in the video, FYI. Have a look at the video and then I’ll follow up with some comments.
Roundabout or traffic circle? Does it matter?
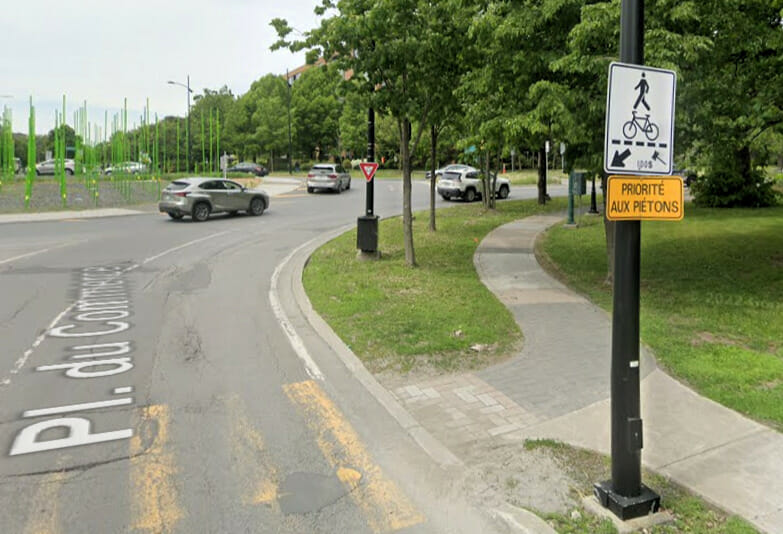
Articles about this intersection call it either a roundabout (rond-point) or a traffic circle (carrefour à circulation giratoire). One of the articles explains that entering traffic must yield to traffic in a roundabout; rules for a traffic circle are the opposite: antiquated French practice. At every circular intersection I have seen in the US or Canada, entering traffic yields, for a good reason which I’ll explain later. Here, signs tell drivers to yield at crosswalks and again when entering the circular roadway. So, I’ll call this a roundabout, though in some ways it doesn’t quite operate as one.
Signs indicate that drivers must yield when entering the roundabout
Modern roundabout advantages and disadvantages
Modern roundabouts have deflection – curved entrances and exits. Also, there is a truck apron — a ring of raised pavement inboard of the circular roadway. When a large truck is in the inner lane, its left rear wheel(s) go up onto the the truck apron. These features slow traffic down. There is more time for drivers to negotiate right of way, reducing crash severity. There are no head-on conflicts. And, because traffic in the circular roadway never stops, a roundabout can carry more traffic than an intersection with traffic signals.
Roundabout advocates like to stress these advantages, but there are also some real problems. Unless drivers reliably yield at crosswalks, pedestrians have a harder time at roundabouts than at signalized intersections. Because traffic flows continuously, gaps in traffic downstream of the roundabout are fewer. Drivers in side streets have a harder time entering or crossing downstream traffic.
In a two-lane modern roundabout, drivers are supposed to yield to traffic in both lanes and go directly to the inner lane except when taking the first exit. Drivers must cross the outer lane when exiting from the inner lane. These issues have led to quite a bit of confusion and to increases in crash rates. As noted in the video, one leg of this roundabout has been restriped from two lanes to one — probably reflecting this concern.
A mostly modern roundabout Quebec-style
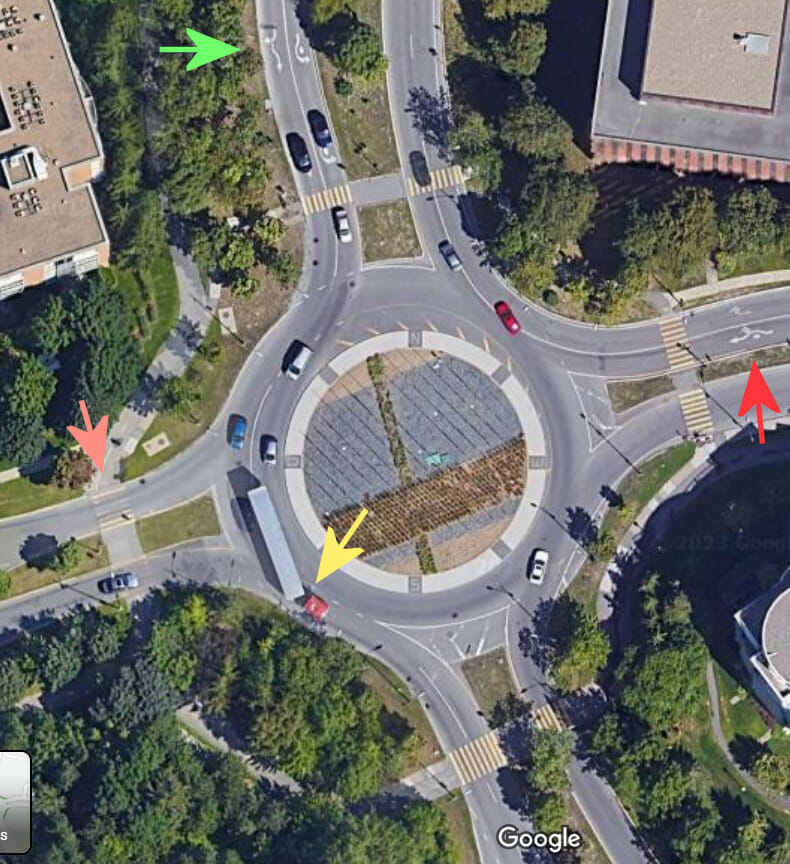
In the satellite view below, the orange arrow at the left shows where I began my tour of the roundabout. The green and red arrows point to markings that tell drivers which lane to use at two-lane entrances. Lane use is different at these two entrances, reflecting the volume of traffic which takes different exits.
It is unusual for both lanes of a two-lane entry, like the one with the red arrow, to allow right turns. Though drivers are not supposed to change lanes or overtake inside a modern roundabout, a red car is doing that anyway. The yellow arrow points to an example why they shouldn’t overtake: the truck’s cab is in the outer lane, but the trailer is off-tracking into the inner lane. A driver who tried to overtake would get a big squeeze. If the truck had entered from the north, it would first have off-tracked to the right. You can actually see where trucks have gone up over the curb.
Do you see inconsistencies with standard US roundabout rules? I see two! Explanations are below the picture.
The inconsistencies:
If the truck (or any other vehicle) entered from the east (red arrow), it would have to change lanes to get to the southbound exit.
The section with the dashed line at the head of the yellow arrow also extends back under the truck. It is long enough that drivers entering from the west (left side of the image) will be merging across this segment rather than yielding to traffic in both lanes at once.
And for bicyclists and pedestrians..
Something different, the video shows… Quebec is very intent on separating bicyclists from motor traffic. Bicyclists are directed to ride around the outside of this roundabout, using crosswalks along with pedestrians.
Motorists’ yielding to heavy bicycle and pedestrian traffic in crosswalks overturns the advantage of a roundabout in increasing capacity for motorists. And safety issues with the sidepath treatment are debatable, as most crashes occur at intersections and driveways, where bicyclists and motorists do not have a good view of each other. Motorists are supposed to yield to bicyclists, but for safety’s sake, bicyclists also most be prepared to yield. Mighk Wilson’s summary of his research, published in this blog, highlights such issues. His key finding was that bicyclists make the bikeways safer — by riding slower — rather than that the bikeways make the bicyclists safer. Safety at speed becomes an increasing concern with the advent of ebikes.
One side, two-way
A two-way sidepath runs along one side of each street that connects to this roundabout. The sidepath runs only 3/4 of the way around the roundabout — and so, to connect with the streets going in all four directions, the sidepath is two-way. The fourth quadrant has only a narrow sidewalk.
Mighk Wilson, among others, has shown that entering a crosswalk from the right is generally much more hazardous for a bicyclist than entering from the left: right-turning drivers will be looking left. In this modern roundabout, crosswalks are well back from the circular roadway. Motorists’ attention does not have to be directed toward roadway traffic when scanning for bicyclists. But still — bicyclists need to be prepared to yield.
I explore the roundabout
While my companion checked out a map, I first rode the sidepath. Fortunately, traffic was light. A motorist was approaching at only one crosswalk, and yielded to me.
The route around the outside of the roundabout on the sidepath is long, and slow. For purposes of comparison, I also rode around in the roadway.
The same strategies demonstrated in the earlier post about traffic circles apply in this modern roundabout. Except when preparing to exit, I kept to the inside, where there are no entrances or exits and motor traffic is slow. My strategy worked fine, and I decided to take a second tour around the roundabout. Riding the roadway is my usual choice, and at many circular intersections, it is the only option.
Bend the rules in a modern roundabout?
Really, the savvy approach to roadway riding is the same in an old-style traffic circle or a modern roundabout: use the correct lane, and especially, get away from the outside if you are going past the first exit. Be careful of entering traffic when you are exiting, especially at a two-lane exit. I sometimes do find it useful to bend the rules and merge toward the outside lane before I exit, to avoid conflict with traffic coming around in the outside lane — explanation here.
The video reveals that two quadrants of the roundabout were originally two-lane, and entering drivers would have to yield to traffic in both lanes. One quadrant still is two-lane, under the semi truck in the image above. Striping a gore (no-drive zone) next to the center island in the other quadrant reduced it to one lane, at least in theory – you’ll notice that the paint is worn. I rode over the gore myself. Bad me. But I avoided a potential conflict with an entering vehicle!
What do you think?
Expect another article soon, taking the exploration of circular intersections to yet another level…
https://cyclingsavvy.org/wp-content/uploads/2023/08/rond-point.jpg864790John Allenhttps://cyclingsavvy.org/wp-content/uploads/2021/06/CS-logo_xlong-header.pngJohn Allen2023-09-06 15:09:452023-12-14 14:40:37A modern roundabout, or is it a traffic circle?
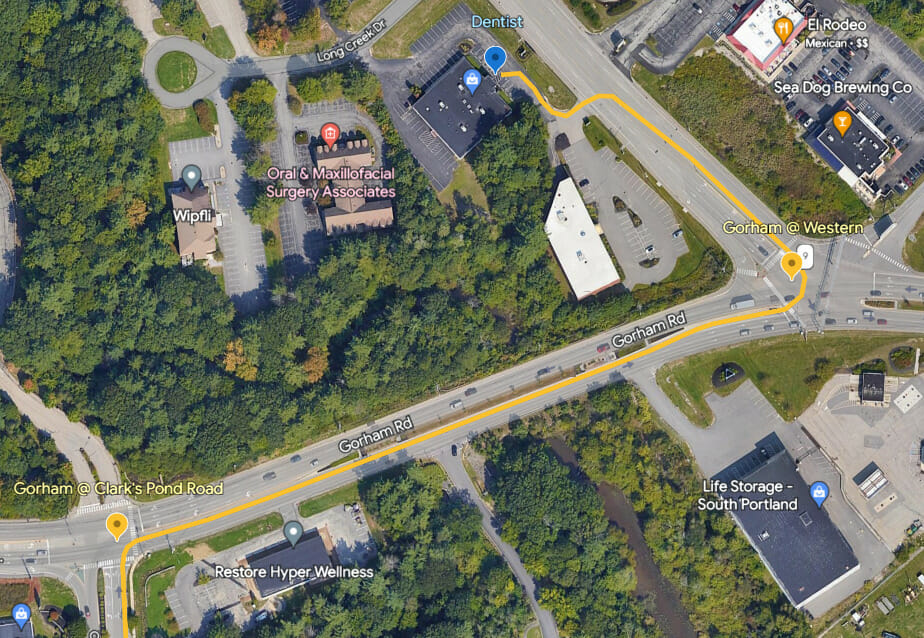
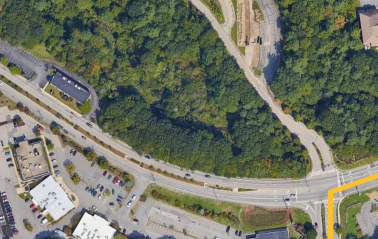
In my initial “Stroad Hack” article, I described a hack involving two intersections. I referred briefly to the quarter mile on a different stroad, but I didn’t go into detail on that.
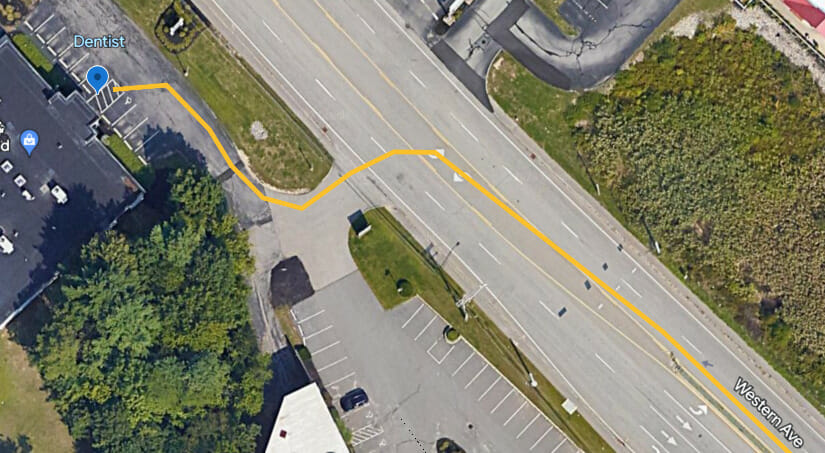
This post will focus on the quarter mile, on Gorham Road. It stretches from left to right in the image below. I use it quite often to go to my dentist’s office.
Use Online Maps…and Work Backwards!
Route planning has of course always used maps, initially on paper. I rely heavily on online maps in these articles, and particularly on Google’s ground-level Street View. Zooming in on Google’s satellite view lets you plan your lane choice. That is especially useful on multi-lane roads that you may be apprehensive about.
Always Use Maps?
So, is it necessary to plan every stroad route with mapping? No, I don’t think so. One of my favorite ways of riding is to explore a new area when I go on vacation. Serendipity is an important aspect of those rides for me. “Hey, that road looks interesting, let’s see what’s down there.” Cycling by the rules of the road is generally safe, even on an unfamiliar road. But you may want to choose mapping, especially when you know you will be on uncomfortable roads. It can allow you to make more informed decisions so the journey is more comfortable.
Mapping is also useful for illustration in these articles. I am using Google Earth for these images, although Google Maps works too. Custom maps are a great teaching tool!
Why work backwards?
When planning a route, it is often useful to start from the destination and work backwards. That way, you’ll see what works as you approach it — and at each step as you work backwards to the start. For that reason, I am numbering the following hacks in reverse order, going back from from the turn into the dentist’s office, to the quarter-mile segment, to the start.
Hack 3 – Lane Choice onto Western Avenue
My dentist’s office is on the left side of Western Avenue. Conveniently, Western Avenue has a two-way center turn lane where I can wait for oncoming traffic to clear, before turning left into the driveway. If I’m already controlling the leftmost through lane, moving into the center turn lane as soon as it opens up is trivial.
Following the rules of the road for drivers, you must use the left-turn lane to turn onto Western Avenue from Gorham Road. If you’re uncomfortable with that, you can dismount and use the crosswalks. But we won’t go into that here.
What lane on Western Avenue do you turn into? Bicyclists who feel like they must always stay to the right might be tempted to turn into the rightmost lane, because “bikes stay to the right”.
Then Why Turn into the Left Lane?
There are (at least) two reasons to choose the left lane. For one, it’s more common when turning onto a multi-lane road to turn into the closest lane, Maine laws do not actually require that, though some states do, and it makes sense here regardless.
There’s an important operational reason here too: It’s only about 225 feet from the intersection to the center turn lane. It’s only about 100 feet more to the driveway. That’s only 25 seconds at 10 MPH. It makes no sense to turn into the right lane, then immediately have to change to the left lane to get to the center turn lane. If you do that, any traffic behind you will turn into the left lane to pass you, and will block your lane change. Why not just turn immediately into the left lane? Any traffic behind you will pass you in the right lane, which is exactly what you want anyway!
So there’s one hack: Turn from Gorham Road into the left lane of Western Avenue.
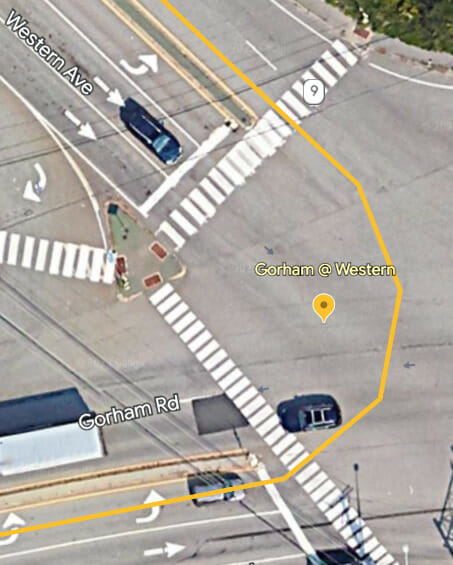
Hack 2 – Lane Choice onto the Quarter Mile
Continuing backwards, what about the lane choice onto Gorham Road?
This decision is like the last one. You’re going to spend less than 1/4 mile on Gorham Road (just over a minute at 10 MPH) before you turn left onto Western. So why turn into the right lane and have to change immediately?
Objections?
Granted, that’s a bit longer time spent in a leftmost lane than on Western Avenue. And that might bring up another objection, that motorists don’t expect bicyclists to travel in the left lane for an “extended” time. In”motorist time,” that may be about 10 seconds. 😉 But in our experience, visibility to people approaching from behind more than makes up for any surprise they may have. They still have plenty of time to see you and react.
If you are in a left through lane because you will be turning left shortly, try making occasional left turn signals. I think people are more patient if they understand why you are doing what you are doing. It may also be that they respect you more if they feel like you know what you’re doing. (And as a Savvy Cyclist, you do!)
Evaluating Convenience
I sometimes would still have had time to change lanes if I turned into the right lane here. But I don’t know that when I make the turn. And, whichever lane I choose, motorists behind me in that lane will have to change lanes. So it comes down to a balance of convenience: how convenient is which lane for me, and how many motorists will have to change lanes? Results vary by location, by time of day, and by what the traffic happens to be at that moment. But in this place, I don’t try to overthink it, and simply choose the left lane. The next and final hack makes that even easier.
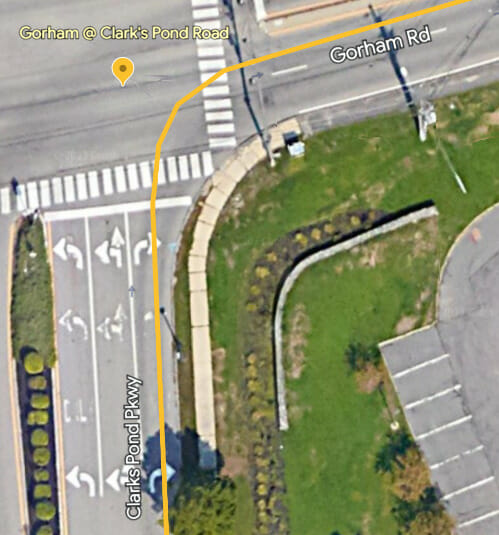
Hack 1 – When to Turn Right onto the Quarter Mile
Here’s one I never learned until I took CyclingSavvy, even after I had been become a certified instructor with another national cycling program. I’ll frame it as a question:
Q: When would you not want to take a right turn on red?
Everyone makes right turns on red, right? Why wouldn’t you? Bicyclists don’t like delay any more than motorists do. (Consider how many cyclists don’t bother stopping at lights if they think they can make it through. And how many pass even a short line of stopped cars on the way there.)
Red Lights Create Gaps
The answer never occurs to most motorists, including me before I started bike commuting. But you may have noticed it if you’ve cycled in traffic for very long: traffic travels in packs.
And why does this happen? In urban and suburban areas, it’s because of red lights. A red light collects a line of traffic while it’s red. Then it turns green and the whole pack surges forward.
The flip side to this is that red lights also create gaps. While that light is red, the only traffic entering the intersection is turning into it from the left or right (as we are in this case). This is nearly always much less traffic. Therefore, there are gaps for as long as the light is red. And effectively longer, because you’ll have traveled away from the intersection!
So, a very basic hack that you can use at every signalized right turn is: Don’t turn right on red. Even if you are allowed to turn right on red, you may wish to wait. Waiting for your green guarantees that you will have a gap with very little or no traffic behind you (except the few that turn onto the road during that time).
Of course, if traffic is light, it may be fine to turn right on red once the initial pack is clear of the intersection. This is especially so if you have the sight distance to see that there is no more oncoming traffic for quite a while. That’s fine. This is a tool, not a hard and fast rule.
As I turn right from Clark’s Road onto the quarter mile segment on Gorham Road, though, the traffic from the left is coming around a curve, so it’s impossible to tell how long until more comes. And it will probably be traveling at the posted speed (or greater) by that time, maybe even racing a yellow. So I almost always wait for the green here.
Notice the curve in Gorham Road, limiting the distance from which you can see traffic coming from your left as you wait to turn right.
Google Street View looking left from Clark’s Pond Parkway, about to make the right turn.
Car behind you?
What if, you may ask, there is a motorist behind you who would like to turn right on red?
Well, you can simply move over and motion for them to go ahead. Whether you move depends on the geometry. In this case, the right turn lane gets wider, so I tend to stop at the extreme left side of it. That way, I leave room for a car to turn on my right. I’ll motion for the driver to do that if necessary.
Where the turn is more squared off, you may not be able to extend this courtesy. Moving to the right can put you in a position to be cut off by turning drivers when the light changes.
Summary
In this article, I showed a typical bike trip from my office to my dentist’s office around the corner. In that trip, I utilized two different CyclingSavvy stroad hacks. First, I chose to wait for a green light to make the right turn onto Gorham Road, to ensure that I could turn into a gap, and be well established on the road as I prepared to turn left onto Western Avenue. In many cases, I’m already pulling into the left turn lane before any traffic catches up to me!
Secondly, I turned directly into the left through lane, twice. In both cases, it was because it was a short distance to another left turn, so it was not worth starting in the right lane and then changing. Traffic turning behind me has a clear lane on my right to pass me in.
These two general purpose hacks are applicable on any stroad, in a great variety of situations. Having these tools in your toolbox will greatly ease the friction that you might otherwise experience on such car-centric roads. They are what makes you a Savvy Cyclist.
I live in Westbrook, Maine, a suburb of Portland. We had a few winter storms here last month.
Navigating with my non-studded hybrid tires under winter road conditions always makes me grateful to have a Savvy Cyclist’s confidence to choose the roads and the position on those roads that works best when there is ice and slush. The choices are not always the same ones I make in good weather.
This is not a general introduction to winter cycling. To place this article in context, here are some related articles that you may also wish to check out:
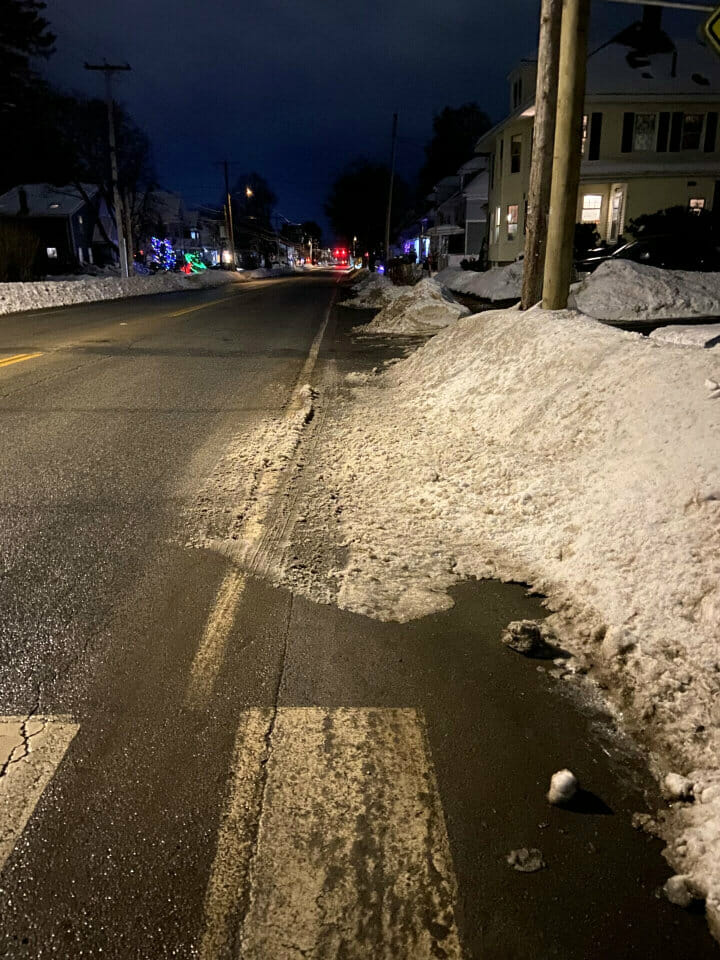
When I set out in messy winter weather, the first challenge starts at the end of my driveway. (I don’t count the driveway itself as a challenge because I can always walk my bike down it. Bonus: You don’t have to shovel the driveway to just get your bike out!)
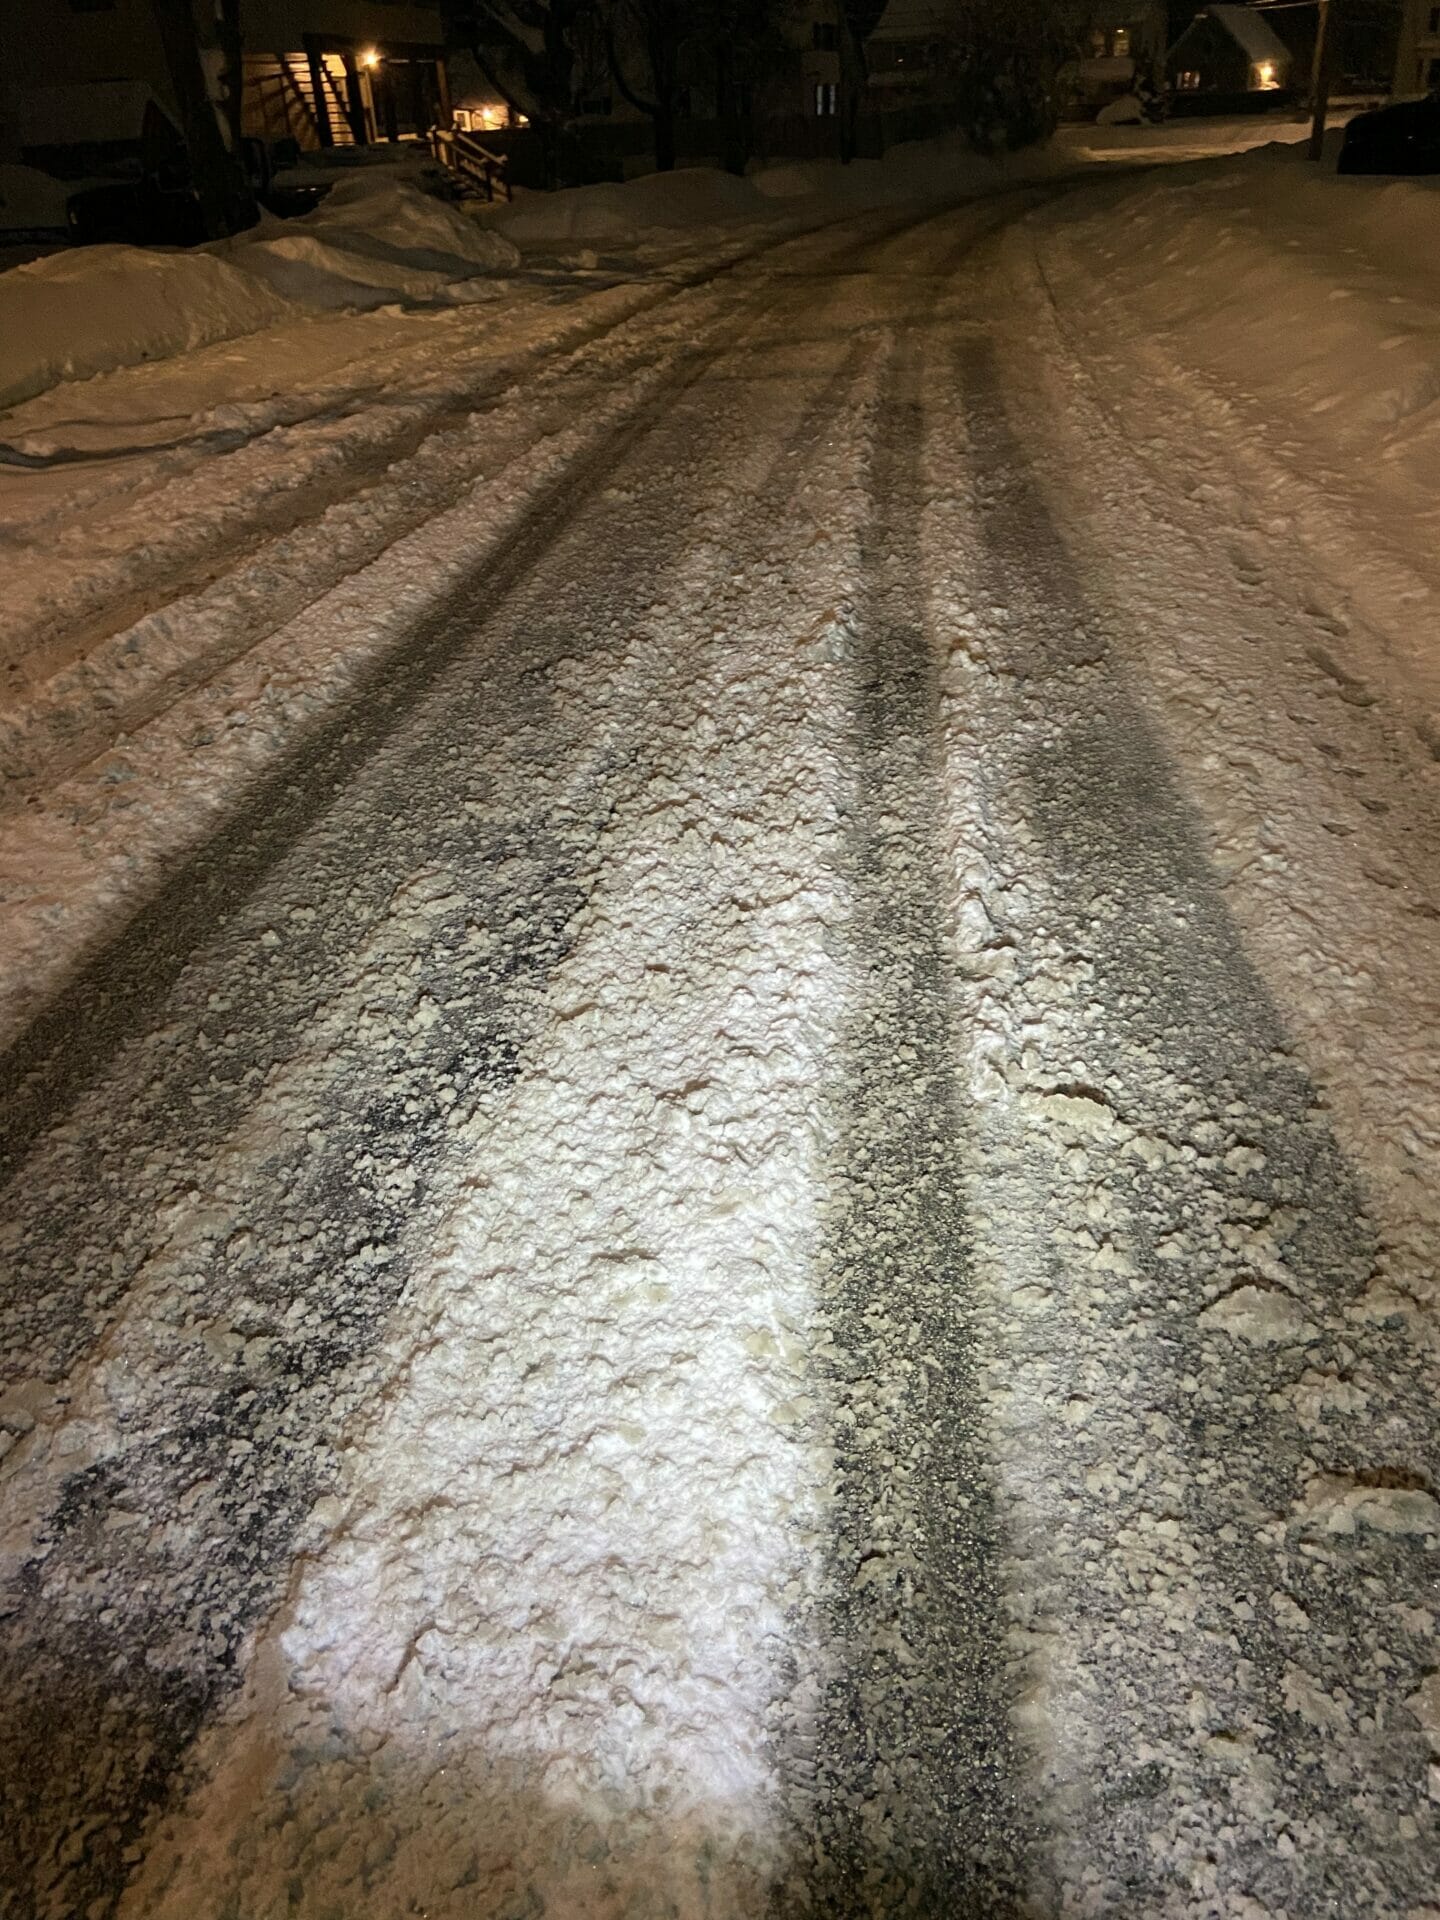
The streets in my neighborhood looked like the photo at the right as I started out to the grocery store one night in late January.
To the extent that any part of this street can be described as clean, it is the car tire tracks. Even in warm, dry weather, the travel lane is usually cleaner than the edge of the road, or the bike lane if there is one. This is because car tires tend to sweep things aside, making the travel lane somewhat “self cleaning”. Under winter road conditions, frequent car traffic has a similar effect. It’s not so much sweeping, unless the snow is really dry. But car tires compress wet snow into slush, and may partially throw it off to the side. They may melt it if the temperature is near or above freezing. This leads to the somewhat “clearer” tire tracks you see here.
Choosing a Route
After I’m on the street, I must next choose what route to take to my destination. It’s always much nicer to bicycle on quiet residential streets, right? Well, except in this weather, all of those streets are going to look just like the one above. Although the tire tracks are better than the middle or edges, they are still usually a bit slippery. The occasional pavement hazards like cracks and potholes increase the risk. Slush may even hide them! All in all, riding under these conditions is annoying, and you often have to go very slowly.
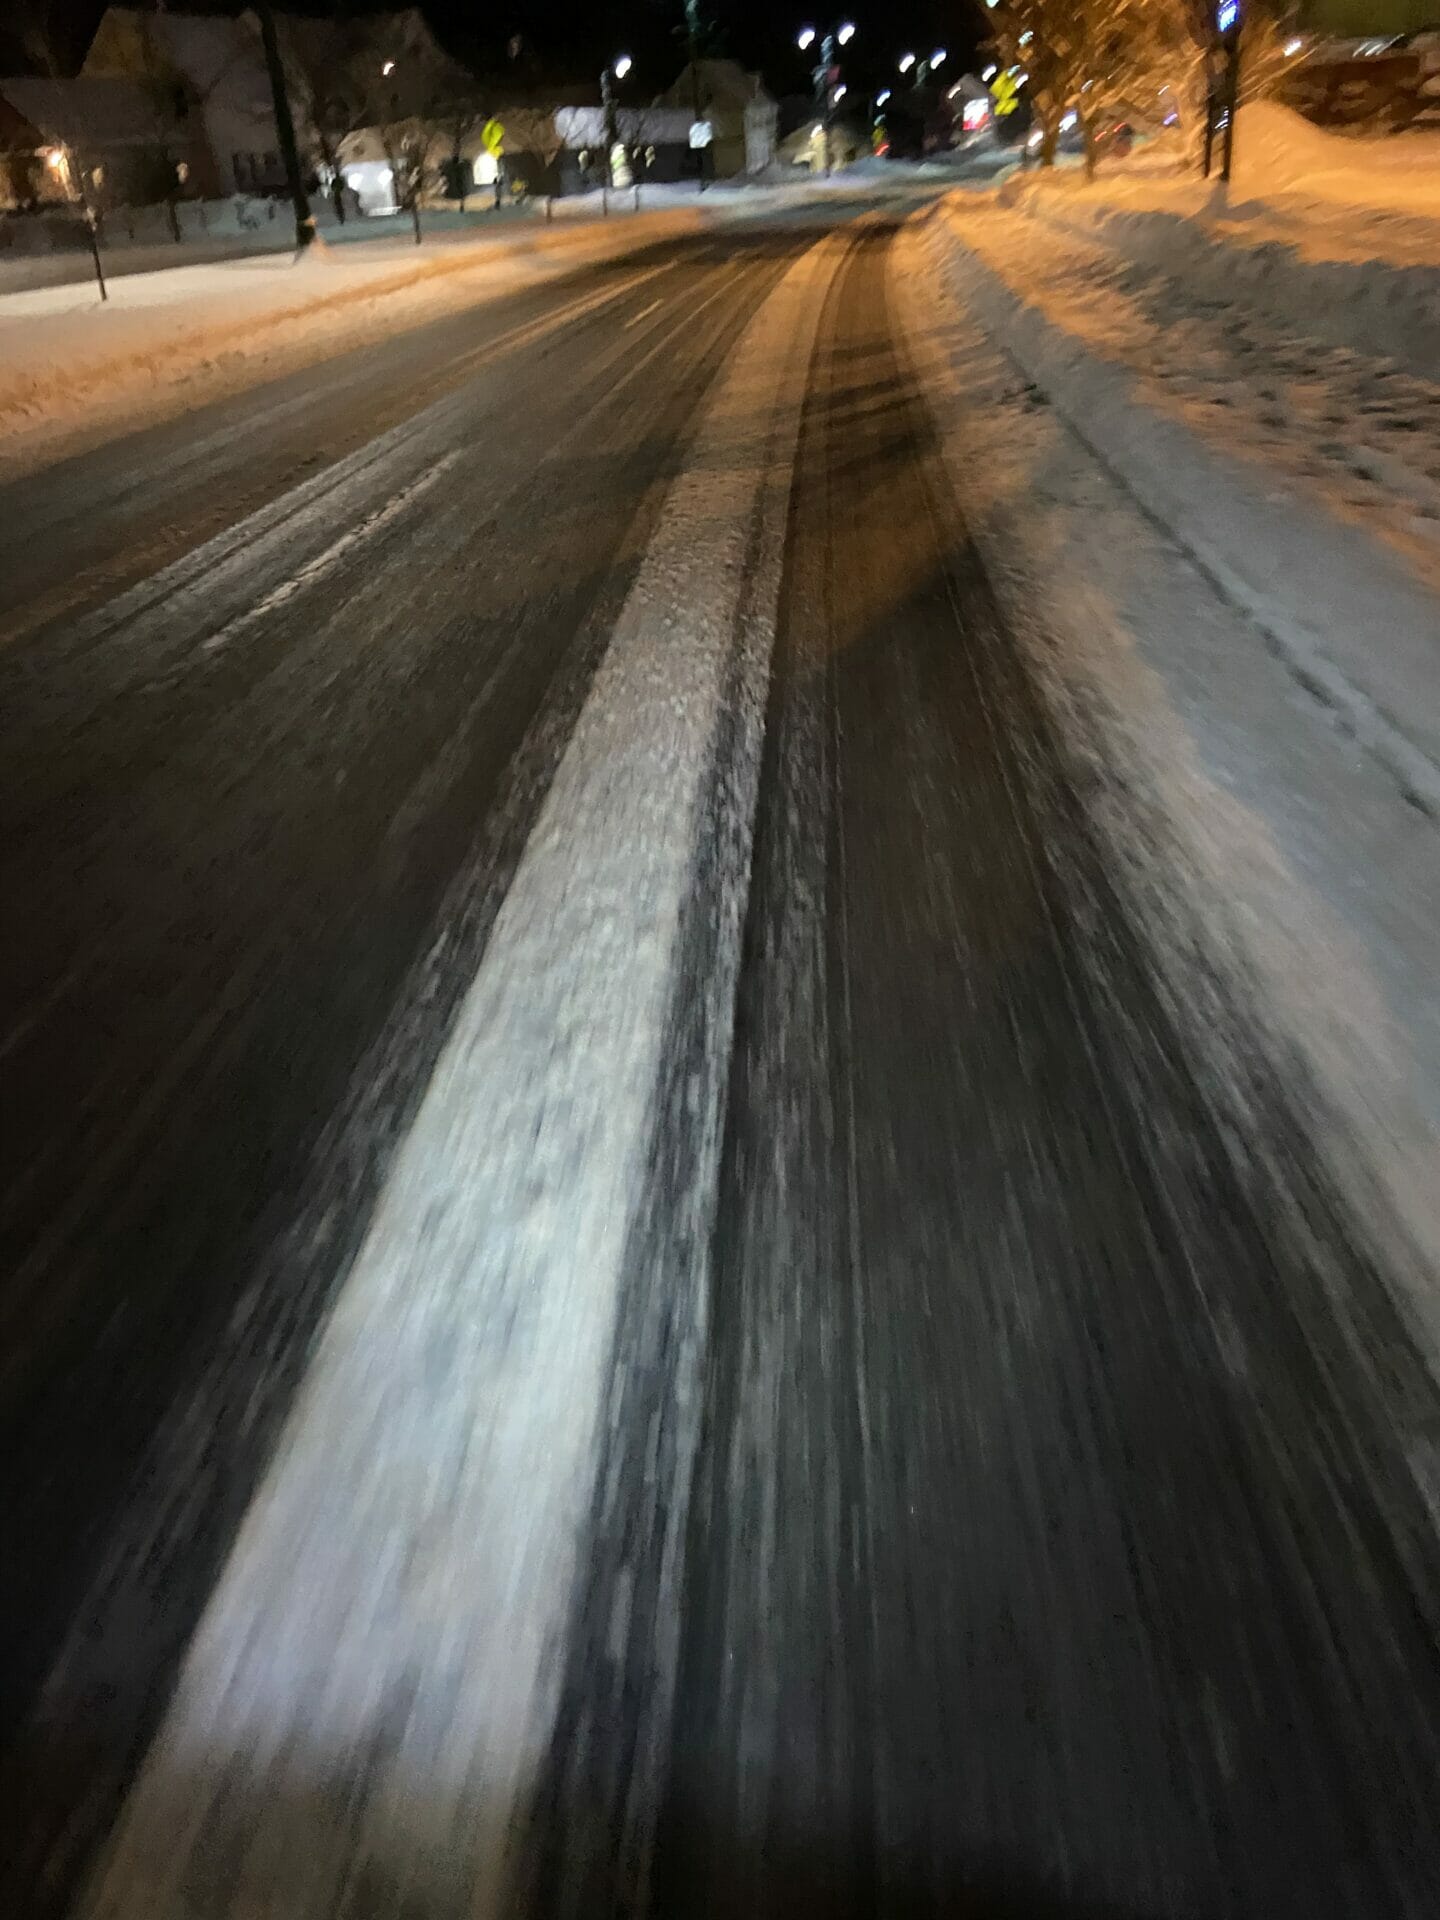
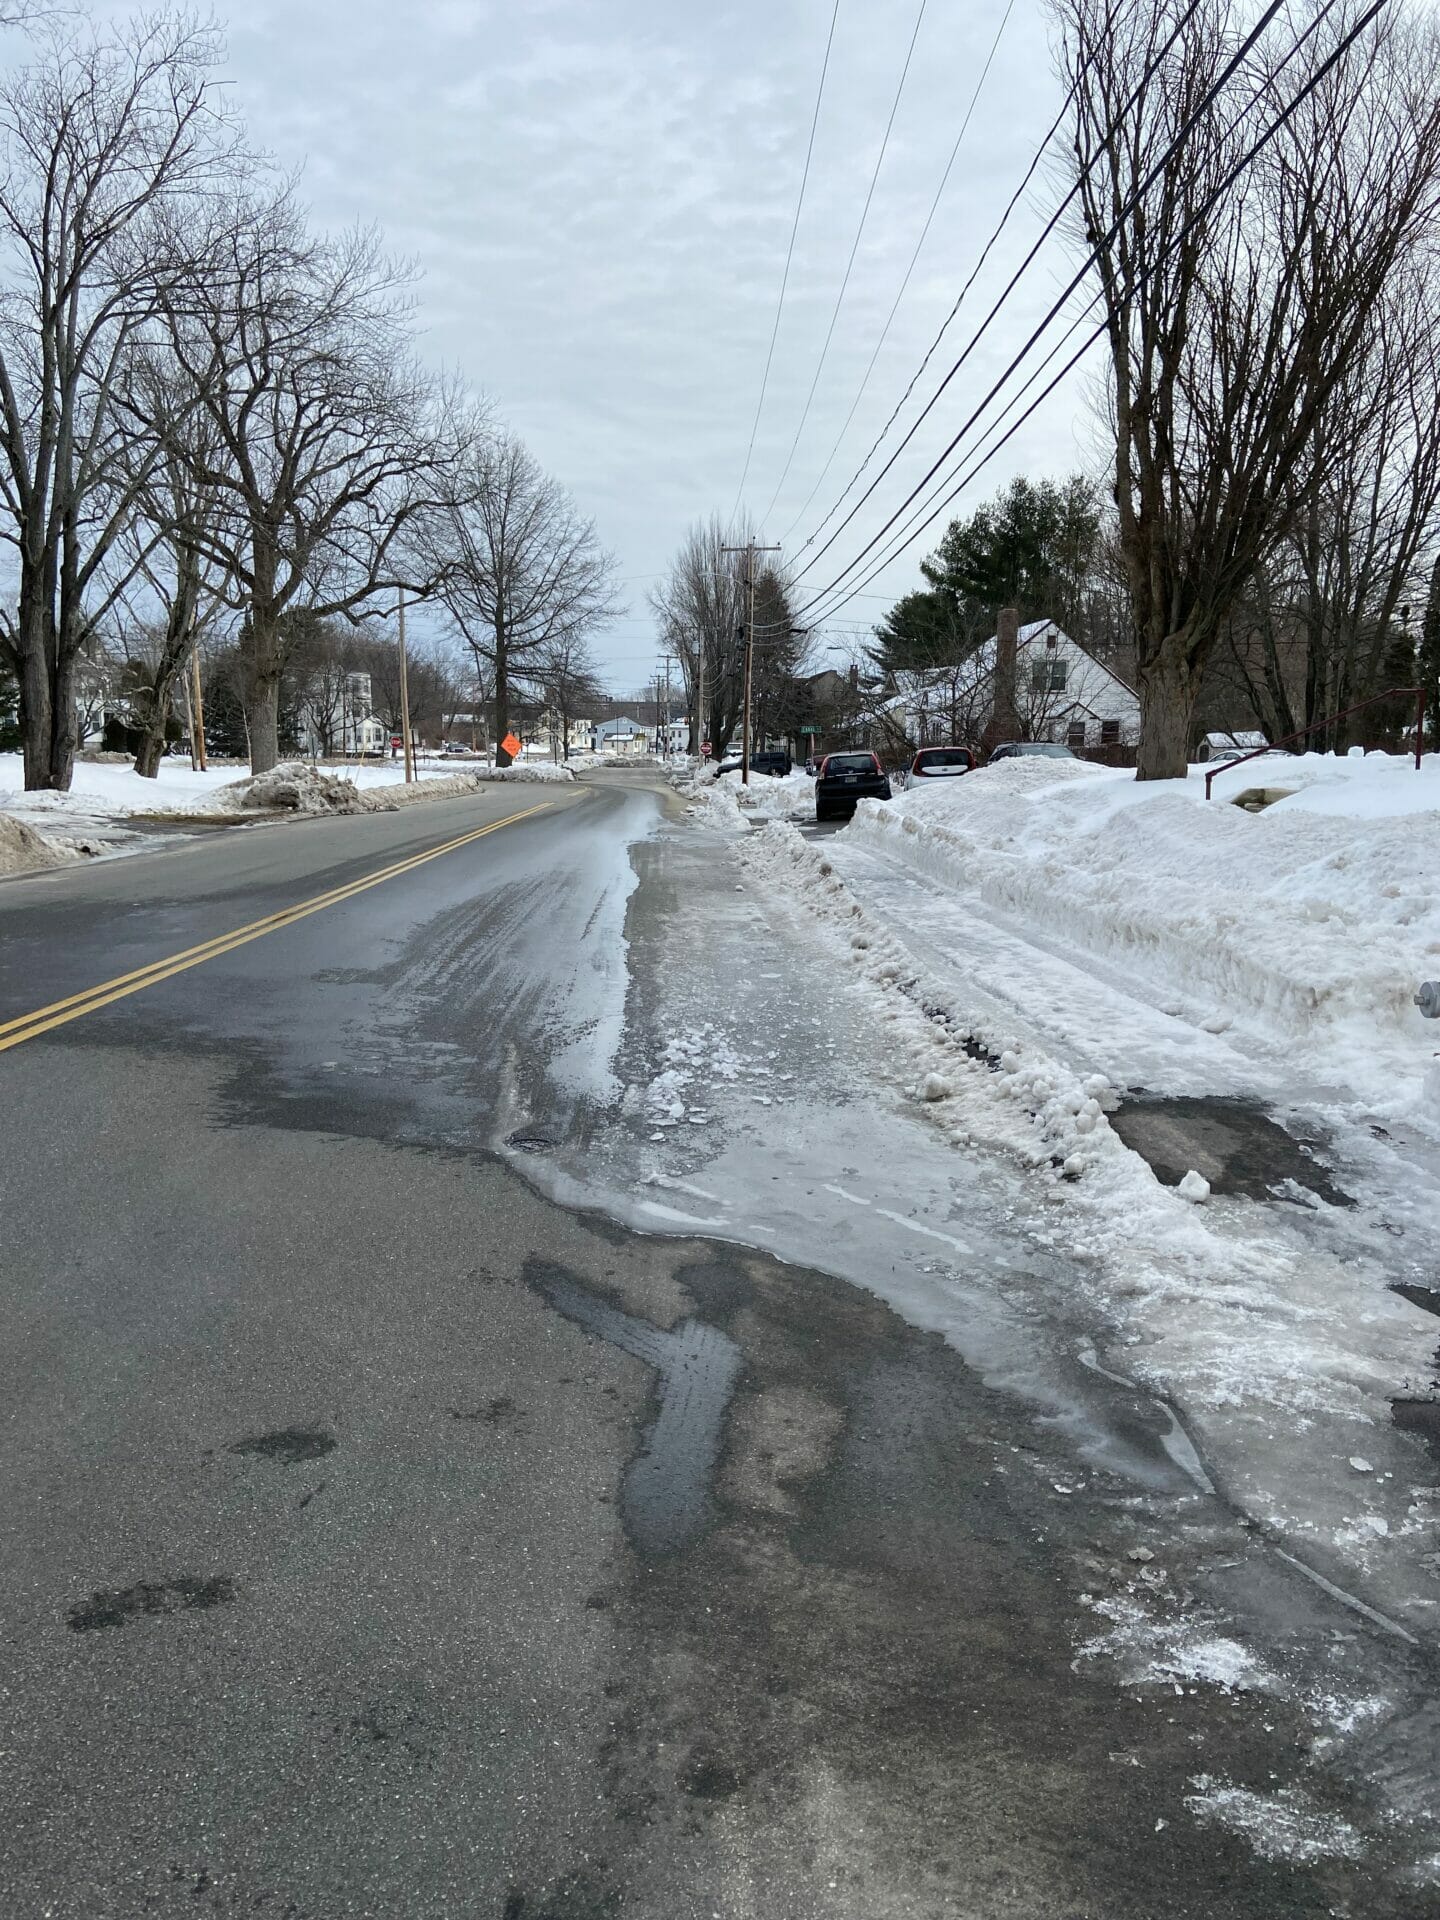
“Fortunately”, arterial roads are usually in better shape! The faster and more frequent traffic helps to clean them up faster, even with the same amount of plowing. (And even if it seems unfair, they usually get more frequent plowing too.) Here’s the 35 MPH arterial street I took to the grocery store that night. It still had snow in the middle and at the edge, but the tire tracks were mostly just wet, and it was much easier to see potholes and cracks. It was much less slippery than the smaller streets.
So here’s a reason you might actually choose an arterial! (And there are more.)
Winter Road Position
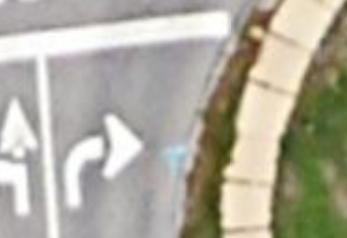
In both photos so far, you can see that the tire tracks are the cleanest position. There was no clear space at all at the edge. Of course some roads have wider shoulders or bike lanes. Plow truck drivers do usually make a decent attempt to clear shoulders and striped bike lanes, at least around here. Separated lanes are another story, because they require special equipment. Some cities are better than others in this regard. Around here, it’s not very reliable. Here’s what Portland’s parking-separated bike lane looked like recently. Also consider that separated lanes don’t get the car tire cleaning effect, and often don’t get as much direct sunlight to help with melting.
Bike Lanes and Shoulders
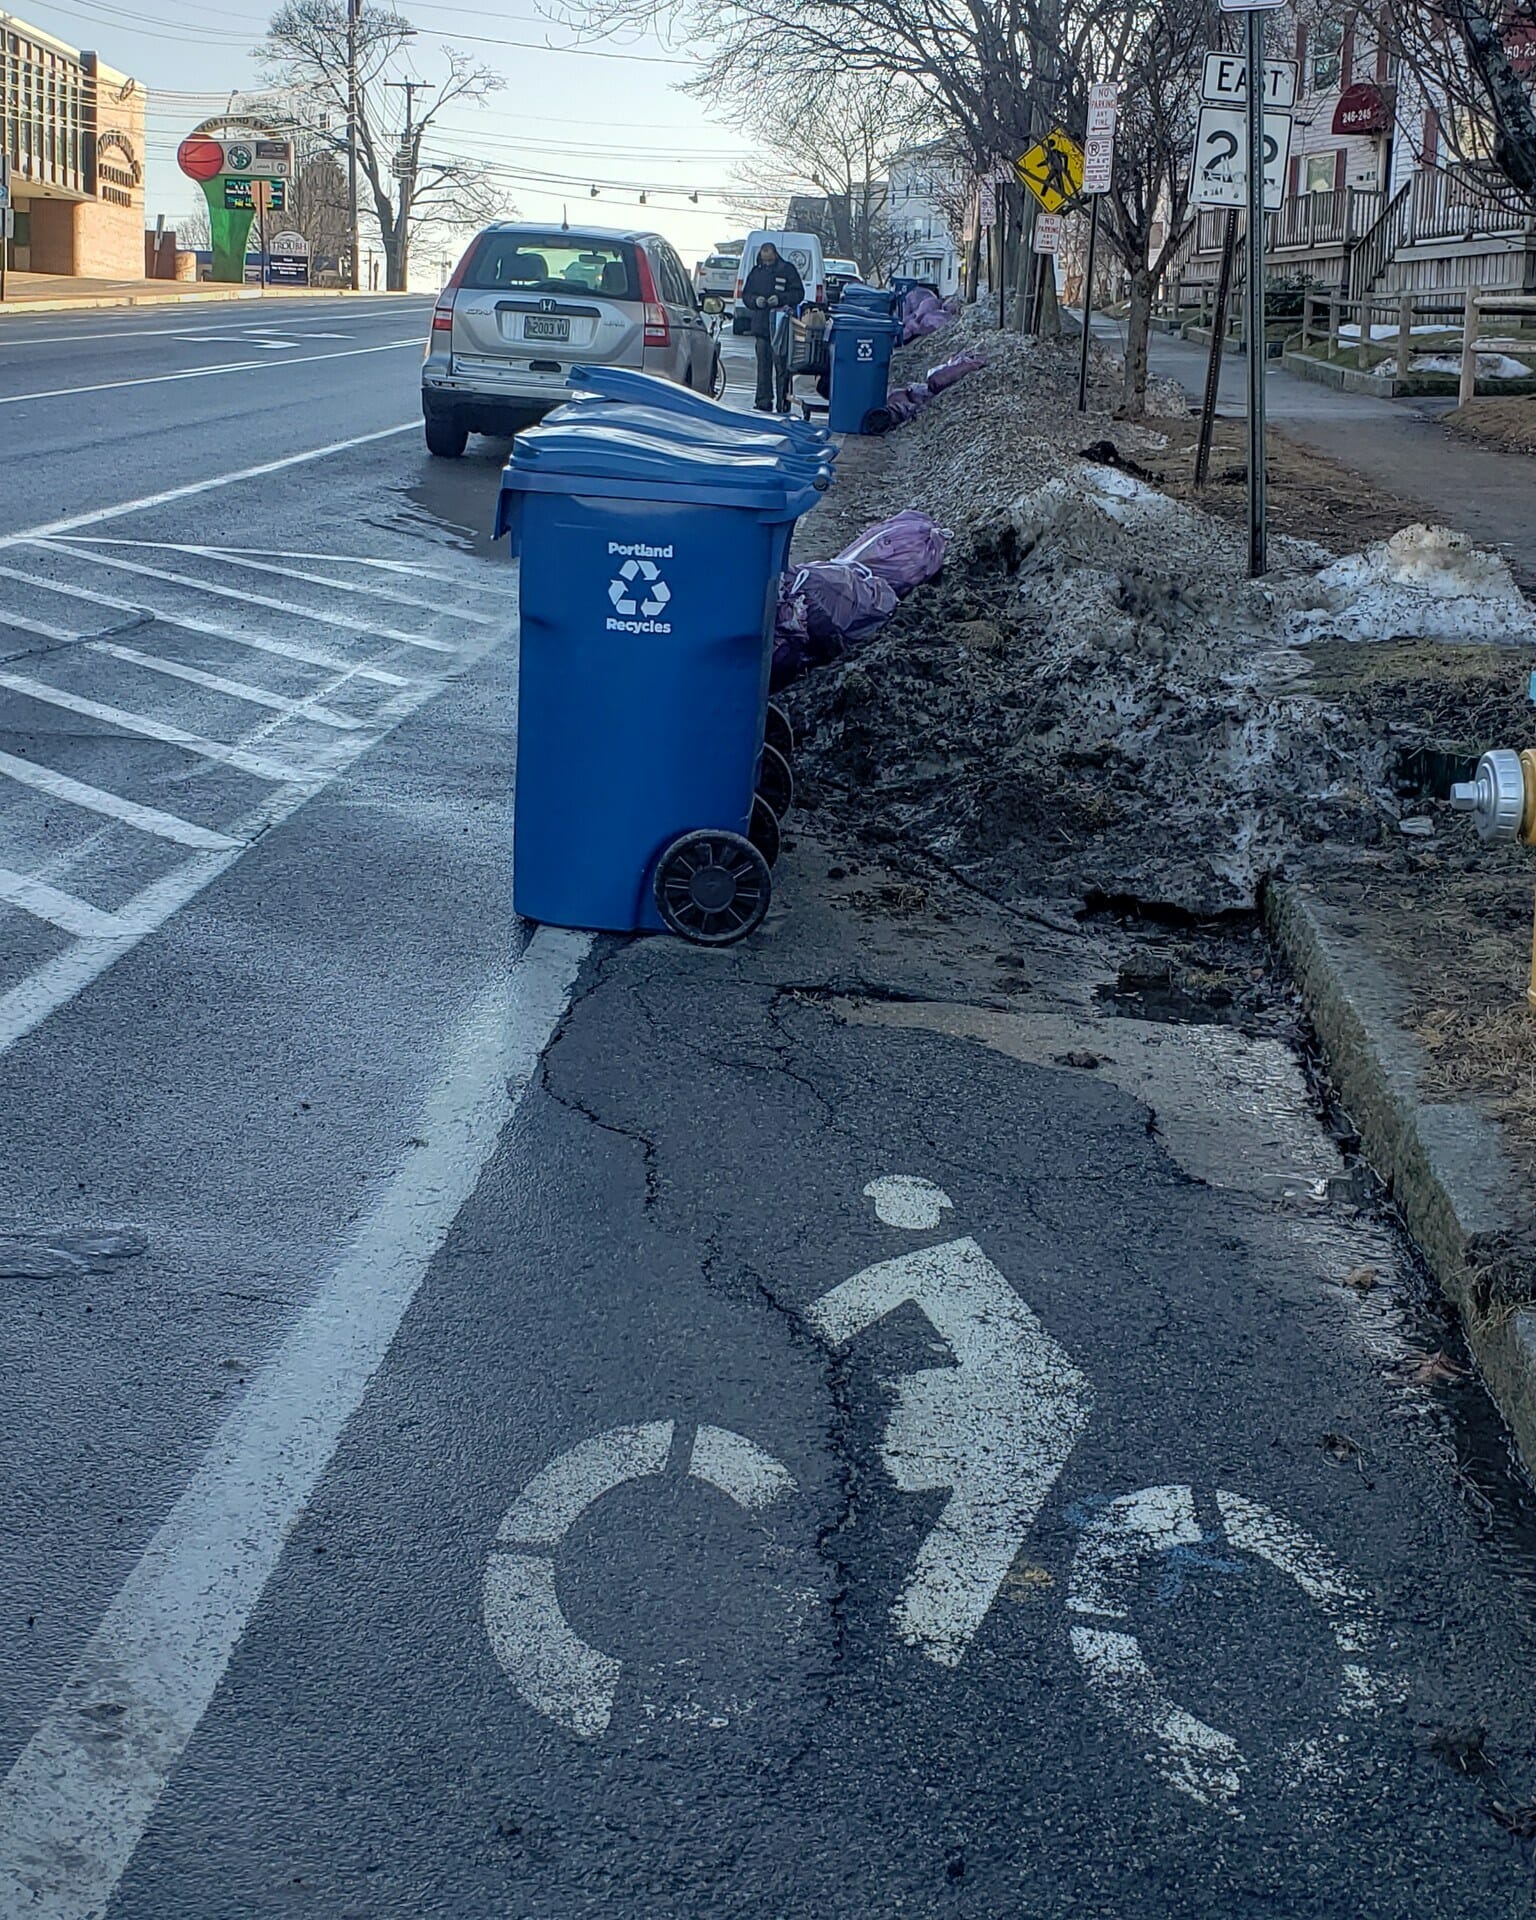
Even shoulders and traditional bike lanes are not necessarily reliable soon after a storm, evidenced by these sections I encountered while biking home a few days after one of last month’s storms.
This is a shoulder.
This is a bike lane.
So, even with a shoulder or bike lane, I sometimes had to ride in the travel lane, even if just briefly to pass icy edge obstructions.
Even within the travel lane, you may find a need to maneuver to a different position. The collector street (below left) presented such a situation about two days after the storm. As poor drainage pooled, melting snow refroze overnight.
Sometimes, you just can’t avoid traveling over a small (hopefully) patch of ice, such as this driveway (above right) leading out of a doughnut shop on my way to work.
I’ve found that I can make it through such small sections of ice, even without studs, by just coasting without pedaling, being careful to keep the front wheel straight. If you are paying enough attention to see an ice patch ahead of time, you may also be able to stop, dismount, and walk it.
The Takeaway
As you can see, riding under winter road conditions requires constant awareness of the road surface, and the ability to adjust your position accordingly. A saving grace of riding during or just after a winter storm is that often there are fewer other people on the road, especially at night, and they are often more careful around you (in my experience). As always, communication with others is valuable. A more assertive lane position makes you more relevant to those around you, and in these road situations, gives you more maneuvering room to adjust your position as the condition of the road surface varies.
With these skills that we emphasize in CyclingSavvy, even cycling in winter road conditions can be fairly low-stress. Not everyone would call in enjoyable, especially given that it’s also cold, but with some attitudinal and clothing preparation, it can provide a great sense of accomplishment and independence!
John has ridden for transportation year-round in the Portland, Maine area for over 20 years.
https://cyclingsavvy.org/wp-content/uploads/2023/02/Partial-Lane-Ice.jpg19201440John Brookinghttps://cyclingsavvy.org/wp-content/uploads/2021/06/CS-logo_xlong-header.pngJohn Brooking2023-02-15 22:30:132023-02-18 16:38:04Bicycling in Winter Road Conditions
We are now in the time of short days and long nights, and so it’s a good time to talk about bicycle lights.
And there’s good news. Thanks to efficient light-emitting diodes (LEDs), bicycle lights can be bright while drawing meager power from a small battery or generator.
Even better news — they won’t draw all the cash out of your wallet.
Like the horsepower race…
The trend can go to excess. Some of today’s bicycle headlights have product names like “Atomic”, and I kid you not, “Blinder” — only too true. Brighter, brighter, brighter… 200, 400, 1000 lumens. (The lumen is a measure of light output.)
The lumen war reminds me of the mid-20th-century horsepower race among big American cars. As in “my car is better than yours because it has a V8 engine with more horsepower!”
Why beam pattern matters
Lumens count light in every direction, but it matters in which direction the light goes. Any bicycle headlight bright enough to light your way should have a special beam pattern, like a car headlight, for at least four reasons:
Efficiency: There is no point in using electrical power to produce wasted light.
Clarity: Light thrown upward illuminates dust, fog, mist, rain, snow — washing out the bicyclist’s view of the riding surface.
Glare reduction: a headlight that spews light upward glares into the eyes of oncoming bicyclists, motorists and pedestrians. Stray light from a properly-designed headlight is still bright enough to reveal you.
Even illumination: a well-designed, shaped headlight beam tapers down in brightness closer to the bicyclist, avoiding a hotspot.
Good bicycle lights have shaped beam patterns
A good beam pattern looks more or less like this, if you shine the light at a wall:
Shaped beam of a better bicycle headlight
Germany’s bicycle lighting standard recognizes this. Several brands of bicycle lights with a shaped beam pattern are available, meeting the German standard. Increasingly, the German standard is being adopted by manufacturers in other countries as well.
Still, many bicycle headlights being sold in the USA have a round beam pattern like the one shown below. These headlights cannot illuminate the riding surface evenly without glaring at eye level and above.These lights are appropriate only for off-road riding, and even then not when there is oncoming traffic.. Some lights do let you switch beam patterns.
Round beam glares into people’s eyes unless aimed low
Any bicycle headlight should throw some light to the sides, to render the bicyclist visible to cross traffic.
Aiming a headlight
For a shaped beam to work correctly, the cutoff needs to be just below horizontal. Check out this video of the beam from my headlight as I walk my bicycle toward my garage. The flat top of the beam slowly rises up the garage door.
Aiming a taillight
A taillight’s beam pattern is less critical. Drivers who can approach at speed will be directly behind you. Aim a taillight level and directly to the rear. As the video shows, you test aim by rolling the bicycle away from a wall. The center of the beam should stay in the same place. The taillight should throw light to the sides too, but need not be as bright there. The headlight and any side-facing reflective material will also be visible from the sides.
What about flashing mode?
A flashing headlight is useful in daylight and at dusk but should be avoided in full darkness for three reasons: 1) it’s difficult for motorists to judge your speed and location from a flashing light; 2) a flashing headlight announces that you are on a bicycle = SLOW. This could inspire motorists to violate your right-of-way. 3) an ultra-bright white LED on a flash pattern could cause a seizure in someone who is vulnerable them.
A flashing taillight also announces that you are on a bicycle, and that is a good thing for motorists to recognize when approaching from behind. It’s best to use a rapid flash pattern for the taillight. If you have two taillights, you can use one on flash mode and one on steady mode.
Good bicycle lights for daytime use?
Some bicyclists, especially those who ride on rural roads, use lights during daylight hours, to be more visible. To be noticed, lights have to be much brighter during the day than at night. Any light used for both day and night should have a different mode for each.
You might ask “isn’t the round beam pattern better for daytime use?” Well, no. To make a shaped-beam headlight work as a daytime running light, re-aim it a bit higher. A shaped-beam headlight also generally has a wider beam pattern than one with a round beam pattern, making it stand out for drivers farther from straight ahead.
https://cyclingsavvy.org/wp-content/uploads/2022/05/taillight-aim-wide.jpg356702John Allenhttps://cyclingsavvy.org/wp-content/uploads/2021/06/CS-logo_xlong-header.pngJohn Allen2022-11-11 13:09:052022-11-11 22:18:18Aiming for good bicycle lighting
Bicycle Portland, Maine and the surrounding area, August 25-28 (Thurs.-Sun.). Pick and choose among any or all of these events:
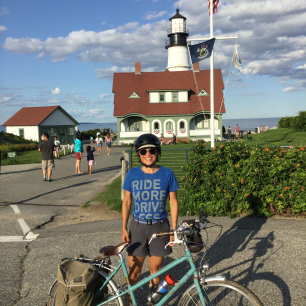
6-lighthouse coastal tour,
lobster dinner on the beach,
overnight camping trip,
CyclingSavvy bike handling and street skills sessions.
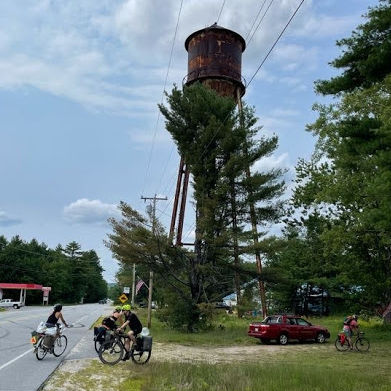
Let us know if you need help finding accommodations for the nights of Aug. 25 and 26. We may be able to help. But the overnight for the tour August 27-28 is free at the People’s Perch in East Baldwin, Maine, a unique and friendly spot with camping accommodations. Then also, there’s a 200-foot water tower which you may climb, safely belayed. Great view…
And click here to register for the CyclingSavvy course. Truth and Techniques session is over Zoom on August 19; then Train Your Bike August 25. Both of these are prerequisites for the Tour of Portland, August 26, but see the course listing for alternative options.
It’s going to be a great time, so bicycle Portland, Maine and the Portland area with us!
Maine is a beautiful place that I paradoxically want to hoard to myself and share with everyone I meet.
John Hodgman
https://cyclingsavvy.org/wp-content/uploads/2022/07/lighthouse-square-300.png306306John Allenhttps://cyclingsavvy.org/wp-content/uploads/2021/06/CS-logo_xlong-header.pngJohn Allen2022-07-30 18:14:252022-07-30 21:22:19Bicycle Portland, Maine
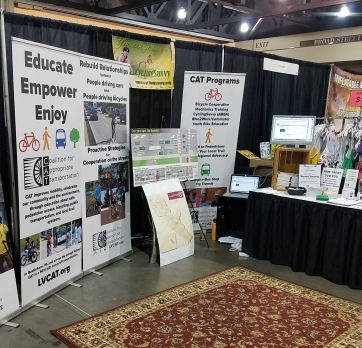
Founded in 2010 by Bilenky Cycle Works, the Philly Bike Expo promotes “the fun, function, fitness and freedom to be found on two wheels.” The event fosters relationships between the cycling community and dedicated companies and organizations.
Bilenky hosts the event so we can all “admire the artisans whose craft enables us to ride two-wheeled art, to applaud the activists whose tireless efforts further our cycling infrastructure and to explore cycling as a fun and efficient transportation alternative.”
Concerned about Covid? There is information online about the Expo’s Covid Protocol. We are vaccinated, will be masked, and consider the risk acceptable.
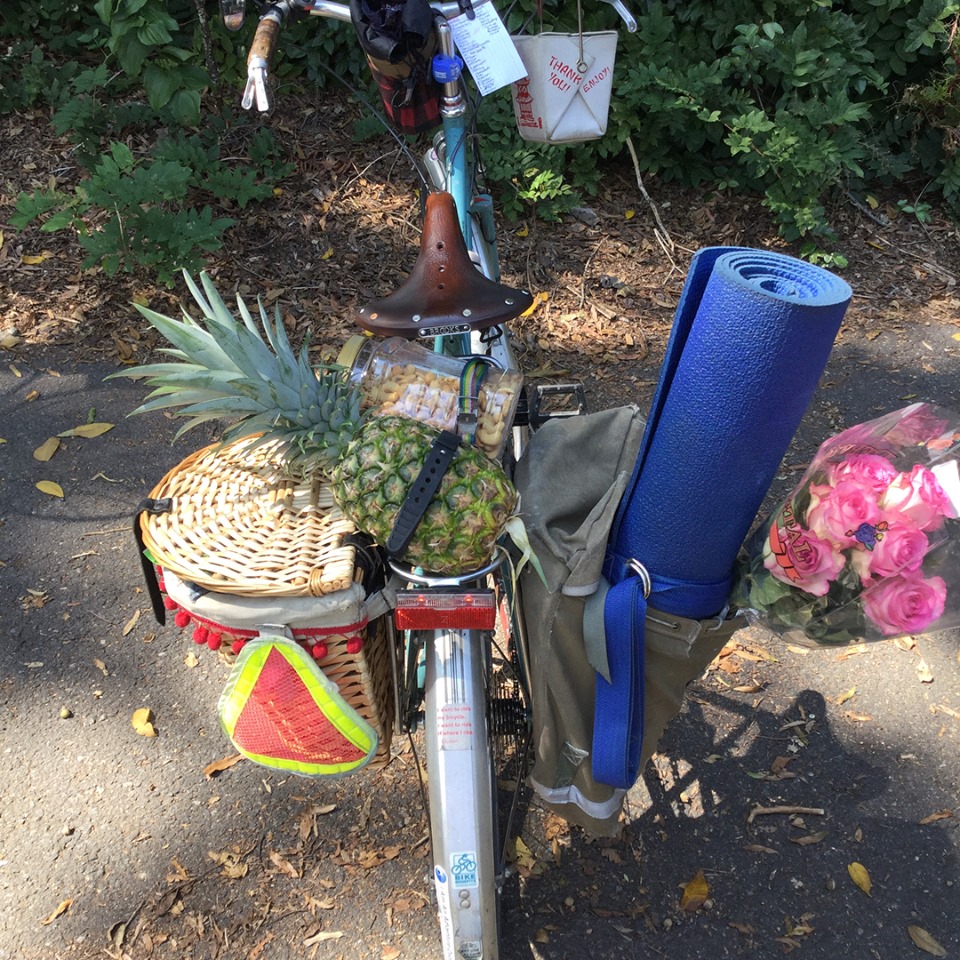
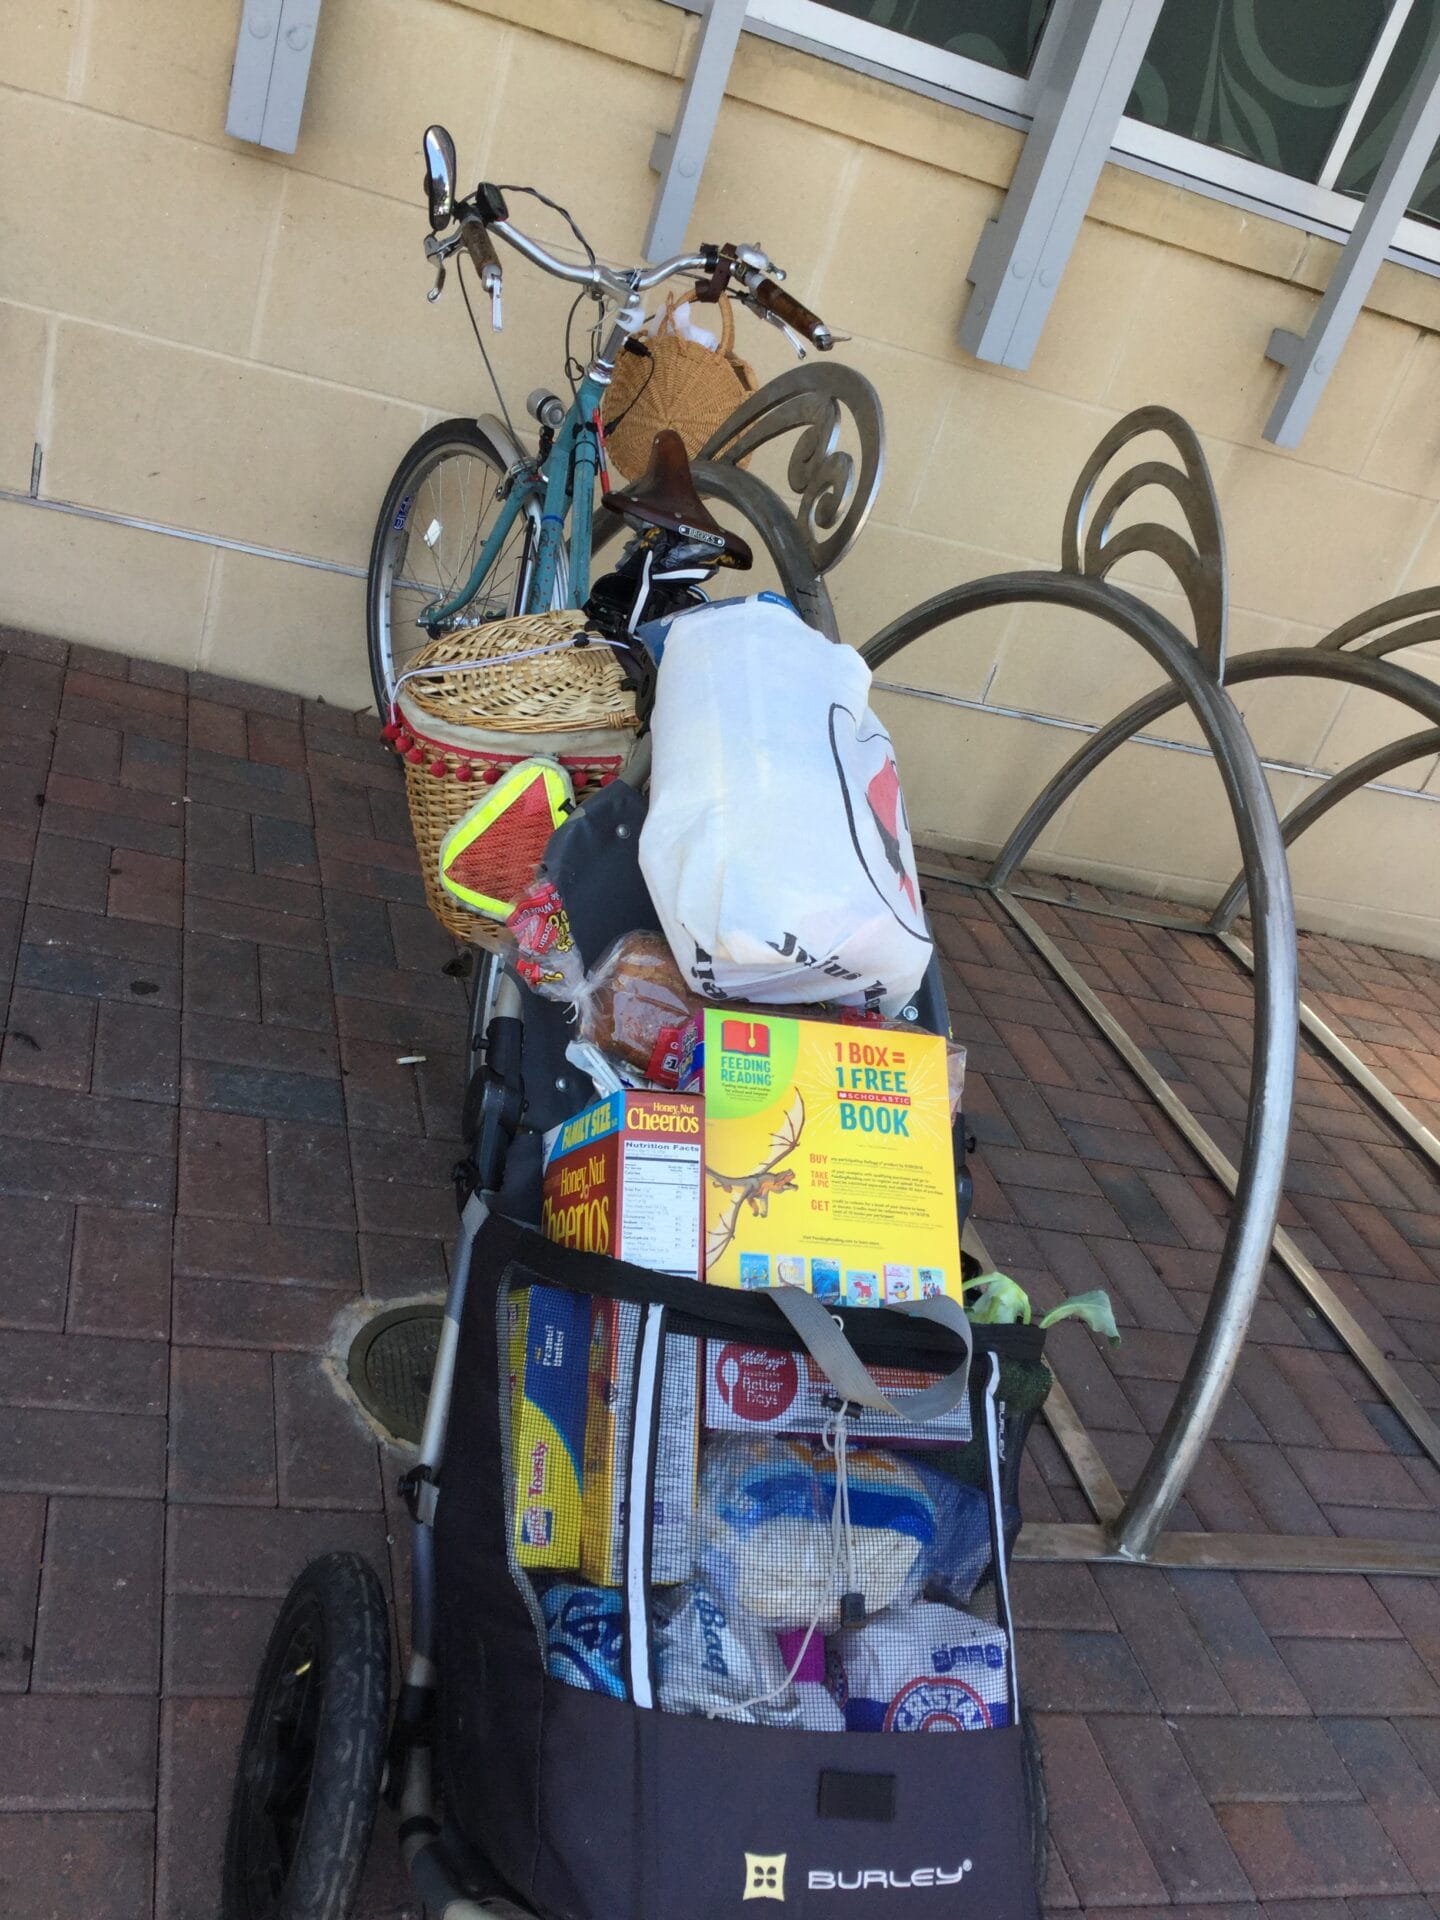
Pam Murray’s bike, home from errands…
Street Smarts — and a raffle.
The recently published Bicycling Street Smarts, CyclingSavvy Edition will be available at the CyclingSavvy/CAT booth. Yes, autographed by the author! And we’ll be raffling off copies. The grand prize winner also gets a full scholarship to a CyclingSavvy course, online or in person.
We’re having workshops too!
Two of us are giving presentations on Sunday:
John and a friend rode Spruce Street.
Pamela Murray, The Bike Life, Sunday. 1:30 PM — Pam rides over 6,000 miles per year for transportation, fitness and recreation. She is a CyclingSavvy instructor and Bicycle Benefits Ambassador, and leads bike rides for vacation and camping.
John Allen, Riding Philly Streets, Sunday, 3 PM. Videos and discussion of tactics to meet the challenges of Philly riding. In and out of the bike lane! Getting a smile from a SEPTA bus driver!
Click to zoom in for details about the ride.
And a bike ride…
We are also organizing an unracer bike ride. It will leave at 7:30 AM on Saturday from the Ellen Phillips Samuel Memorial (just downriver from the Girard Bridge), and will arrive at the Convention Center in time for you to check in for the opening of the exhibit hall.
We hope to see you in The Cradle of Liberty!
https://cyclingsavvy.org/wp-content/uploads/2021/10/PBE-featured.png310594John Allenhttps://cyclingsavvy.org/wp-content/uploads/2021/06/CS-logo_xlong-header.pngJohn Allen2021-10-28 17:56:592021-10-28 22:28:51Join Us at the Philly Bike Expo!
Welcome to the next in our series of beginner articles. In this one, I’ll introduce the topic of how to use your gears.
Most bicycles in the USA these days have the chain shifting across several sprockets. Many earlier bikes, and some current ones, have actual gears inside the wheel hub, “internal gears”. We’ll discuss both kinds.
Why do bicycles have multiple gears? Multiple gears can make your riding smoother and less tiring, especially if you live in a hilly area, as well as in extremely windy situations.
The point of gears is to keep your pedaling effort and speed (“cadence”) at a comfortable level. Pay attention to your effort. If you are pushing down too hard, you need to go down to a lower (easier) gear. If you are spinning uselessly, you need to go up to a higher (harder) gear. CyclingSavvy Instructor John Allen demonstrates.
Just as with a car, low (easy) gears are for starting and moving slowly, and higher (harder) gears are to keep your engine — your legs — from turning too fast as you speed up. But there are important differences compared to shifting gears in a car.
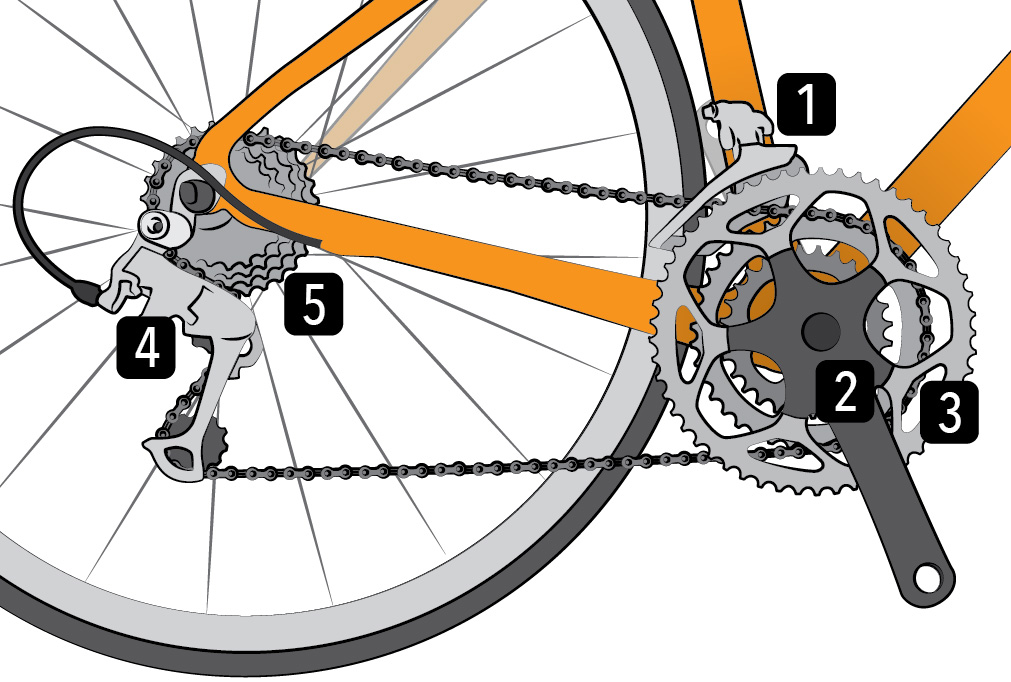
Your bike’s drivetrain: 1) front derailer, 2) crankset, 3) chainrings, 4) rear derailer, 5) cassette made up of individual sprockets
Two shifters: what’s that about?
Many bikes have two or three front sprockets (called chainrings) at the cranks (pedals), and several sprockets on the rear wheel, giving you two shifters to think about. It would be simple if you had, say, a 21-speed bike with just one shifter that went from 1 to 21. But unfortunately, it isn’t that simple.
The good news is, using two shifters in combination is not as hard as you might think. Let’s say you have 3 chainrings (front sprockets, left shifter), and 7 in the back (right shifter, remember that both “rear” and “right” start with R). Don’t think of them as having 21 steps in a sequence (because they’re not): think instead of having 3 overlapping ranges of 7 steps each. Each chainring gives you a different range, and the rear sprockets let you make smaller adjustments within the current range.
If you have 3 chainrings, think of the middle one as your “normal” range, where you will spend most of your time. Start and stop in this range, generally with the back sprockets at or near 1 (easiest). The smallest (inside) chainring shifts the whole range down to be easier, for when you are going up a steep hill or into a strong headwind. The largest (outside) chainring shifts the whole range to be harder, useful downhill or with a strong wind at your back.
If you only have 2 chainrings, which one is “normal” will depend on you and on the specific gearing. Experiment.
If you have just 1 chainring, the preceding 4 paragraphs don’t apply. :-)
You can feel how pedaling gets harder as you move a shifter one way, easier the other way.
Homing in on the range
One way or the other, once the range is right for the conditions, just shift your back sprockets as necessary. (Remember, rear = right shifter). Start from a stop at the easy end, or near it. As you gain speed, you will notice at some point that your pedaling is no longer delivering much power; then it’s time to shift up. This is usually all with the same front chainring.
The outermost of three chainrings (at the cranks) should be used only with the outer four or five rear sprockets, the inner chainring only with the two or three innermost rear sprockets. This essentially boils down to: avoid having the front in the easiest gear while the back is in relatively a hard gear, and vice-versa. Keep easy with easy, and hard with hard.
The middle chainring can be used with any unless the chain rubs against the outer chainring when used with the smallest rear sprockets. If there are only two chainrings, the outer one can be used with more of the rear sprockets.
Shifting gears strategy
Think “how do I shift to get to the gear I need to use,“ not “am I in 7th gear or 8th gear.” It would be complicated to keep track of the sequence from gear 1 to gear 21; also, many combinations are duplicates and near-duplicates, so it is pointless. Typically, a “21-speed” bicycle will have a working sequence of 10 to 12 different gears, and a wide enough range for any terrain and level of fitness, with small enough steps to be comfortable. Use the numbers on twist-grip shifters only as a guide — lower numbers, easier.
The basic sequence is to start in a low (easy) gear, and shift to a harder one when the pedals get to turning too fast. Keep pedaling lightly and shift down as you slow down. This will allow you to accelerate briskly from a stop or a low speed.
When accelerating from a stop, you may need to shift as often as once per second. This keeps your cadence in the sweet spot and accelerates you quickest. You have something in common with a big semitrailer truck — listen to it as it accelerates. The driver shifts through multiple gears, because the truck also has a narrow range of engine speed which optimizes power production.
Gear range wide enough?
Is your bicycle’s easiest gear easy enough? That depends on the terrain where you ride, and on your fitness. On most bicycles, it is possible to replace rear sprockets and widen the range. There is no shame in using an easy gear. It shows that you know how to take care of yourself.
No matter how many speeds your bicycle has in theory, you can use only one at a time! “21-speed” does make a nice advertising slogan, though, doesn’t it?
Derailer Complications
Most multi-gear bicycles in North America use derailers at the cranks and the rear wheel. Those mechanisms push (derail) the chain to one side or the other, from one sprocket or chainwheel to another. The derailer at the rear wheel has pulley wheels to take up slack in the chain produced by the different-sized sprockets. (Clever, right?)
A derailer system has some complications:
Shifting works only when the chain is moving forward! If you shift without pedaling, including when stopped, you will get a lot of grinding once you start pedaling, as the chain finds its way to the right spot. That is tough for the chain and sprockets, and embarrassing for you. If you did not shift down before stopping, the bicycle will be in a high gear and starting will be hard.
To shift smoothly as you slow down, keep spinning the pedals but without putting any force on them. When accelerating or holding speed, reduce force on the pedals momentarily as you shift.
You backpedal to step forward off the saddle when coming to a stop. (See our post about starting and stopping.) Finish shifting before you stop. If the chain and derailers are not aligned, the chain will jam as you backpedal. Test by backpedaling lightly. Sometimes you can adjust the shift levers even after stopping.
Internal Gears
Instead of a derailer, some bicycles have gears in the hub of the rear wheel, or sometimes at the cranks. Usually a shifter and cable connect to the internal mechanism; some two-speed hubs shift by backpedaling. 3-speed internal-gear hubs were very popular in the mid-20th century. Now 7 and 8-speed internal-gear hubs are common, and some have even more speeds.
An internal-gear hub shifts best when the chain is not moving, just the opposite of a derailer system. Coast or backpedal slightly for a moment while you shift. You don’t need to worry about downshifting while slowing to a stop; you can do that after you stop. It’s one less thing to concern yourself with. The sprocket can be changed with internal gears, in case you find that the range is too easy or too hard (usually, too hard). More about internal-gear hubs.
Shifting gears – Summary
Now that you know how shifting works, keep the goal of consistent cadence in mind as you ride. If your bicycle has more than one chainring, remember that the easy range is for uphill or headwind, hard one for downhill or tailwind. Middle (if you have 3) is for all other conditions. Use the sprockets at the rear wheel to adjust within the range as necessary. Easier gears are also good for creeping along while maintaining control, and being ready to accelerate, for example if a red light turns green before you reach it.
The idea is to keep your feet turning at a constant rate. A follow-up article will help you feel in your legs what that rate needs to be.
https://cyclingsavvy.org/wp-content/uploads/2021/08/bike-drivetrain-01.jpg6821011John Brookinghttps://cyclingsavvy.org/wp-content/uploads/2021/06/CS-logo_xlong-header.pngJohn Brooking2021-08-26 14:45:512022-03-13 22:41:38Shifting Gears to Accelerate Quickly
My friend, CyclingSavvy graduate Ian Whiting, rides a lot on shoulderless Massachusetts highways. Big rigs also use them. Ian likes to shoot video as he rides. I am pleased to host his videos here on the Savvy Cyclist. There are already Savvy Cyclist posts about how to be safe when cycling around big trucks in urban traffic, but now Ian will show us a couple of examples of CyclingSavvy control-and-release strategy for the open road.
What is control-and-release strategy?
CyclingSavvy control-and-release strategy is to control the travel lane when passing is unsafe, releasing control by moving over to the right when passing becomes safe. This strategy is about cyclists’ engaging actively with motorists, and it is about release as much as it is about control. Ian’s video shows a couple of different ways to release on the same uphill stretch, with oncoming traffic and a restricted sight line over the hilltop. Both clips in the video start at the same traffic signal. Here’s the location in Google Maps.
Pulling over
In Ian’s first clip, he starts out on a green light; the truck catches up with him partway up the hill. He pulls over into a convenient driveway entrance to let the truck pass. There is nothing unusual about this – except – A second truck was following the one he pulled over to let pass. There’s a lesson in that: cyclists should always check before re-entering the roadway, even after only pulling aside briefly. What you saw behind you is now in front of you, but you might not have seen everything that was behind you.
The “loop-the loop” – not a conventional control-and-release strategy!
In the second clip, Ian is waiting at the traffic light when a big rig pulls up behind. He does a “loop the loop” — a U turn, backtracking, and another U turn to get behind the truck. This is not a conventional control-and-release strategy, but it works. Clever!
I advise using the loop-the-loop technique only when traffic is stopped, and passing would be illegal. In Ian’s video, he is first in line at a red light. The loop-the-loop is practical only when you can easily reach a lane for traffic in the opposite direction — so, almost always on a two-lane highway, though also on a multi-lane highway if you are waiting to turn left. You need to check for illegal passing, but also for traffic in the lane where you will backtrack — including traffic turning into that lane.
Generating goodwill
The loop-the-loop technique probably won’t generate goodwill to the same extent as pulling over. The truck driver will probably think that you decided to turn around and go back where you came from. But either way, it works better to be behind the big rig than in front. Well, except for the truck’s diesel smoke. But you would get that anyway, only at a different time.
https://cyclingsavvy.org/wp-content/uploads/2021/07/whiting-backtrack.jpg6791077John Allenhttps://cyclingsavvy.org/wp-content/uploads/2021/06/CS-logo_xlong-header.pngJohn Allen2021-07-31 18:00:002021-07-31 19:18:41Control-and-Release Strategy with Ian Whiting
California CyclingSavvy Instructor Gary Cziko will present. The Webinar will include live chat with three other instructors, and a Q&A session. If you can’t make it, ABEA will be posting a recording. We’ll announce where YouTube has placed it, once we know.
Bike club/organization members
Your club’s requested donation of $100 will give all club members free access to the Zoom Webinar for Bike Clubs and Group Rides, being held at the same time next Wednesday, December 16, 2020.
Club leaders, register here. Choose the Benefactor level. Include your organization’s name in the “Company” box. Note that your club is a Webinar Sponsor in the “Comments” box.
Donations will pay for work being developed exclusively for club and group cycling. Here’s a preview of the new online Group Ride Leader course currently in development:
Here are the sponsoring organizations as of December 8, 2020. Yours can still be on this list!
Learn more about CyclingSavvy in-person classes here.
Maximize your cycling experience!
What makes CyclingSavvy different from any other course is our deep dive into unique strategies for mastering even the most intimidating and complicated scenarios. You’ll be blown away by the places you can ride a bike without being a road warrior!
Truth & techniques is an in-person classroom session. Train Your Bike is a bike handling skills class taught in a parking lot. The tour is an experiential on-road session where it all comes together. The classroom and bike handling sessions are required for participation in the tour.
On the Tour of Orlando, we’ll travel as a group, stopping to survey and discuss each exercise location. After observing the feature, discussing the traffic dynamics and the best strategies for safe and easy passage, participants ride through individually and regroup at a nearby location.
Limited time offer. Receive a 50% discount on a Ride Awesome membership purchased at the same time as a 3-Part Workshop. Coupon will be added to the shopping cart automatically – just click to purchase.
Discover innovative ways to successfully use your bike to go shopping. Learn about and explore how to use various equipment to transport your purchases safely and confidently. Following the setup session, we will ride to a few nearby stores to put your newfound skills to the test.
We encourage you to bring a bike with a rack for this class.
https://cyclingsavvy.org/wp-content/uploads/2021/06/CS-logo_xlong-header.png00Pamela Murrayhttps://cyclingsavvy.org/wp-content/uploads/2021/06/CS-logo_xlong-header.pngPamela Murray2024-04-05 19:07:292024-04-05 19:09:06Bike Charlotte, NC, Free Shopping by Bike Class, May 3rd (In-Person)
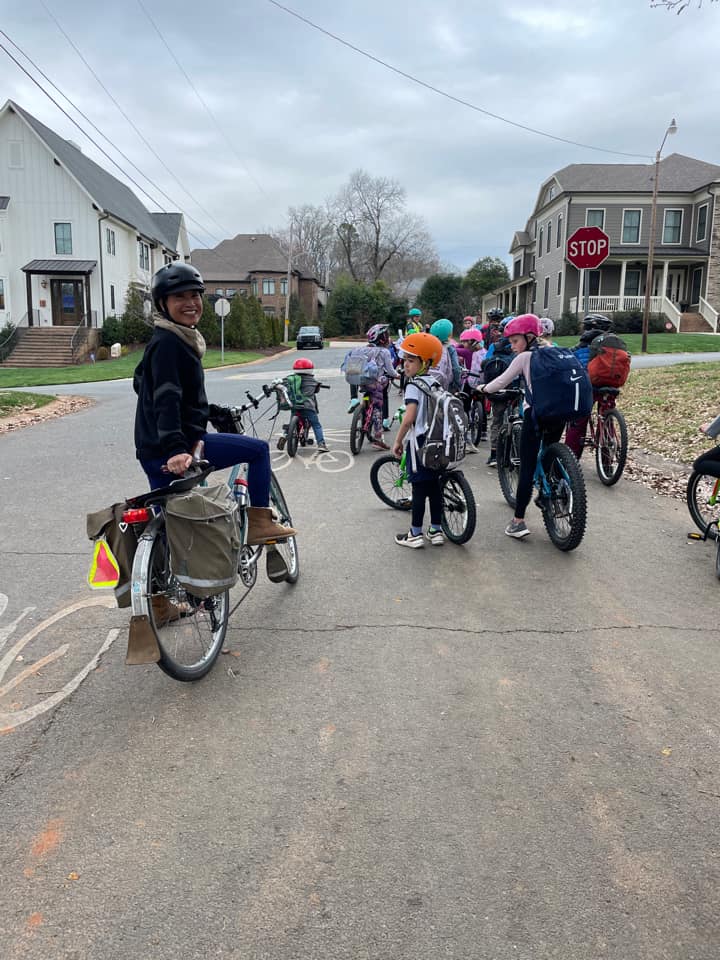
Grab the kids and join us for Kidical Mass on Mother’s Day. Learn about family riding skills in a safe and enjoyable environment. Gain confidence riding with your kid in a bike seat and/or trailer or alongside them on their own bikes.
Children must be accompanied by an adult and should be able to pedal on their own for 2 miles.
https://cyclingsavvy.org/wp-content/uploads/2021/06/CS-logo_xlong-header.png00Pamela Murrayhttps://cyclingsavvy.org/wp-content/uploads/2021/06/CS-logo_xlong-header.pngPamela Murray2024-04-05 18:59:222024-04-05 19:01:59Bike Charlotte, NC, Free Family Bicycle Ride, May 12 (In-Person)
Truth & Techniques (classroom) Virtual via Zoom (a link will be emailed to attendees) Friday, July 12, 4-7 PM
Train Your Bike (bike handling skills) Midwood Baptist Church, 2029 Mecklenburg Ave., Charlotte NC 28205 see venue map and instructions. Saturday, July 13, 2-5 PM
What makes CyclingSavvy different from any other course is our deep dive into unique strategies for mastering even the most intimidating and complicated scenarios. You’ll be blown away by the places you can ride a bike without being a road warrior!
Truth & techniques is a virtual classroom session offered over Zoom. Train Your Bike is a bike handling skills class taught in a parking lot. The tour is an experiential on-road session where it all comes together. The classroom and bike handling sessions are required for participation in the tour.
On the Tour of Charlotte, we’ll travel as a group, stopping to survey and discuss each exercise location. After observing the feature, discussing the traffic dynamics and the best strategies for safe and easy passage, participants ride through individually and regroup at a nearby location.
Learn more about CyclingSavvy in-person classes here.
Limited time offer. Receive a 50% discount on a Ride Awesome membership purchased at the same time as a 3-Part Workshop. Coupon will be added to the shopping cart automatically – just click to purchase.
https://cyclingsavvy.org/wp-content/uploads/2022/10/charlotte-tyb.jpg13841920Pamela Murrayhttps://cyclingsavvy.org/wp-content/uploads/2021/06/CS-logo_xlong-header.pngPamela Murray2024-02-13 17:30:042024-02-13 17:41:073-Part Workshop, Charlotte NC, July 12-14