Emergency Maneuvers
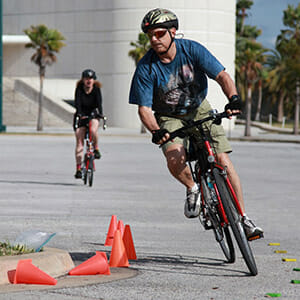
This article on emergency maneuvers continues our Beginner’s Guide series, which started here, with a bicycle checkover. You won’t need to use emergency maneuvers very often. If you keep aware, know what hazards to watch out for, and plan ahead, your need for them will decrease tremendously. But, any of us can occasionally become distracted and miss warning signs. So, here are the three emergency maneuvers commonly taught by most bike safety programs. None of them come naturally, at least not to me. To be prepared to use them, you need to practice them in an empty parking lot, with a helmet.
Preparation: bicycle condition
Your bicycle needs to be in good condition for you to practice emergency maneuvers. Run the ABC Quick Check described in the first article in this series — but pay special attention to the brakes.
To serve you well in the quick stop emergency maneuver, brakes need to be in top condition. Here’s a link to articles that go into more detail on brake types and adjustment. Or take your bike into a bike shop. Adjustment takes only a minute or two and can often done while your wait. Watch it done and you may be able to do it yourself next time.
Brake sensitivity differs from one bicycle to another. You should check a bicycle before mounting it the first time or if you haven’t ridden it in a while. You can check brake sensitivity only while actually riding. Test the brakes by using them lightly at first. Disc brakes, in particular, can be very sensitive.
Quick Stop Emergency Maneuver
In one of my early on-road crashes, a car unexpectedly entered the intersection opposite me as I was starting to turn left. I needed to brake hard to avoid a collision. Fortunately, I wasn’t hit, but I did go over the handlebars. The driver did not stop, but others did slow down and ask me if I was okay. I was, and so was the bike. I just walked it over to the sidewalk and sat down for a few minutes to compose myself. If I had known then what I am about to share, I would have avoided that crash without going over the bars.
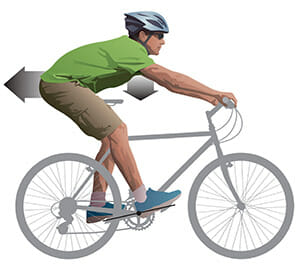
My article about Braking and Cornering mentioned shifting weight back as you brake, to prevent going over the handlebars. The “Quick Stop” emergency maneuver is basically that technique taken to an extreme. Position your pedals level (at the “3-o’clock” and “9 o’clock” positions) and raise your butt off the saddle very slightly. Keep your weight low and move your butt back to behind the saddle if possible. Try to get as much of your body weight as far back as possible. When you stop, you might want try to step forward off the saddle the normal way, but make sure the bike is completely stopped before moving your weight forward. Remember, a graceful dismount is the least of your worries. It’s OK to jump off behind the saddle.
Rock Dodge Emergency Maneuver
If you find yourself about to run over a small pothole or other obstacle, this technique will help you least avoid hitting it with your front wheel. If your back wheel still goes over it, that’s not as bad, because it is more likely just to follow the bike anyway. The front wheel being diverted is more likely make you crash.
The basic action here is to quickly flick the front wheel around the object. The wheel weaves quickly to one side, then the other while your bike and body maintain a straight line.
You can drill yourself on this by setting anything on the ground that you don’t mind actually running over, like a leaf. Practice not hitting it after approaching it at cruising speed. You might have to do a rock dodge if you haven’t seen the obstacle soon enough, so try to pretend you didn’t see it until the last second. You can set up other soft objects to mark a narrow lane so you do a true last-second emergency dodge rather than a big long swerve.
Snap Turn Emergency Maneuver
A quick right turn is sometimes the best way to avoid an intersection collision. Of course, you end up going in a different direction than you intended, but at least you avoided the crash.
You use the part of technique described above for the rock dodge. You momentarily flick the wheel opposite the direction you want to turn, but don’t bring it back. This is a forced counter-steer that causes the bike to lean into the turn. The most important thing to do next is turn your head toward the turn and look where you want to go. Don’t try to steer the bike, it will go where you look. Remember to keep the inside pedal up. This maneuver creates an abrupt and jarring sensation — that means you’re doing it right. “Trusting the lean” is the hardest part of this emergency maneuver for me, and the mantra I repeat to myself.
The best way to learn this drill is in a class with the supervision and guidance of an instructor. If you want to try it on your own, start out with low speeds and work on the components. Flick the bars away from the turn, turn your head into the turn, keep the inside pedal up, focus on where you want to go until the bike completes the turn and rights itself.
Warning: Making an error at high speed can result in a crash, so it’s essential to learn the steps at low speed. Do not attempt this maneuver with knobby (dirt) tires, they may not grip pavement. Never touch the brakes once the bike is leaning into the turn: this will cause the back wheel to lift and slide out.
Conclusion
With emergency maneuvers, we conclude the skills section of our beginner series. We move on to a post on how your behavior can keep you safe — and even obtain better cooperation from motorists!

