Aiming for good bicycle lighting

We are now in the time of short days and long nights, and so it’s a good time to talk about bicycle lights.

And there’s good news. Thanks to efficient light-emitting diodes (LEDs), bicycle lights can be bright while drawing meager power from a small battery or generator.

Even better news — they won’t draw all the cash out of your wallet.

Like the horsepower race…

The trend can go to excess. Some of today’s bicycle headlights have product names like “Atomic”, and I kid you not, “Blinder” — only too true. Brighter, brighter, brighter… 200, 400, 1000 lumens. (The lumen is a measure of light output.)

The lumen war reminds me of the mid-20th-century horsepower race among big American cars. As in “my car is better than yours because it has a V8 engine with more horsepower!”

Why beam pattern matters

Lumens count light in every direction, but it matters in which direction the light goes. Any bicycle headlight bright enough to light your way should have a special beam pattern, like a car headlight, for at least four reasons:

  • Efficiency:  There is no point in using electrical power to produce wasted light.
  • Clarity: Light thrown upward illuminates dust, fog, mist, rain, snow — washing out the bicyclist’s view of the riding surface.
  • Glare reduction: a headlight that spews light upward glares into the eyes of oncoming bicyclists, motorists and pedestrians. Stray light from a properly-designed headlight is still bright enough to reveal you.
  • Even illumination: a well-designed, shaped headlight beam tapers down in brightness closer to the bicyclist, avoiding a hotspot.

Good bicycle lights have shaped beam patterns

A good beam pattern looks more or less like this, if you shine the light at a wall:

Shaped beam of a well-designed bicycle headlight
Shaped beam of a better bicycle headlight

Germany’s bicycle lighting standard recognizes this. Several brands of bicycle lights with a shaped beam pattern are available, meeting the German standard. Increasingly, the German standard is being adopted by manufacturers in other countries as well.

Still, many bicycle headlights being sold in the USA have a round beam pattern like the one shown below. These headlights cannot illuminate the riding surface evenly without glaring at eye level and above.These lights are appropriate only for off-road riding, and even then not when there is oncoming traffic.. Some lights do let you switch beam patterns.

Round beam glares into people's eyes unless aimed low
Round beam glares into people’s eyes unless aimed low

Any bicycle headlight should throw some light to the sides, to render the bicyclist visible to cross traffic.

Aiming a headlight

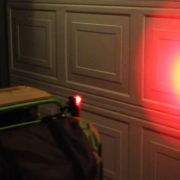
For a shaped beam to work correctly, the cutoff needs to be just below horizontal. Check out this video of the beam from my headlight as I walk my bicycle toward my garage. The flat top of the beam slowly rises up the garage door.

Aiming a taillight

A taillight’s beam pattern is less critical. Drivers who can approach at speed will be directly behind you. Aim a taillight level and directly to the rear. As the video shows, you test aim by rolling the bicycle away from a wall. The center of the beam should stay in the same place. The taillight should throw light to the sides too, but need not be as bright there. The headlight and any side-facing reflective material will also be visible from the sides.

What about flashing mode?

A flashing headlight is useful in daylight and at dusk but should be avoided in full darkness for three reasons: 1) it’s difficult for motorists to judge your speed and location from a flashing light; 2) a flashing headlight announces that you are on a bicycle = SLOW. This could inspire motorists to violate your right-of-way. 3) an ultra-bright white LED on a flash pattern could cause a seizure in someone who is vulnerable them.

A flashing taillight also announces that you are on a bicycle, and that is a good thing for motorists to recognize when approaching from behind. It’s best to use a rapid flash pattern for the taillight. If you have two taillights, you can use one on flash mode and one on steady mode.

Good bicycle lights for daytime use?

Some bicyclists, especially those who ride on rural roads, use lights during daylight hours, to be more visible. To be noticed, lights have to be much brighter during the day than at night. Any light used for both day and night should have a different mode for each.

You might ask “isn’t the round beam pattern better for daytime use?” Well, no. To make a shaped-beam headlight work as a daytime running light, re-aim it a bit higher. A shaped-beam headlight also generally has a wider beam pattern than one with a round beam pattern, making it stand out for drivers farther from straight ahead.

More general information

More general information about lights can be found in John Brooking’s article on this blog.

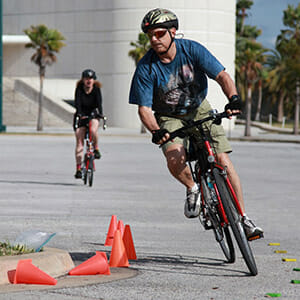
cornering image

Emergency Maneuvers

This article on emergency maneuvers continues our Beginner’s Guide series, which started here, with a bicycle checkover. You won’t need to use emergency maneuvers very often. If you keep aware, know what hazards to watch out for, and plan ahead, your need for them will decrease tremendously. But, any of us can occasionally become distracted and miss warning signs. So, here are the three emergency maneuvers commonly taught by most bike safety programs. None of them come naturally, at least not to me. To be prepared to use them, you need to practice them in an empty parking lot, with a helmet.

Preparation: bicycle condition

Your bicycle needs to be in good condition for you to practice emergency maneuvers. Run the ABC Quick Check described in the first article in this series — but pay special attention to the brakes.

To serve you well in the quick stop emergency maneuver, brakes need to be in top condition. Here’s a link to articles that go into more detail on brake types and adjustment. Or take your bike into a bike shop. Adjustment takes only a minute or two and can often done while your wait. Watch it done and you may be able to do it yourself next time.

Brake sensitivity differs from one bicycle to another. You should check a bicycle before mounting it the first time or if you haven’t ridden it in a while. You can check brake sensitivity only while actually riding. Test the brakes by using them lightly at first. Disc brakes, in particular, can be very sensitive.

Quick Stop Emergency Maneuver

In one of my early on-road crashes, a car unexpectedly entered the intersection opposite me as I was starting to turn left. I needed to brake hard to avoid a collision. Fortunately, I wasn’t hit, but I did go over the handlebars. The driver did not stop, but others did slow down and ask me if I was okay. I was, and so was the bike. I just walked it over to the sidewalk and sat down for a few minutes to compose myself. If I had known then what I am about to share, I would have avoided that crash without going over the bars.

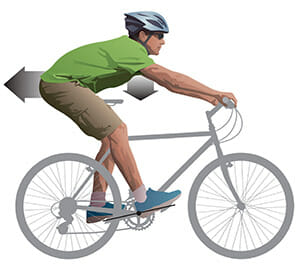
My article about Braking and Cornering mentioned shifting weight back as you brake, to prevent going over the handlebars. The “Quick Stop” emergency maneuver is basically that technique taken to an extreme. Position your pedals level (at the “3-o’clock” and “9 o’clock” positions) and raise your butt off the saddle very slightly. Keep your weight low and move your butt back to behind the saddle if possible. Try to get as much of your body weight as far back as possible. When you stop, you might want try to step forward off the saddle the normal way, but make sure the bike is completely stopped before moving your weight forward. Remember, a graceful dismount is the least of your worries. It’s OK to jump off behind the saddle.

Body position in quick stop emergency maneuver
Braking body position

Rock Dodge Emergency Maneuver

If you find yourself about to run over a small pothole or other obstacle, this technique will help you least avoid hitting it with your front wheel. If your back wheel still goes over it, that’s not as bad, because it is more likely just to follow the bike anyway. The front wheel being diverted is more likely make you crash.

The basic action here is to quickly flick the front wheel around the object. The wheel weaves quickly to one side, then the other while your bike and body maintain a straight line.

You can drill yourself on this by setting anything on the ground that you don’t mind actually running over, like a leaf. Practice not hitting it after approaching it at cruising speed. You might have to do a rock dodge if you haven’t seen the obstacle soon enough, so try to pretend you didn’t see it until the last second. You can set up other soft objects to mark a narrow lane so you do a true last-second emergency dodge rather than a big long swerve.

Rock Dodge demonstration in a CyclingSavvy class

Snap Turn Emergency Maneuver

A quick right turn is sometimes the best way to avoid an intersection collision. Of course, you end up going in a different direction than you intended, but at least you avoided the crash.

Snap turn emergency maneuver
Inside pedal up. Look into the turn.

You use the part of technique described above for the rock dodge. You momentarily flick the wheel opposite the direction you want to turn, but don’t bring it back. This is a forced counter-steer that causes the bike to lean into the turn. The most important thing to do next is turn your head toward the turn and look where you want to go. Don’t try to steer the bike, it will go where you look. Remember to keep the inside pedal up. This maneuver creates an abrupt and jarring sensation — that means you’re doing it right. “Trusting the lean” is the hardest part of this emergency maneuver for me, and the mantra I repeat to myself.

The best way to learn this drill is in a class with the supervision and guidance of an instructor. If you want to try it on your own, start out with low speeds and work on the components. Flick the bars away from the turn, turn your head into the turn, keep the inside pedal up, focus on where you want to go until the bike completes the turn and rights itself.

Warning: Making an error at high speed can result in a crash, so it’s essential to learn the steps at low speed. Do not attempt this maneuver with knobby (dirt) tires, they may not grip pavement. Never touch the brakes once the bike is leaning into the turn: this will cause the back wheel to lift and slide out.

Conclusion

With emergency maneuvers, we conclude the skills section of our beginner series. We move on to a post on how your behavior can keep you safe — and even obtain better cooperation from motorists!

Philadelphia Bicycle Expo

Philly Bike Expo, October 29-30

One of the Nation’s Best

The Philly Bike Expo is celebrating its 12th year. This remarkable event, at the Pennsylvania Convention Center in downtown Philadelphia, brings together outstanding exhibitors from throughout the country. These include dealers, distributors, advocacy organizations, and specialty frame makers. There will be valet bicycle parking. For general information, check out the Expo’s Web site. Here’s a panoramic view of the exhibitor area in an earlier year’s Philly Bike Expo. (Click photo to enlarge.)

Panoramic view of the Philly Bike Expo exhibtors' space

CyclingSavvy at the Philly Bike Expo

Don’t forget to visit the ABEA/Coalition for Appropriate Transportation booth (number 3510, just to the right of the food court). You’ll be able to “drive” a human-powered vehicle through a busy intersection and see how to avoid the hazards.

Rides

CyclingSavvy sightseeing ride to the Philly Bike Expo
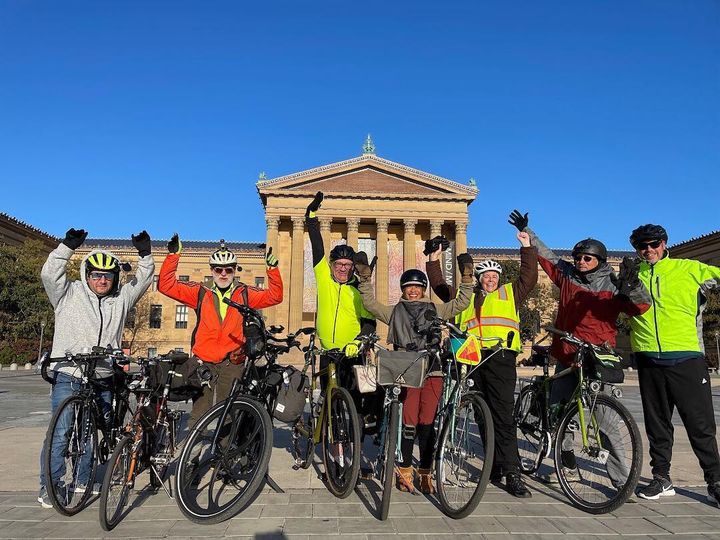
2021 ride group stops for a photo at the Philadelphia Museum of Art
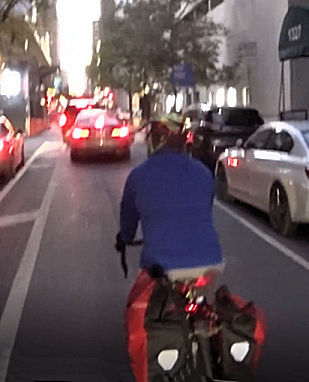
Riding Spruce Street in Philly at night

We’ll lead a sightseeing ride ride Saturday morning — 7:30 AM from the Ellen Phillips Samuel Monument. More detail is here. The ride arrives at the Expo as it opens. We’ll also lead a ride from the Convention Center to a big Saturday evening party.

Workshops and demos

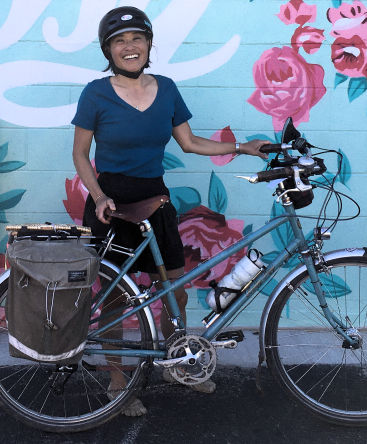
Pamela Murray with her bicycle set up for practical use

John Allen will give his talk Riding Philly Streets Saturday at 10:30 AM, and Pam Murray will give a demo on setting up a bicycle for everyday use Saturday at 1:30 PM. The full workshop schedule is here.

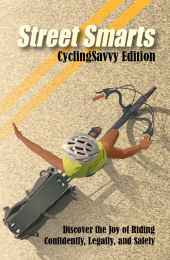
Bicycling Street Smarts cover image

Street Smarts, Autographed

Bicycling Street Smarts, CyclingSavvy Edition will be available in the CyclingSavvy/CAT booth at the Expo. Yes, autographed by the author!  At booth 3510!

Philly Bike Expo Kids Arena

Kids arena at the pHILLY bIKE eXPO

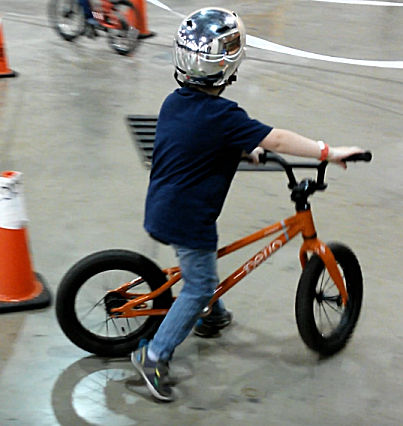
Bring your kids! There will be an indoor riding arena where children can try out bikes and practice riding.

Be There or Be Square!

The Philly Bike Expo is the only big bicycling event of its kind on the East Coast. It is not to miss.

See you there!

Illegal turns, unsolicited favors

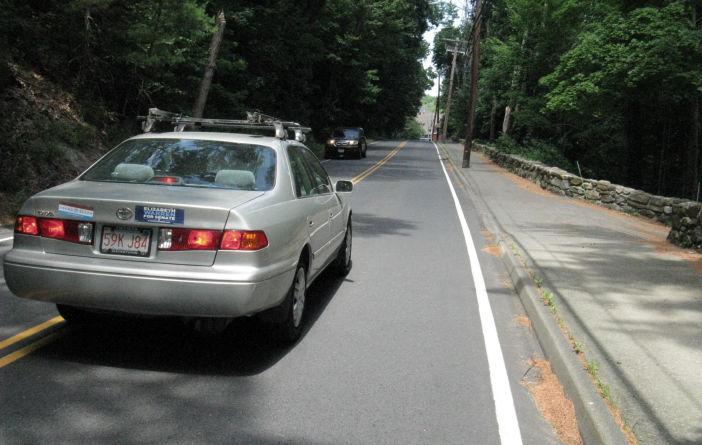
I am riding on a two-lane road, leaving room for motorists to pass — releasing. This is a semi-rural road with a residential driveway here and there. Almost all traffic continues straight through, and I have made the considered decision to allow motorists to pass. Illegal turns are rare here. But now a car pulls ahead of me and stops, just short of a driveway on the right.

Almost every time this happens, the driver thinks that allowing me to pass on the right does me a favor.

Illegal turns: drivers wait for bicyclists to pass on the right.
Take the bait and pass on the right?

Legal vs. illegal turns

The everyday rules of the road and the traffic law are clear: it’s no favor. Right turns from the middle of the road are illegal turns. The driver should slow and follow me for the few seconds it takes me to get past the driveway, merge to the right edge of the road, and then turn right. (It’s MGL Ch. 89 § 2 and 90 § 14 in my home state, Massachusetts, in case you care to look)

I want to encourage drivers to do the right thing. How do I handle this?

Traffic is a dance of large objects with limited maneuverability. But with my forward view and a rear-view mirror, I can interact smoothly with motorists as long as they are predictable. Rules of the road make for smooth and cooperative interaction, as long as everyone is obeying them. If a driver just slows to follow me for a couple of seconds, I can pass the driveway and the driver can then turn right. This is the way things are supposed to work. It even takes less time.

Anticipating illegal turns

It’s actually easier to anticipate an unsignalled and illegal right turns when the speed of passing traffic is high, because drivers have to slow before turning right. I check my rear-view mirror and when a driver slows, I merge to lane-control position, or make the “don’t pass” signal: arm outstretched, palm facing to the rear. If speeds are slow, a car going little faster than me could turn right and cut me off without warning, so I need to control the lane whenever approaching a driveway.

But sometimes I miss the cue and a driver will invite me to pass on the right. I have to admit, I haven’t always handled this well. Bicycling gets me into “the zone”, a so-called flow experience, living in the present. That is one of the joys of bicycling for me. But I am also keyed up with the exercise, and it can be jarring when my flow experience is interrupted.

How to react?

When a driver pulls up just ahead of me and stops, what do I do?

I also stop. (I have seen bicyclists shoot through on the right. Don’t – a misunderstanding could be injurious.) I need to resist the temptation to have a conversation with the driver, and that is where I have failed at times. I am not in the best mood when my flow has been broken. Here in New England, people drive with the windows closed except on blessed days with fine weather. And often then too. So, I have both the incentive and the need to raise my voice. That doesn’t make for a good conversation. Drivers can get offended that I don’t appreciate their nice favor.

What is better? If I’m sure that the driver isn’t waiting to turn left, I could pass on the left. That confounds the driver’s expectations and sends the lesson: “I don’t pass on the right.” Sometimes I have to back up first, because the car has stopped next to me. But just staying stopped sends a stronger message.If a long vehicle has stopped next to me, I am in danger and I need to get out of there.

So, to sum up, you face an uncertain situation when almost almost all traffic is going straight through and you want to let it pass, but there is a driveway on the right. The best I can say is to have a mirror, use it, check it, anticipate and forestall illegal turns when you see them about to happen. Use lane control and the “do not pass” signal. When it happens anyway, stop, don’t say anything. The longer this continues, the more mind-bending it is for the driver. Or if it will be safe, you could pass on the left with a friendly wave. Better only to confound the driver’s expectation than to try to start a conversation!

Srivwer behvior, avoiding an opening car door

Three Types of Bicyclist Behavior

In our “Beginner’s Guide” series, we are attempting to bring all facets of basic bicycle safety together::

  1. Equipment & Accessories: Is The Bike Safe to Ride?, plus lights, mirrors, bells, and other optional equipment and clothing.
  2. Skills: The Top 3 Bike Handling Skills, Braking and Cornering, Using Your Gears, and (coming soon) Emergency Maneuvers.
  3. Bicyclist Behavior: How what you know and what you do can keep you safe.

In this post, we start to discuss the third broad topic, bicyclist behavior.

We see a wide range of bicyclist behavior in the real world, and we can probably all agree that some of it is not so good. I don’t blame the cyclist, in most cases. Given the general lack of bicycling education in North America, many people grow up with little idea of how best to keep themselves safe while cycling with other traffic. We’re told as kids that the street is for cars and is dangerous. We usually get some basic-level training in how to use crosswalks.

But most cyclists do not get any formal cycling education beyond grade school, if even then. As teens and adults, they fall back on what their parents may have taught them when they were little, what they observe others doing, and what seems like “common sense.” So it’s understandable that many bicyclists adopt a “pedestrian on wheels” approach to getting around by bike. Like pedestrians, these cyclists try to stay out of the road as much as possible. These cyclists do not feel welcome on the road, they do not know what they are allowed to do or should do, and maybe don’t even think they belong there. They use sidewalks and crosswalks where available.

Bicyclist Behavior: Driver, Edge, Pedestrian.

CyclingSavvy identifies three categories of bicyclist behavior, as suggested by bicycling educator Dan Gutierrez. These are not intended to label the cyclist, just the behavior. The same rider may adopt any combination of these strategies during a single trip.

  1. Driver behavior: Use the road, following the normal driver rules, on the correct side and not always at the edge.
  2. Pedestrian behavior: Stick to pedestrian infrastructure wherever possible.
  3. Edge behavior: Ride on the road but stick to edge as much as possible (including riding against traffic).

Driver Behavior

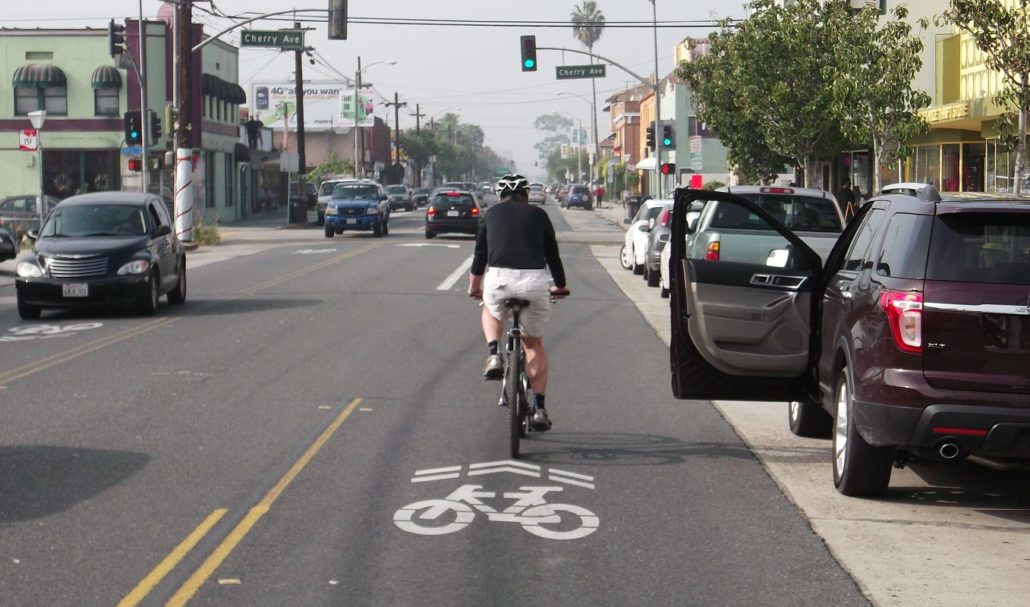
Bicyclist using driver behavior, avoiding an opening car door
Driver behavior, avoiding an opening car door

The CyclingSavvy program builds on John Forester’s assertion that “cyclists fare best when they act and are treated as drivers of vehicles,” that is, driver behavior. But we recognize that driver behavior can be daunting at first. Not every bicyclist immediately has the knowledge and confidence to take it up. Also, becoming a pedestrian, and operating in pedestrian space, may be unavoidable or more convenient for parts of a trip.

Pedestrian Behavior

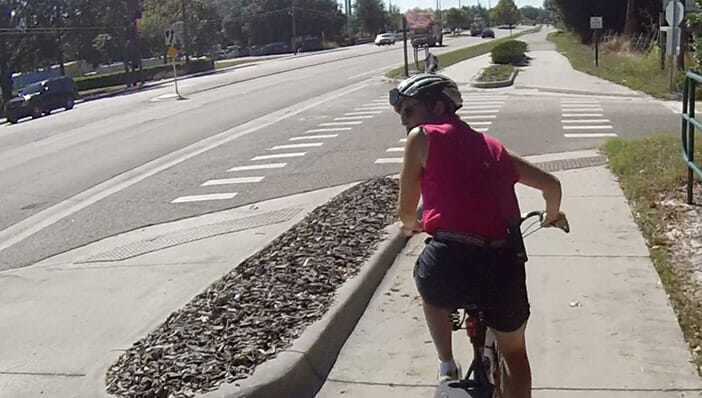
Bicyclist using pedestrian behavior: scan back on sidepath
Pedestrian behavior with shoulder check approaching an intersection.

So, part of our instruction covers safe pedestrian behavior. This basically amounts to “go slow, and look carefully in all directions at driveways and intersections.” We also recommend dismounting in crosswalks, and on sidewalks if they are busy. Stay far away from doorways. If you are prepared to accept these limitations, and if sidewalk riding is legal where you are riding (check your state laws and municipal ordinances), then we won’t flat out tell you not to do it. But you have to go slowly to stay safe, and even beginners can go too fast sometimes. There may be too many pedestrians (the rightful users). And often, there isn’t a sidewalk anyway.

Edge Behavior

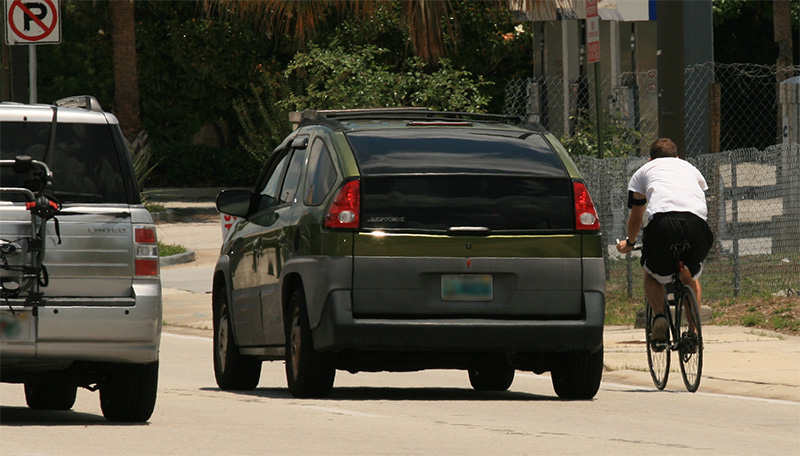
Bicyclist behavior: edge rider
Edge behavior. What could go wrong?

Of the three behavior types, edge behavior is probably the hardest to practice safely. While it generally allows for faster riding than pedestrian behavior, it renders the bicyclist less visible, less relevant, and less predictable than does driver behavior. It frequently leads to conflicts at intersections.

Despite all these limitations, it’s the default behavior for most beginning cyclists. Pretty much all of us began as edge cyclists, if not pedestrian cyclists. Remembering my early days, I had a limited understanding of bicyclist behavior options. I had a vague notion that I should obey all the same rules as car drivers, and not use the sidewalk. Yet, I did not yet have either the knowledge or the model for how to do anything beyond stay at the edge, even at intersections.

Does the Law Allow Driver Behavior by Bicyclists?

Like all traffic laws, laws about bicyclist behavior vary from state to state; check your state laws to be sure. But we can categorize them generally here, noting exceptions where we are aware of them.

Rights of a Driver

In all states and provinces in North America, bicyclists have generally the same rights and duties as other drivers. Some states define the bicycle as a vehicle, while others grant bicyclists the rights of drivers. The end result is the same, legally.

This is the starting point. Additional statutes may modify it.

As Far Right as Safe or Practicable?

Most, but not all, states have some kind of law stating that a bicyclist must ride as close as safe or practicable to the right curb or edge of the roadway, followed by a list of exceptions. “Practicable” —  an unfamiliar word meaning that something is workable in practice. It is not the same as “far right as possible,” although impatient motorists and even some law enforcement officers may think of it that way.

It seems reasonable for drivers of slower vehicles to be considerate of drivers of faster vehicles. But what is really reasonable bicyclist behavior, and what is not? Ever since this law first appeared in the 1940s, exceptions (or, if you prefer, examples of impracticable situations) have been explicitly added, until in most states, the exceptions take many more words to define than the law itself!  (In Maine, where I am, the basic law is 44 words, with 173 words, nearly 4 times as many, to describe the exceptions!) You could say that the exceptions outweigh the rule.

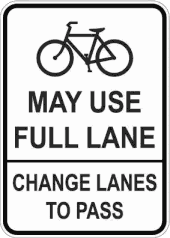
BMUFL sign is a reminder that driver behavior is legal

Exceptions Are the Rule

In most states, bicyclists are not required to keep to the right when :

  • passing other slower traffic;
  • preparing for or executing a left turn;
  • proceeding straight in places where right turns are permitted;
  • avoiding hazards at the edge (including but not limited to sand, debris, potholes, surface hazards, grates, glass, puddles, opening doors of parked cars);
  • the lane is too narrow to share side by side within the lane.

The word “practicable”, correctly interpreted, encompasses these definitions, too. It comes down to this: You are never required to sacrifice your safety for someone else’s convenience! The “Bicycle May Use Full Lane” sign is a reminder of this. The sign does not have to be posted for this to apply.

We spend a great deal of time in CyclingSavvy on opening doors of parked cars, and how to handle narrow lane situations. For now, suffice it to say that we may legally use driver behavior, riding far enough away from parked cars to avoid not only the door itself, if it opens, but also to avoid being startled into swerving, which can be just as deadly. Indeed, whenever keeping to the right portion of the travel lane is not required, bicyclists have the right to use the full lane, that is, to ride anywhere they wish in the lane.

Bicyclist Behavior and Lane Widths

Here is the basic math:

  • 4 feet: Bicyclist operating width, per U.S. Federal Highway Administration definition
  • 3 feet: Minimum passing clearance
  • 7 feet: Bare minimum width of a passing car; trucks can be 8 or 9 feet wide with the mirrors!

4 + 3 + 7 = 14 feet, the minimum lane width shareable with most cars and small SUVs. A standard lane is 12 feet wide, and some are narrower. The following diagram shows the minimum lane widths needed for safely sharing with motor vehicles of different types at different speeds.

A car is about 7 feet wide with its side mirrors. You can picture this total as wide enough to accommodate two small cars side by side, parked! Larger motor vehicles take even more room.

Required to Use Special Facilities?

Some states which have put a lot of effort into building bike lanes also have passed laws requiring bicyclists to use them. These laws tend to use the same kind of “practicable” language and exceptions as the Far Right as Practicable laws, so the decision is like whether to ride at the edge of a travel lane. Often, the same kind of hazards exist. Unfortunately, laws that presume to dictate bicyclist behavior can lead to both motorists and law enforcement not understanding good reasons for why a cyclist may not be using a bike lane.

We say, don’t let the paint think for you!!

Getting adequate passing distance is important in choosing lane position, but there are other considerations. More about this in a follow-up article.

Bicycle Portland, Maine

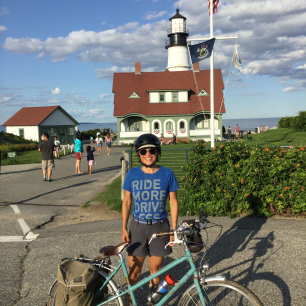
Pamela Murray welcomes you to the Maine lighthouse bicycle tour
Pamela Murray welcomes you to the Lighthouse Tour

Bicycle Portland, Maine and the surrounding area, August 25-28 (Thurs.-Sun.). Pick and choose among any or all of these events:

  • 6-lighthouse coastal tour,
  • lobster dinner on the beach,
  • overnight camping trip,
  • CyclingSavvy bike handling and street skills  sessions. 

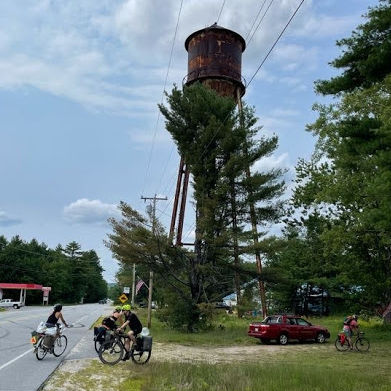
Let us know if you need help finding accommodations for the nights of Aug. 25 and 26. We may be able to help. But the overnight for the tour August 27-28 is free at the People’s Perch in East Baldwin, Maine, a unique and friendly spot with camping accommodations. Then also, there’s a 200-foot water tower which you may climb, safely belayed. Great view…

Bicyclists arrive at the People's Perch in East Baldwin, Maine with its 200-foot water tower.
Bicyclists arrive at the People’s Perch

Click here for a form to contact us and sign on. We’ll soon get back to you by phone or e-mail.

And click here to register for the CyclingSavvy course. Truth and Techniques session is over Zoom on August 19; then Train Your Bike August 25. Both of these are prerequisites for the Tour of Portland, August 26, but see the course listing for alternative options.

It’s going to be a great time, so bicycle Portland, Maine and the Portland area with us!

Maine is a beautiful place that I paradoxically want to hoard to myself and share with everyone I meet.

John Hodgman

Circular Intersection Basics

This article introduces the topic of circular intersections, also called traffic circles, rotaries, and roundabouts. Wikipedia has a detailed description of them.

I hail from Massachusetts, which is notorious for its circular intersections — called rotaries here. Most date back to the early decades of the 20th Century. A few are modern roundabouts, with entries and exits that deflect and slow motor traffic.

This article will cover the basics of riding a bicycle through a small rotary. We’ll deal with complications later.

Mastering a small circular intersection

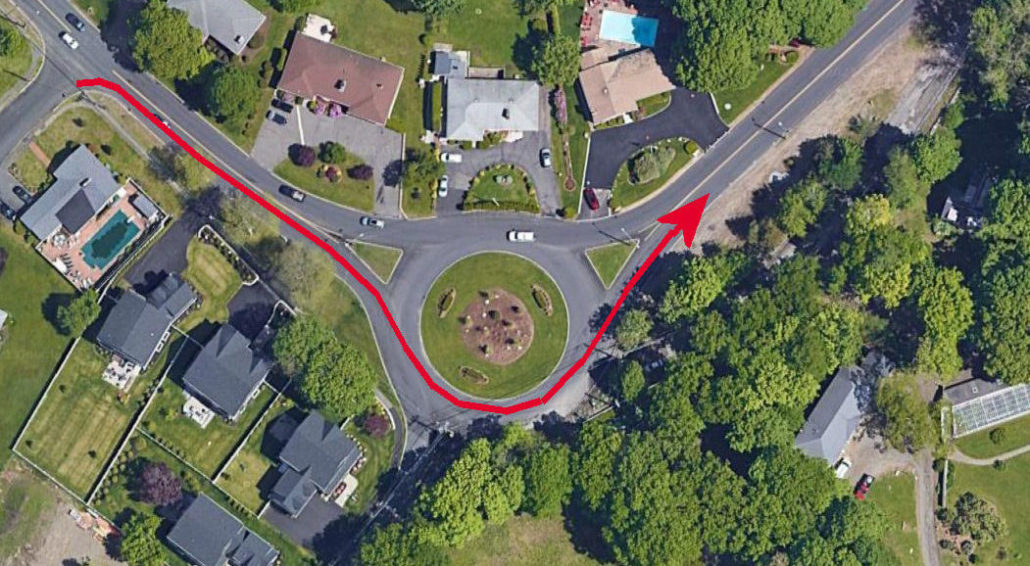
You can think of a circular intersection as a one-way street wrapped around into a circle, with T intersections from the outside of the circle. At a T intersection, entering traffic yields to traffic on the top bar of the T. This rule is especially important in a circular intersection. If traffic in the circle had to yield, it would pile in but couldn’t keep moving: instant traffic jam!

Be glad that you are a bicyclist as you approach a circular intersection. Bicycle drivers have a much easier time than pedestrians with these intersections. The secret of success? Stay away from the outside edge. If you are at the edge, drivers entering the circle have to turn their heads sharply to see you. Exiting vehicles go nearly straight and do not have to slow down much. Keep far enough toward the inside to allow motorists to enter and exit on your right. No entrances or exits at the inside, and so no vehicles will cross your path. I have sometimes demonstrated this by riding two or more times around a rotary before exiting!

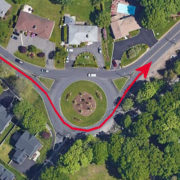
Route through a small circular intersection

CyclingSavvy student Ian Whiting captured the ride shown in the image above at a small rotary in Waltham. The video belowillustrates all the points I have made.

More…

Circular intersections are well-known to achieve smoother traffic flow and greater throughput than signalized intersections, because traffic does not have to stop moving. But — there are also problems. Another article addresses these, and describes how to navigate larger, multi-lane circular intersections.

If you would like to check out the very intersection shown in the video, sign up for a future course with me. I have courses in the warmer months every year.

Resources from Bicycle Touring Ride Awesome Meeting

Ride Awesome members -- here are resources that Laurie and Marshall Cohen provided in connection with the Zoom session about bicycle touring they led on March 23. Thanks to Laurie and Marshall!

There is a video recording of the March meeting.

Here are the links to the documents which Marshal...

This post is for Ride Awesome Members.

The making of the CyclingSavvy Blind Area of a Truck Video

For years, the American Bicycling Education Association has used words and pictures to show how bicyclists can avoid truck-bicycle crashes. Sometime in 2019, CyclingSavvy Instructor John Schubert suggested that we go further and create a mirror image version of a British video. (Over there, they drive on the left, y’know.) That video showed a large number of cyclists invisible to the driver in the blind area of a truck, — in the British video, the left side.

John shared the idea with ABEA co-founder Keri Caffrey, and she expanded on it. Our video could show on-road encounters. A bicyclist, a car, a pedestrian walking dogs could make appearances. The truck could go around the block for repeated takes. Multiple cameras could record the scene.

We published that video and introduced it with a Savvy Cyclist post.

And now…here’s a “making of” video describing the technical details of our shoot. Keep reading below the video for the story of our teamwork.

Planning for the Video Shoot

Almost all other CyclingSavvy traffic videos are unstaged. A bicyclist riding with a camera, sometimes two cameras, captures normal traffic situations while riding. This approach demonstrates that the situations are real — but produces a huge amount of useless, boring and irrelevant footage.

As is clear from the Making Of video, our truck-video shoot was planned and staged. The people, materiel and planning resources were substantial. Capturing video of the same encounters during normal riding would take a prohibitive amount of time. I went up on a ladder with my camera; John Schubert stood in the street, sheltered by his parked van, with his camera on a tripod. Keri rode in the truck cab shooting video. That doesn’t happen by chance.

But — we took pains that the staged encounters would be entirely normal. Actually, several vehicles do appear in the video unstaged, and they add to the story. We did have to discard a couple of runs when they interfered with it.

The task of planning for the video shoot fell mostly to John Schubert. CyclingSavvy Instructor Scott Slingerland recruited truck driver Bob Dolan, a champion in national competitions for driving precision. He arrived in a super prop for the shoot, a huge semitrailer truck. Lehigh University police chief Jason Schiffer would ride his e-bike in encounters with the truck. Scott also recruited a crew of extras, with their bicycles.

The shoot was set for September 4, 2019 when Keri would be on her way back to Florida from a vacation in Maine. She could pick me up outside Boston, and we would join the crew in Pennsylvania.

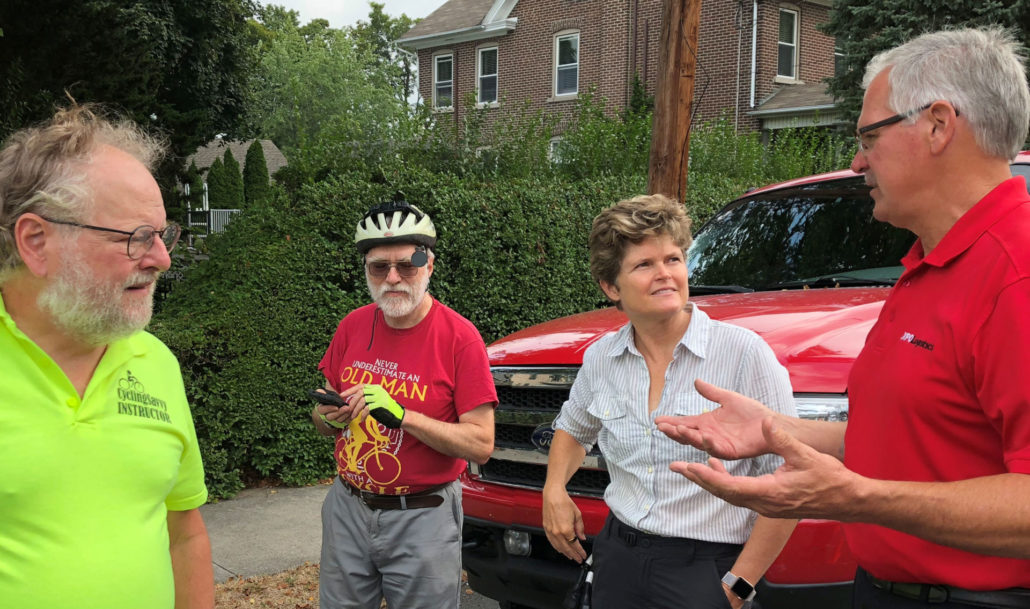
John Schubert, John Allen, Keri Caffrey and Bob Dolan plan the video shoot

Mirroring a British Blind Area of a Truck Video

Everything went more or less according to plan on the day of the shoot. A morning session mirrored the British video with bicyclists in the blind area of a truck.

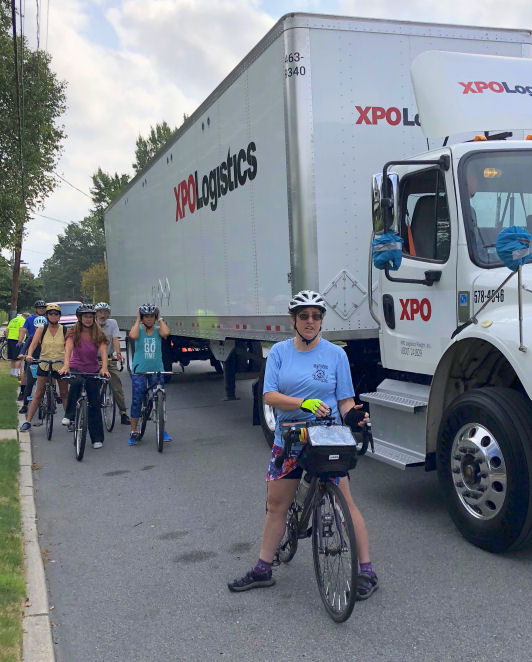
Cyclists in the blind area of a truck
Cyclists in truck blind area

Shooting the Riding Sequence

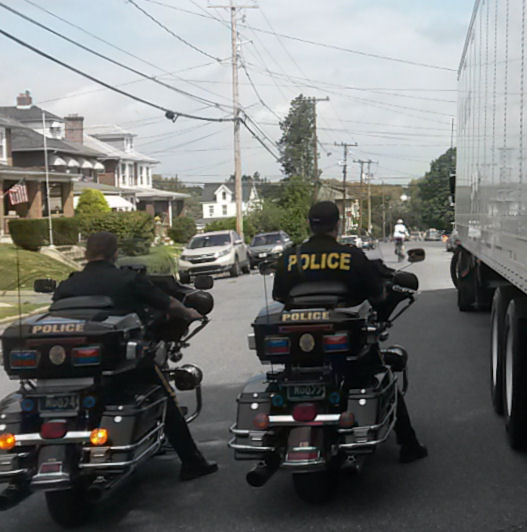
For the riding sequence, John Schubert and I would record video from outside the truck, while Keri recorded from inside the truck cab. Bethlehem police on motorcycles held the street open. Communication was maintained with walkie-talkies, cell phones, and Scott Slingerland serving as bicycle messenger.

Bethlehem police on motorcycles
Yes, they wore helmets — when riding!

Chief Schiffer made several runs showing different tactics, safer and less safe — but never riding into the danger zone next to the truck. The Making Of video shows two of those runs.

As is usual with a crowdsourced event, there were surprises. Some led to difficulties, others to happy discoveries.

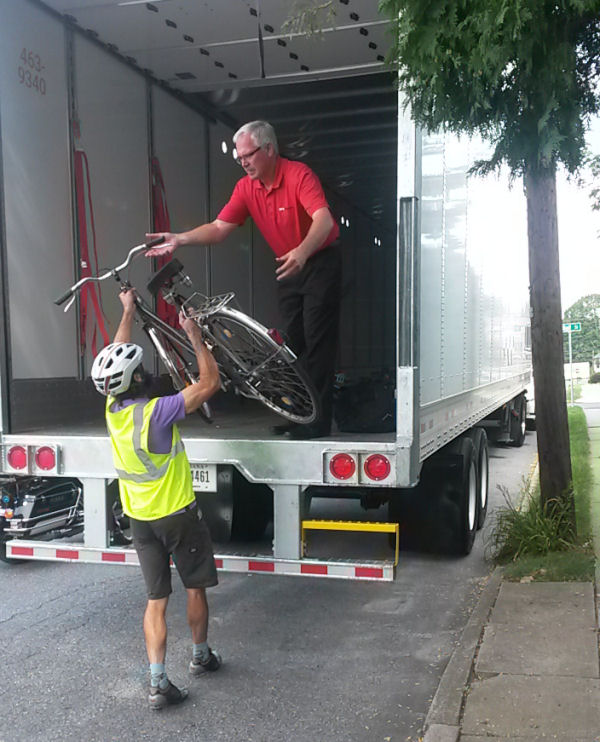
Thanks to champion truck driver Bob Dolan, not only did we have a very big truck to store bicycles, but also — if you hold a driver’s license, you may remember how tough parallel parking was at first. It took me about ten tries for my own license exam. Somehow I got my license anyway. Now imagine backing up a semitrailer truck, where steering to one side turns the lonnnggg trailer to the other side. Bob Dolan got the result in the photo below in a single try.

Scott Slingerland hands a bicycle up to Bob Dolan

Difficulties, Discoveries

It was great how many volunteers showed up. That went as planned, but there were some unexpected turns. Cars came out of a side street, as already mentioned. But also, only rarely can it be said that a liquor store serves the interest of road safety. As we set up to record video, I noticed that a liquor store’s changeable LED sign offered a perfect cue to synchronize clips from the different cameras. This coincidence was so improbable and so helpful that I have to wonder what forces might have been shining down on us, other than the sun, breaking through in a partly cloudy sky. Rain would have spoiled our plan.

After an hour or so and several trips around the block by the truck, we figured that we had enough material, and repaired to a local restaurant for a late lunch.

…Editor’s Work, a “Making of” Video and a Director’s Cut

I took the video clips home to Massachusetts to assemble and collate. Color matching four cameras was a headache, but synchronizing the clips was a piece of cake, or maybe I should say beer and chips, thanks to the liquor store sign.

Video effectively lets a viewer be in more than one place at the same time. Once I had synchronized the clips, the sound of the turn-signal clicker in the truck cab matched the flashing of the turn signals outside. I think that is sort of cool.

I sent the collated and color-adjusted clips to Keri. She spent many hours distilling our work down to a three-minute release video. That is how video editing goes. But a good time was had by all.

A previous Savvy Cyclist post includes the finished video.

shimano 8-speed hub

About Bicycle Gearing for a Good Pedaling Cadence

A previous Savvy Cyclist post describes bicycle gearing, and how to accelerate. This post gets to how your legs can produce power for a day’s ride without getting sore – and for a lifetime without wearing out.

Pistons, not pendulums

When you walk, your legs are like pendulums. Stand on one leg and swing the other forward and back. It has a natural, easy swing. Swinging it either faster or slower takes effort. Here’s a one-minute video illustrating the point:

But when you are riding your bicycle, your legs do not work as pendulums. Neither do they support your weight. They are pistons in an engine, connected to cranks. Because the cranks keep your legs turning, they can easily go faster. Let’s look at how this works out.

From one-speeds to bicycles with gears

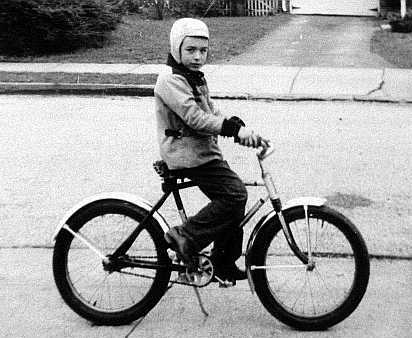
I rode single speed coaster-brake bicycles as a kid. I got my first bicycle at age 7. Its small wheels had me spinning the pedals.

John Allen, age 7, on his first bicycle
My first bicycle, 1953

The next bike was big and heavy. I quit bicycling because I couldn’t ride it up the hill to my elementary school.

I first rode a bicycle with gears at age 17. It felt like flying. As is well known, the Wright brothers studied the flight of birds, helping them design their airplanes. But also, let’s remember that the Wright brothers were bicycle builders first. A bicycle, like an airplane, banks into turns. No earlier vehicle had done that.  

Still, English three-speeds were geared too high to suit me. My career modifying gearing began with my installing a larger rear sprocket on my three-speed, so it would cruise along nicely in top gear and climb smartly in low gear.  Really, a three- speed, so modified, is fine for urban riding if hills aren’t super steep.

From bicycles with gears to bicycles with more gears

After ten years riding on three-speeds, I got my first derailleur-equipped bicycle. I almost immediately modified it to get smaller steps between top gears and a lower bottom gear.

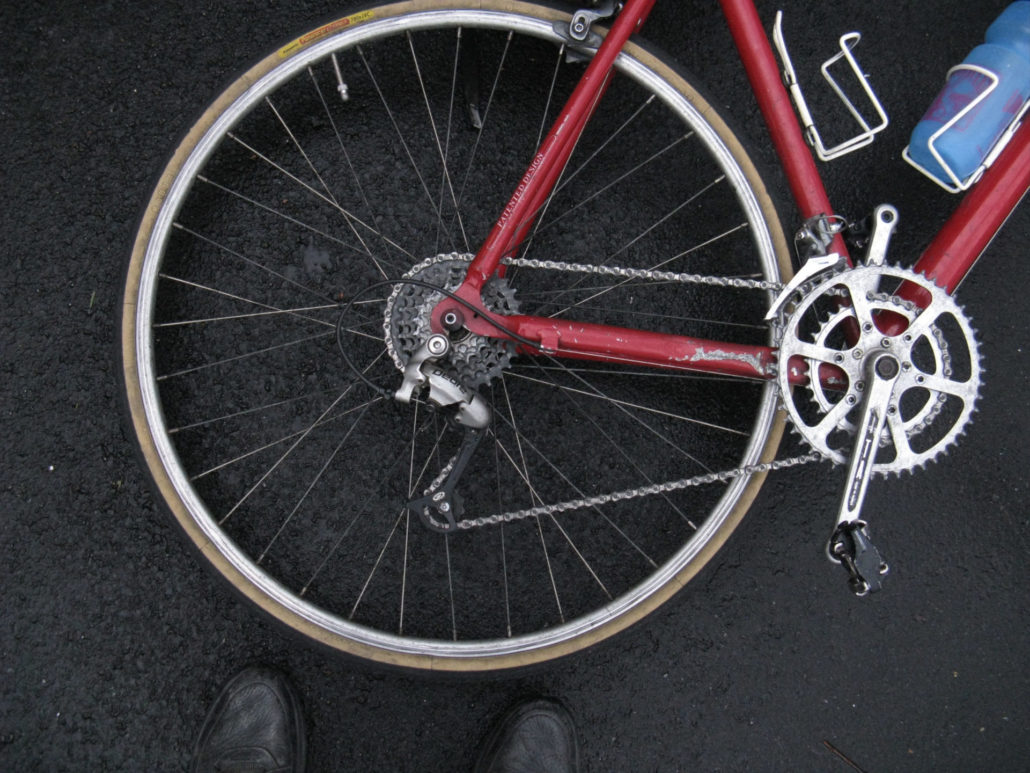
I’ll grant that gearing options have improved considerably over the years. Any mountain bike has a nice, wide gear range. Road bikes tend to have more gears but a narrow range: a racer mentality prevails, and these bicycles often need modification to work for ordinary people. Here’s the drivetrain of the road bike I use for recreational riding: It gets me up the hills!

My road bike is equipped for climbing with an MTB sprocket cluster and rear derailleur, wide-step crankset.

Now, 7- and 8-speed internally-geared hubs are common. 11 and 14 speeds are available, too, though expensive.

Shimano Nexus 8-speed internally-geared hub on my city bike.

What is the comfortable swing?

My legs are nearly as long as the grandfather clock’s pendulum in my video, but they swing twice as fast, because most of the weight isn’t at the bottom. It’s march tempo in music, no coincidence.: If you wear heavy hiking boots, your gait will slow down. But again, your legs are pistons, not pendulums when you ride a bicycle. The faster your legs turn, the less hard they have to push to produce the same power – so you can ride all day without getting sore, and for a lifetime without wearing out your knees.

A good pedaling cadence is quite a bit faster than a walking pace. With an optimal cadence, your oxygen-carrying capacity sets the limit of sustained power production. Your lungs don’t get sore by breathing hard, and your heart doesn’t get sore by beating faster. You can ride all day this way. .

Building muscle strength is something else entirely

Here’s another way to look at the issue: muscle-building exercise stresses muscles to their limit. The usual advice is for three sets of ten repetitions, to exhaustion, twice a week. More repetitions than that won’t build muscles any faster, they make you sore, and in the long run, can cause permanent damage. But, in an hour’s bicycle ride, your legs turn around thousands of times.

Certainly though, you can apply full muscle power for short bursts of power. Keep it in reserve for when you need it, because it fades quickly, and then you have to return to spinning.

Where to turn for more information about bicycle gearing

Getting the right gearing is simplest if it is original equipment on a bicycle you buy. But if your bicycle’s gears do not allow you to climb hills at a comfortable cadence, answers are as close as the nearest bike shop.  Every kind of bicycle, even one-speeds, allows modifications.

For more details on modifying gearing with an internal-gear hub,  you might look here:

https://www.sheldonbrown.com/internal-gears.html#sprockets

and for derailleur gears, here:

https://www.sheldonbrown.com/gear-theory.html .

Next article

In the next article in this series, John Brooking describes emergency maneuvers.