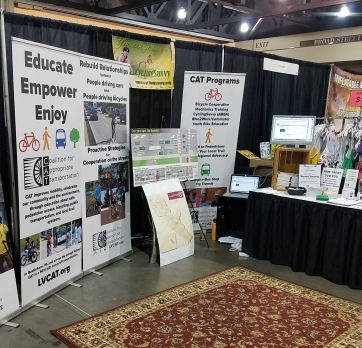
Founded in 2010 by Bilenky Cycle Works, the Philly Bike Expo promotes “the fun, function, fitness and freedom to be found on two wheels.” The event fosters relationships between the cycling community and dedicated companies and organizations.
Bilenky hosts the event so we can all “admire the artisans whose craft enables us to ride two-wheeled art, to applaud the activists whose tireless efforts further our cycling infrastructure and to explore cycling as a fun and efficient transportation alternative.”
Concerned about Covid? There is information online about the Expo’s Covid Protocol. We are vaccinated, will be masked, and consider the risk acceptable.
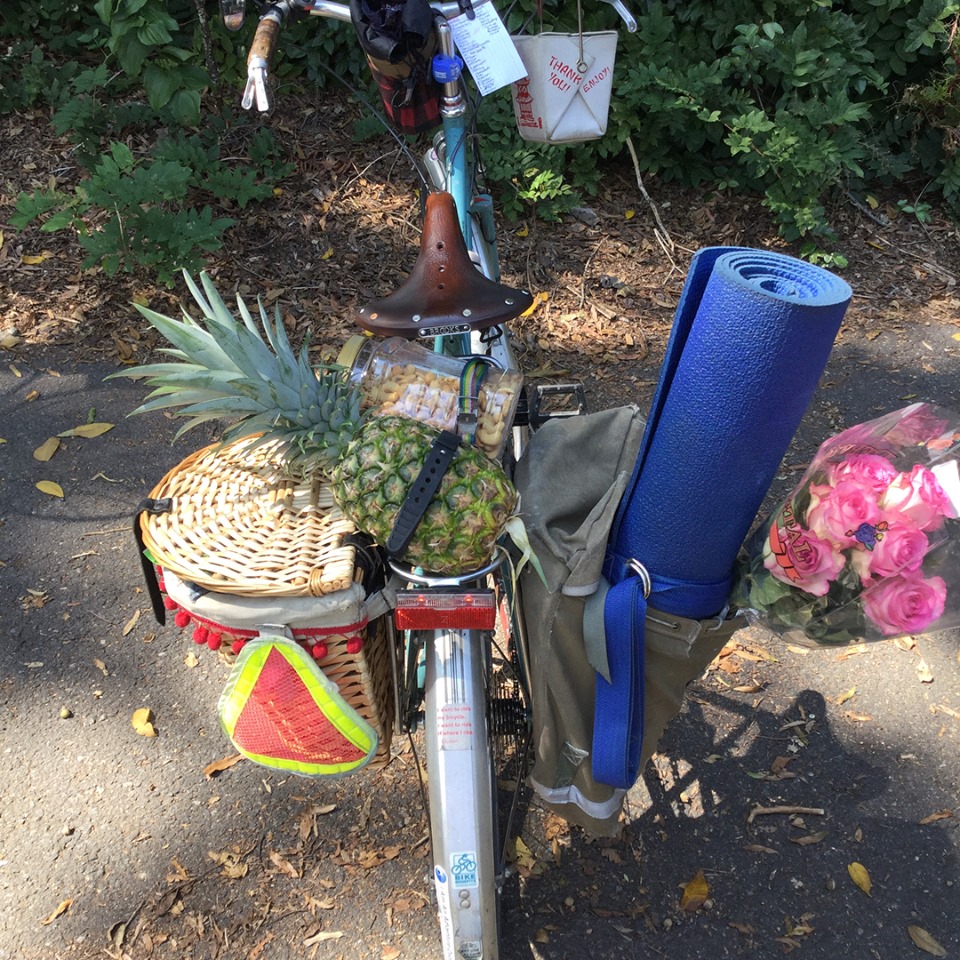
Pam Murray’s bike, home from errands…
Street Smarts — and a raffle.
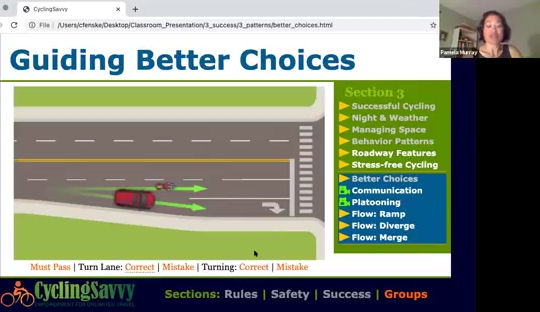
The recently published Bicycling Street Smarts, CyclingSavvy Edition will be available at the CyclingSavvy/CAT booth. Yes, autographed by the author! And we’ll be raffling off copies. The grand prize winner also gets a full scholarship to a CyclingSavvy course, online or in person.
We’re having workshops too!
Two of us are giving presentations on Sunday:
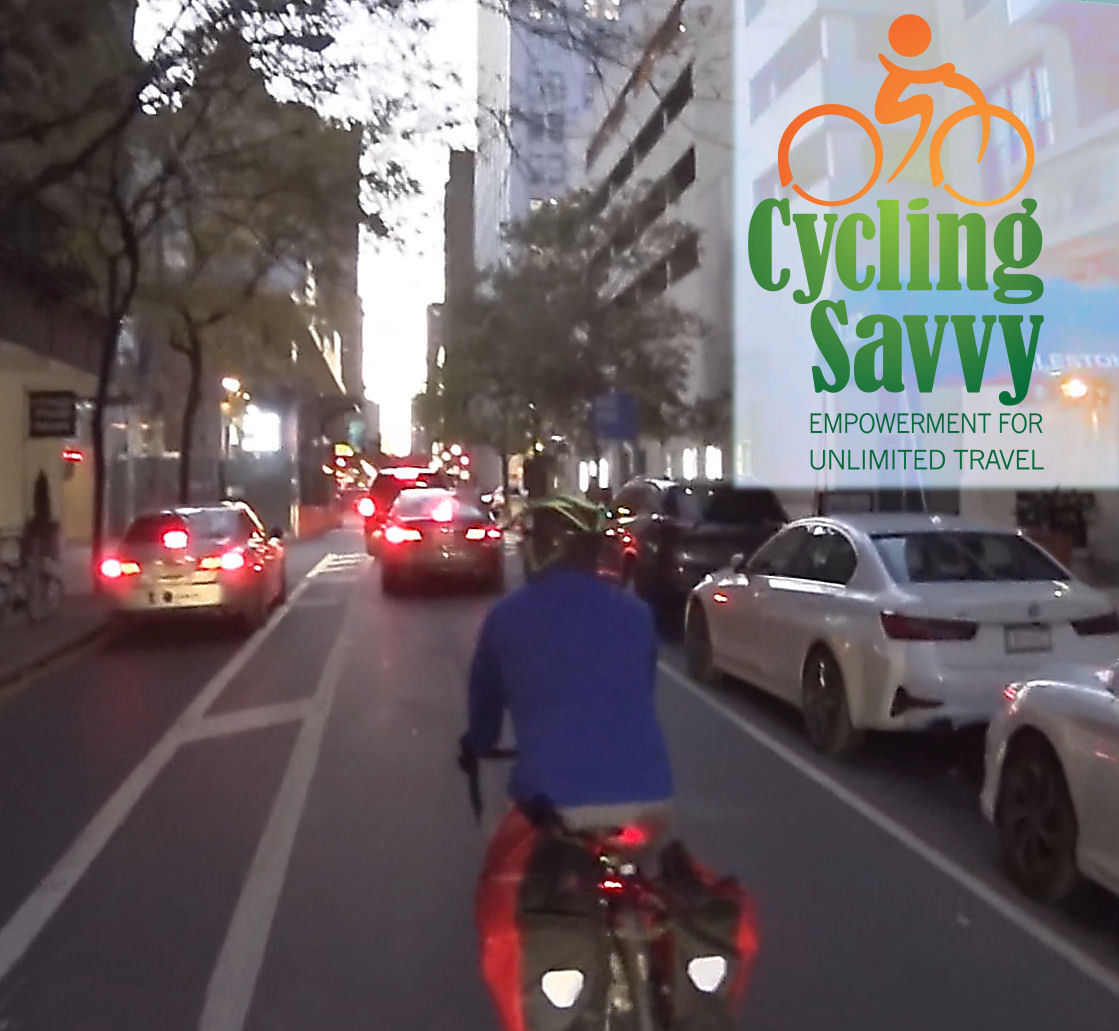
John and a friend rode Spruce Street.
Pamela Murray, The Bike Life, Sunday. 1:30 PM — Pam rides over 6,000 miles per year for transportation, fitness and recreation. She is a CyclingSavvy instructor and Bicycle Benefits Ambassador, and leads bike rides for vacation and camping.
John Allen, Riding Philly Streets, Sunday, 3 PM. Videos and discussion of tactics to meet the challenges of Philly riding. In and out of the bike lane! Getting a smile from a SEPTA bus driver!
Click to zoom in for details about the ride.
And a bike ride…
We are also organizing an unracer bike ride. It will leave at 7:30 AM on Saturday from the Ellen Phillips Samuel Memorial (just downriver from the Girard Bridge), and will arrive at the Convention Center in time for you to check in for the opening of the exhibit hall.
We hope to see you in The Cradle of Liberty!
https://cyclingsavvy.org/wp-content/uploads/2021/10/PBE-featured.png310594John Allenhttps://cyclingsavvy.org/wp-content/uploads/2021/06/CS-logo_xlong-header.pngJohn Allen2021-10-28 17:56:592021-10-28 22:28:51Join Us at the Philly Bike Expo!
Welcome to the next in our series of beginner articles. In this one, I’ll introduce the topic of how to use your gears.
Most bicycles in the USA these days have the chain shifting across several sprockets. Many earlier bikes, and some current ones, have actual gears inside the wheel hub, “internal gears”. We’ll discuss both kinds.
Why do bicycles have multiple gears? Multiple gears can make your riding smoother and less tiring, especially if you live in a hilly area, as well as in extremely windy situations.
The point of gears is to keep your pedaling effort and speed (“cadence”) at a comfortable level. Pay attention to your effort. If you are pushing down too hard, you need to go down to a lower (easier) gear. If you are spinning uselessly, you need to go up to a higher (harder) gear. CyclingSavvy Instructor John Allen demonstrates.
Just as with a car, low (easy) gears are for starting and moving slowly, and higher (harder) gears are to keep your engine — your legs — from turning too fast as you speed up. But there are important differences compared to shifting gears in a car.
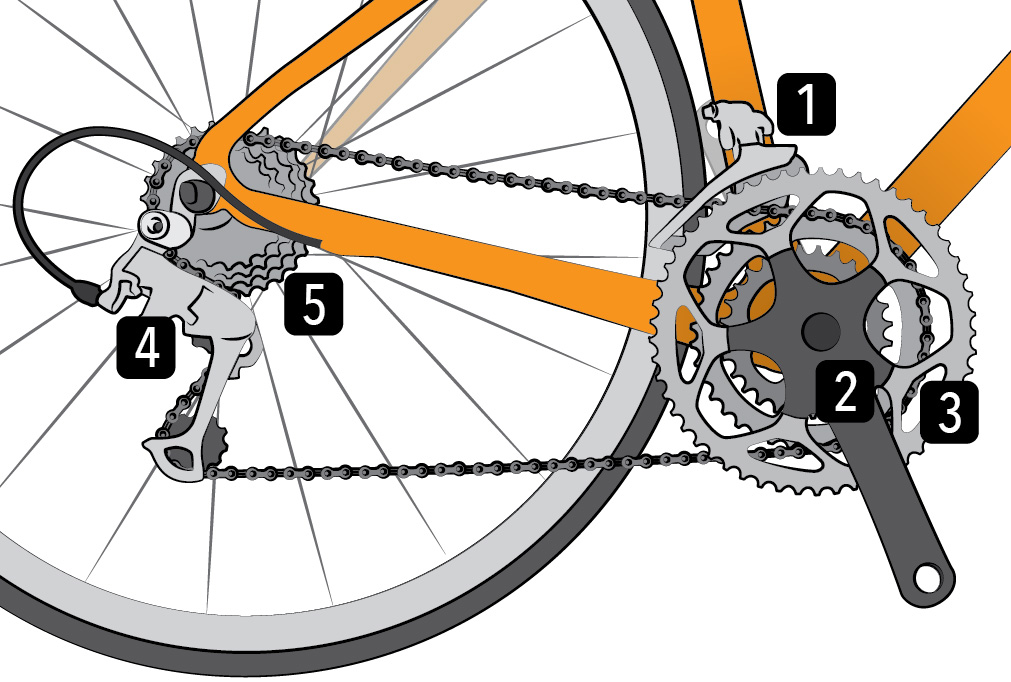
Your bike’s drivetrain: 1) front derailer, 2) crankset, 3) chainrings, 4) rear derailer, 5) cassette made up of individual sprockets
Two shifters: what’s that about?
Many bikes have two or three front sprockets (called chainrings) at the cranks (pedals), and several sprockets on the rear wheel, giving you two shifters to think about. It would be simple if you had, say, a 21-speed bike with just one shifter that went from 1 to 21. But unfortunately, it isn’t that simple.
The good news is, using two shifters in combination is not as hard as you might think. Let’s say you have 3 chainrings (front sprockets, left shifter), and 7 in the back (right shifter, remember that both “rear” and “right” start with R). Don’t think of them as having 21 steps in a sequence (because they’re not): think instead of having 3 overlapping ranges of 7 steps each. Each chainring gives you a different range, and the rear sprockets let you make smaller adjustments within the current range.
If you have 3 chainrings, think of the middle one as your “normal” range, where you will spend most of your time. Start and stop in this range, generally with the back sprockets at or near 1 (easiest). The smallest (inside) chainring shifts the whole range down to be easier, for when you are going up a steep hill or into a strong headwind. The largest (outside) chainring shifts the whole range to be harder, useful downhill or with a strong wind at your back.
If you only have 2 chainrings, which one is “normal” will depend on you and on the specific gearing. Experiment.
If you have just 1 chainring, the preceding 4 paragraphs don’t apply. :-)
You can feel how pedaling gets harder as you move a shifter one way, easier the other way.
Homing in on the range
One way or the other, once the range is right for the conditions, just shift your back sprockets as necessary. (Remember, rear = right shifter). Start from a stop at the easy end, or near it. As you gain speed, you will notice at some point that your pedaling is no longer delivering much power; then it’s time to shift up. This is usually all with the same front chainring.
The outermost of three chainrings (at the cranks) should be used only with the outer four or five rear sprockets, the inner chainring only with the two or three innermost rear sprockets. This essentially boils down to: avoid having the front in the easiest gear while the back is in relatively a hard gear, and vice-versa. Keep easy with easy, and hard with hard.
The middle chainring can be used with any unless the chain rubs against the outer chainring when used with the smallest rear sprockets. If there are only two chainrings, the outer one can be used with more of the rear sprockets.
Shifting gears strategy
Think “how do I shift to get to the gear I need to use,“ not “am I in 7th gear or 8th gear.” It would be complicated to keep track of the sequence from gear 1 to gear 21; also, many combinations are duplicates and near-duplicates, so it is pointless. Typically, a “21-speed” bicycle will have a working sequence of 10 to 12 different gears, and a wide enough range for any terrain and level of fitness, with small enough steps to be comfortable. Use the numbers on twist-grip shifters only as a guide — lower numbers, easier.
The basic sequence is to start in a low (easy) gear, and shift to a harder one when the pedals get to turning too fast. Keep pedaling lightly and shift down as you slow down. This will allow you to accelerate briskly from a stop or a low speed.
When accelerating from a stop, you may need to shift as often as once per second. This keeps your cadence in the sweet spot and accelerates you quickest. You have something in common with a big semitrailer truck — listen to it as it accelerates. The driver shifts through multiple gears, because the truck also has a narrow range of engine speed which optimizes power production.
Gear range wide enough?
Is your bicycle’s easiest gear easy enough? That depends on the terrain where you ride, and on your fitness. On most bicycles, it is possible to replace rear sprockets and widen the range. There is no shame in using an easy gear. It shows that you know how to take care of yourself.
No matter how many speeds your bicycle has in theory, you can use only one at a time! “21-speed” does make a nice advertising slogan, though, doesn’t it?
Derailer Complications
Most multi-gear bicycles in North America use derailers at the cranks and the rear wheel. Those mechanisms push (derail) the chain to one side or the other, from one sprocket or chainwheel to another. The derailer at the rear wheel has pulley wheels to take up slack in the chain produced by the different-sized sprockets. (Clever, right?)
A derailer system has some complications:
Shifting works only when the chain is moving forward! If you shift without pedaling, including when stopped, you will get a lot of grinding once you start pedaling, as the chain finds its way to the right spot. That is tough for the chain and sprockets, and embarrassing for you. If you did not shift down before stopping, the bicycle will be in a high gear and starting will be hard.
To shift smoothly as you slow down, keep spinning the pedals but without putting any force on them. When accelerating or holding speed, reduce force on the pedals momentarily as you shift.
You backpedal to step forward off the saddle when coming to a stop. (See our post about starting and stopping.) Finish shifting before you stop. If the chain and derailers are not aligned, the chain will jam as you backpedal. Test by backpedaling lightly. Sometimes you can adjust the shift levers even after stopping.
Internal Gears
Instead of a derailer, some bicycles have gears in the hub of the rear wheel, or sometimes at the cranks. Usually a shifter and cable connect to the internal mechanism; some two-speed hubs shift by backpedaling. 3-speed internal-gear hubs were very popular in the mid-20th century. Now 7 and 8-speed internal-gear hubs are common, and some have even more speeds.
An internal-gear hub shifts best when the chain is not moving, just the opposite of a derailer system. Coast or backpedal slightly for a moment while you shift. You don’t need to worry about downshifting while slowing to a stop; you can do that after you stop. It’s one less thing to concern yourself with. The sprocket can be changed with internal gears, in case you find that the range is too easy or too hard (usually, too hard). More about internal-gear hubs.
Shifting gears – Summary
Now that you know how shifting works, keep the goal of consistent cadence in mind as you ride. If your bicycle has more than one chainring, remember that the easy range is for uphill or headwind, hard one for downhill or tailwind. Middle (if you have 3) is for all other conditions. Use the sprockets at the rear wheel to adjust within the range as necessary. Easier gears are also good for creeping along while maintaining control, and being ready to accelerate, for example if a red light turns green before you reach it.
The idea is to keep your feet turning at a constant rate. A follow-up article will help you feel in your legs what that rate needs to be.
https://cyclingsavvy.org/wp-content/uploads/2021/08/bike-drivetrain-01.jpg6821011John Brookinghttps://cyclingsavvy.org/wp-content/uploads/2021/06/CS-logo_xlong-header.pngJohn Brooking2021-08-26 14:45:512022-03-13 22:41:38Shifting Gears to Accelerate Quickly
My friend, CyclingSavvy graduate Ian Whiting, rides a lot on shoulderless Massachusetts highways. Big rigs also use them. Ian likes to shoot video as he rides. I am pleased to host his videos here on the Savvy Cyclist. There are already Savvy Cyclist posts about how to be safe when cycling around big trucks in urban traffic, but now Ian will show us a couple of examples of CyclingSavvy control-and-release strategy for the open road.
What is control-and-release strategy?
CyclingSavvy control-and-release strategy is to control the travel lane when passing is unsafe, releasing control by moving over to the right when passing becomes safe. This strategy is about cyclists’ engaging actively with motorists, and it is about release as much as it is about control. Ian’s video shows a couple of different ways to release on the same uphill stretch, with oncoming traffic and a restricted sight line over the hilltop. Both clips in the video start at the same traffic signal. Here’s the location in Google Maps.
Pulling over
In Ian’s first clip, he starts out on a green light; the truck catches up with him partway up the hill. He pulls over into a convenient driveway entrance to let the truck pass. There is nothing unusual about this – except – A second truck was following the one he pulled over to let pass. There’s a lesson in that: cyclists should always check before re-entering the roadway, even after only pulling aside briefly. What you saw behind you is now in front of you, but you might not have seen everything that was behind you.
The “loop-the loop” – not a conventional control-and-release strategy!
In the second clip, Ian is waiting at the traffic light when a big rig pulls up behind. He does a “loop the loop” — a U turn, backtracking, and another U turn to get behind the truck. This is not a conventional control-and-release strategy, but it works. Clever!
I advise using the loop-the-loop technique only when traffic is stopped, and passing would be illegal. In Ian’s video, he is first in line at a red light. The loop-the-loop is practical only when you can easily reach a lane for traffic in the opposite direction — so, almost always on a two-lane highway, though also on a multi-lane highway if you are waiting to turn left. You need to check for illegal passing, but also for traffic in the lane where you will backtrack — including traffic turning into that lane.
Generating goodwill
The loop-the-loop technique probably won’t generate goodwill to the same extent as pulling over. The truck driver will probably think that you decided to turn around and go back where you came from. But either way, it works better to be behind the big rig than in front. Well, except for the truck’s diesel smoke. But you would get that anyway, only at a different time.
https://cyclingsavvy.org/wp-content/uploads/2021/07/whiting-backtrack.jpg6791077John Allenhttps://cyclingsavvy.org/wp-content/uploads/2021/06/CS-logo_xlong-header.pngJohn Allen2021-07-31 18:00:002021-07-31 19:18:41Control-and-Release Strategy with Ian Whiting
On July 30 and 31, instructors John Brooking and Pam Murray are giving a full three-part CyclingSavvy course in Portland, Maine. The classroom session, 6-9 PM EDT Friday, July 30, will be held over Zoom. You can Zoom in from anywhere. Registering for this session gets you a $25 discount on the full course at any other time and place. You can even repeat the classroom session. Enough said!
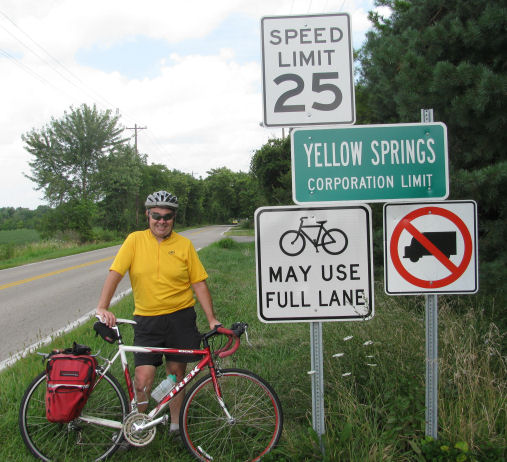
We were saddened by the sudden passing of Cycling Savvy Instructor Dan Carrigan on January 30, 2021. Dan died unexpectedly at his home in Yellow Springs, Ohio. We will miss Dan’s adventurous spirit, his discerning intellect and his humorous outlook.
Dan’s contributions to cycling
Dan was a longtime board member of Ohio Bicycle Federation, working with others on the 2006 Better Bicycling Bill, which improved the traffic laws for Ohio cyclists, and contributing to other programs and services of OBF. He made contributions to the cycling community in his hometown of Yellow Springs, encouraging city staff to erect Bicyclists may Use Full LaneL signs at the city limits, advising on safe infrastructure for both cycling and walking, leading Safe Routes to School efforts, and leading a middle school program called “Into the Wild”, a 3-day bicycle adventure with some writing, arithmetic, history and a whole lot of physical activity.
Dan’s career
Dan had a varied career in photography and library science. He worked for many years in the research library at Wright Patterson Air Force Base in Dayton, commuting daily by bicycle from Yellow Springs. Dan was a bicycle educator, first as a League of American Bicyclists instructor and later as a Cycling Savvy Instructor. Dan attended the “I am Traffic” conferences in Orlando and St. Louis, andwas thrilled to be able to meet the leaders in bicycle education. I was fortunate to travel with Dan to both conferences and in Ohio to teach CyclingSavvy. The time would fly as we discussed bicycle advocacy and politics, for which we held similar views. Since Dan wasn’t on Facebook, he would call me regularly to talk about the latest bicycle news. I will miss those amicable conversations.
A favorite memory will be riding the 50th TOSRV with Dan in 2011. We didn’t often get to ride together, so I’m grateful we could ride the epic tour.
A warm tribute to Dan from his loving family can be read here.
A memorial for Dan will take place on July 10, Saturday at 1 pm at John Bryan State park, lower picnic shelter.
A note from Kate Carrigan, Dan’s wife:
I would be happy if some of Dan’s bike family could come. It’s a time to tell stories, to reminisce about those epic bike rides and Dan’s work with OBF and other bicycling passions. Dan’s love of cycling has a long history and was one of his greatest passions. You all were very important people to him in his cycling endeavors and I thank you for that.
Please let anyone else in your group who might want to attend know about this event.Memorial donations in Dan’s name can be made to OBF or Yellow Springs Library Association.
I hope you will join us to celebrate Dan’s life. I look forward to seeing and meeting you all.
As e-bikes have gained popularity, misconceptions have diminished. They still need to be discussed.
“Riding an e-bike is ‘CHEATING!’” FALSE: It’s SMART, especially for people limited by fitness, age or disability. E-bikes also make sense for law enforcement, Fire, EMS and other public safety personnel seeking advantages and better customer service.
“There’s NO fitness and health benefit to riding an e-bike.” Again, FALSE. More and more research is dispelling this misconception. See the resource page from PeopleForBikes: Electric Bikes Statistics | People for Bikes.
Aside from the research, e-bikes allow riders to go farther, faster, longer, and with less effort while having fun. People will want to stay out longer and/or ride more often. That equates to better fitness and calorie burning. Here is a report on an easy e-bike ride I did on the road a while back, demonstrating the fitness and calorie-burning point.
Key E-Bike Etiquette Issues
Unfortunately, most e-bike users have not sought out or received the training they need to ride more safely, legally and cooperatively. E-bike etiquette is becoming a hot topic! The cycling community, public, and local authorities – including law enforcement – are receiving complaints of unsafe, illegal, irresponsible, and uncooperative use of e-bikes. Our youth also fall short. Linked here is an example: Manhattan Beach Police to Increase Enforcement on Electric Bike Riders – NBC Los Angeles.
Keep these strategies in mind while riding your e-bike, on- or off-road. Several are CyclingSavvy strategies:
Ride safely and legally. Be aware of the local, state, and federal laws (user, access, and equipment requirements) for e-bikes where you plan to ride. PeopleForBikes has excellent resources for State by State Electric Bike Laws and much more.
Ride respectably and cooperatively, especially on sidewalks, shared-use paths, and multi-use trails. “Pedestrian” behavior (walking speed) on these facilities is a MUST, especially when other users are present!
Pass only when safe and appropriate. Call out “on your left” or ring your bell in advance. Slow down while passing. Offer a friendly and uplifting comment like, “what a great day for a ride!”
Don’t “FLAUNT” your e-bike power, especially with other bicyclists. For example, do not power up a climb leaving your human-powered ride partners in the dust, and say later “what took you so long?!” Not cool!
Do you post your e-bike rides on Strava or a similar app? Strava has an “E-bike Ride” option, under the type of ride. It now also asks you whether your ride was on an e-bike.
While riding off-road on your electric mountain bicycle (eMTB), practice good and courteous trail sharing, as messaged by the signs below.
“E-Bike Etiquette Tip of the Day:” If you come upon a horseback rider or other animal while riding an e-bike, turn that motor OFF! The whining noise of the electric motor may startle or spook a horse or other animal!
Each bicycle club, and group ride leaders, must answer these questions:
Should e-bikes be mixed (integrated) into group rides, especially on the road?
If so, how and where within the group?
What are concern(s) for a mixed group ride? One example: A less-skilled cyclist, riding a heavier e-bike, bumps another cyclist riding a lighter pedal-only bike. Guess who is going down?
Could an e-bike be an asset or help to the entire group? Hint: Maybe by pacing a rider who had suffered a flat tire back to the group.
Will ride leaders need additional savvy cycling and/or group riding training for their position(s) within the group? Linked here is the perfect and free resource Club Rider Essentials | CyclingSavvy.
Should there be an e-bike-specific sub-group ride option instead?
One Last Thought
“It’s not what you ride, but how you ride!”
Karen Karabell, CyclingSavvy, and I hope you have enjoyed and benefited from this series on e-bikes! Who knows, maybe some additional articles on e-bikes may pop up in the future.
BIO
Clint is a CyclingSavvy Instructor Candidate. He is a retired law enforcement officer after a 24-year career including time with the Los Angeles County Sheriff’s and Riverside Community College District Police Departments. While at RCCDPD, he was a bike officer for 23 years.
He is a 26-year active and certified California Bike Patrol Instructor and currently instructs Bike Patrol Courses for the Riverside County Sheriff’s Department. He has been an IPMBA (International Police Mountain Bike Association) member since 1994 and is a former instructor.
Clint owns two e-bikes and runs errands, commutes, races, teaches, and patrols (at his church) on them. At the 2018 and 2019 IPMBA conferences, he presented/co-presented e-bike workshops to instructors and general attendees.He has also presented e-bike seminars and presentations for local bicycle clubs, Chicago Area Bicycle Dealers’ Association Expos, and the Florida Bicycle Association. He has authored e-bike-related articles for CyclingSavvy, Bicycle Retailer and Industry News, IPMBA, and officer.com.
https://cyclingsavvy.org/wp-content/uploads/2021/06/yield-trail-white-bg-wide.png312550Clint Sanduskyhttps://cyclingsavvy.org/wp-content/uploads/2021/06/CS-logo_xlong-header.pngClint Sandusky2021-06-12 09:00:002023-05-20 19:53:49Ebike Etiquette, Misconceptions, and Mixed-Group Riding
A bicycle, like any road vehicle, should have two independent braking systems, in case one fails. Most state statutes do not require dual brakes for bicycles, but it’s a good idea for safety. On a bike, both front and rear brakes are required for maximum stopping power (stopping in the shortest distance).
Most modern bikes have dual handbrakes. Some bikes have a coaster brake on the rear and can have a handbrake for the front. Fixed gear bikes use the drive train to stop the rear wheel, but should also have a handbrake for the front.
If your bicycle has dual handbrakes, the best strategy at first is to use both more or less equally. Squeeze the levers gradually. If you are braking to a stop, remember to coordinate braking with the dismount off the front of the saddle described in the previous article.
With a coaster brake, pushing back on a pedal stops the rear wheel. The bicycle should also have a front handbrake for greater stopping power, and so you can keep the bike stopped when you place a foot on the forward pedal for a power-pedal start. Same with a fixed gear bike.
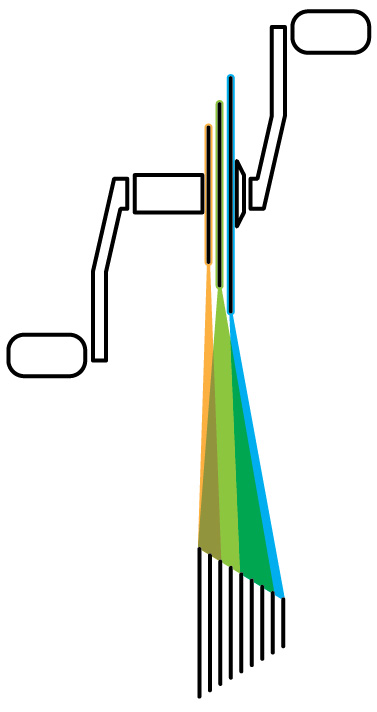
Front brake has most of your stopping power… and the power to dump you on your head.
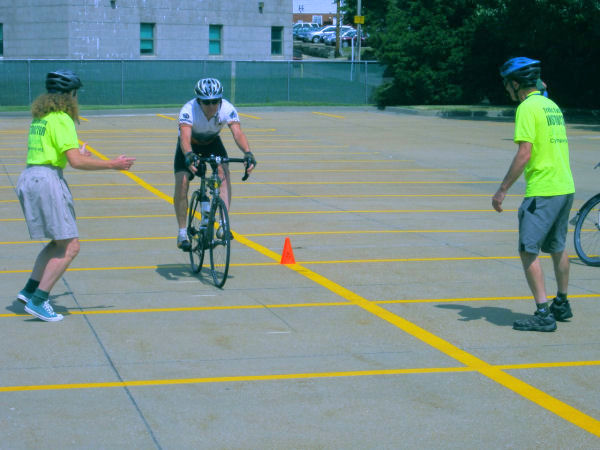
If you must brake suddenly, avoid pitching over the handlebars by sliding your weight back. We practice emergency stopping in “Train Your Bike,” CyclingSavvy’s bike handling skills session.
Braking body position from Bicycling Street Smarts CyclingSavvy Edition for Kindle
Front- and rear-wheel brakes may look the same, but they perform differently. Are you afraid of going over the handlebars if you brake too hard with the front brake? You’re not alone if you are. Lots of people avoid the front brake because it actually can send the rider over the bars. But it also has a lot more stopping power!
When you brake, weight shifts from the rear wheel to the front wheel. The rear brake alone has very little stopping power, limited to the rear wheel’s skidding. Using the front brake along with the rear allows the front wheel to contribute, as it is carrying additional weight.
But that’s where the danger lies. If all of your weight is off the rear wheel, it will lift. You and the bike can rotate over the front wheel. Yikes!
You can avoid this by shifting your weight back as you brake. If you start braking well ahead of time and gradually, this should not be necessary. But in an emergency, you may have to brake hard and fast. If you can train yourself to thrust your weight back behind the saddle (like the illustration above), you will stop in a shorter distance without flipping over the bars. Even with gradual braking, you’ll need to shift your weight back when you are going downhill (mountain bikers know this).
A future discussion of bicycling skills will go into more detail about developing braking technique.
Bicycling Skills: Cornering
To turn a bike, you turn the handlebars and the bike follows, right? Well, not really. That’s how you turn a car.
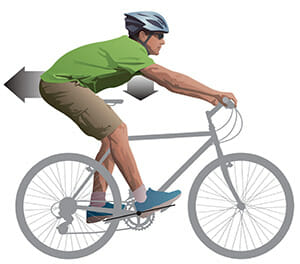
Practicing cornering during “Train Your Bike,’ CyclingSavvy’s bike handling skills session.
When you steer a bicycle to one side, it actually leans to the other side. You probably don’t notice this on low speed turns, because you subconsciously adjust the steering to maintain balance. Actually, you are just steering so the bike follows the turn that the lean already started.
Why does this matter?
At low speeds it doesn’t, much. Most cyclists ride for years without being aware of it. I did. But what happens when you’re cruising downhill and there’s a curve? Sure, you could slow down, and certainly you need to know your limits.
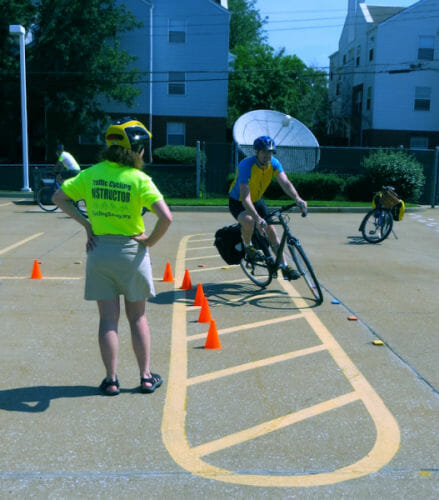
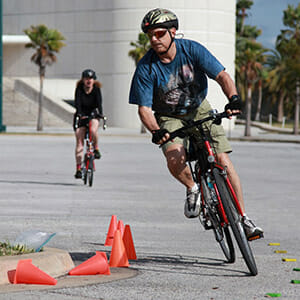
Inside pedal up. Look into the turn.
At higher speeds, starting the lean is harder. You can get the bike to help you by intentionally countersteering slightly to start. Briefly steering away from the turn will cause the bike to lean into the turn. So to initiate a right turn, push the handlebars very slightly and briefly left. Once the bike leans, just go with it. Turn your head and look into the turn; the bike will follow. It’s best to stop pedaling when making a sharp turn. When the bike is leaning, the inside pedal can hit the pavement at the bottom of the stroke. So once you initiate the lean, push the outside pedal down and keep it there.
It’s very important to look in the direction you are turning, because your body will naturally go where you’re looking. This will help you keep your turns tighter.
Beyond basic braking and turning
In case you want to go into more detail, this page from noted bicycle mechanic Sheldon Brown describes special circumstances in which to use one or the other brake, and different ways of leaning in a turn.
This article will focus on the benefits (advantages) and challenges (disadvantages) of e-bike use. The fifth article will focus on misconceptions, etiquette, and mixed-group riding (conventional bikes and e-bikes).
E-bikes are seen more and more often (courtesy Clint Sandusky & Haley Earnest)
This good news exposes the need for traffic education and training for everyone—old to young, skilled to unskilled, and experienced to novice—driving these faster, heavier, and at times less nimble e-bikes.
E-Bike Benefits
The bicycle industry and community are good at promoting the benefits and advantages of e-bikes:
Dependable option for people limited by fitness, age, or disability
Great Equalizer, allowing the entire family, friends, or ride partners to ride together
Eco-friendly and reduce traffic congestion
Promote health and fitness
Provide for socially-distanced commuting
Require no driver’s license, vehicle registration, or insurance (may vary state to state)
Make parking EASY; no fees involved
E-bikes also REMOVE the “Too Barriers.” These are common excuses not to ride a bicycle. They include:
Too far
Too long
Too hard
Too hilly
Too sweaty or fatigued
Too hot or windy
Additionally, some e-bikes can carry bulky cargo and children, as pictured here.
Cargo e-bike carrying a child (courtesy Bike Friday)
Bike-Handling Challenges
To be fair, we must also discuss the challenges to using an e-bike. E-bikes are faster, heavier, and at times less nimble than their “conventional” counterparts. Some skills can be more awkward and/or challenging, for example:
Mounts and Dismounts:
These are an issue for unskilled, inexperienced, and/or older persons—including with balance issues.
For beginners or less skilled riders, it is extremely important to keep the power to the motor (drive unit) OFF when mounting or dismounting an e-bike. This is different from stopping and starting during a ride, normally done in a lower support/assist/power mode.
Turning off the motor eliminates “lurching,” which can occur with either a throttle-assisted or pedal-assist-only e-bike. Unexpected lurching could cause you to lose your balance, fall off, and injure yourself.
It is also important to “lock your bike down” when mounting or dismounting! Apply the left brake lever (front brake) before you mount or dismount, to prevent the bike from rolling out from under you. It is usually best to mount or dismount a bicycle from the left (non-drivetrain) side.
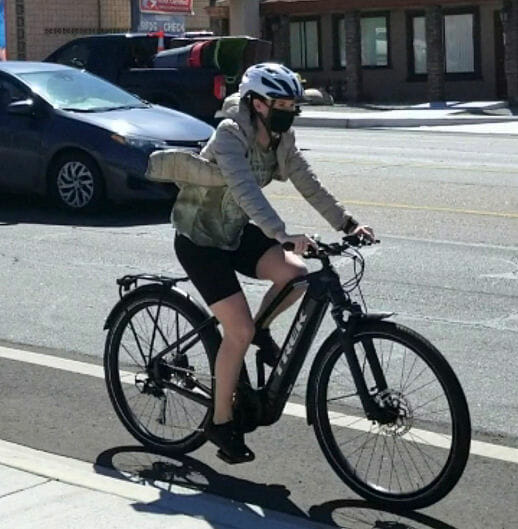
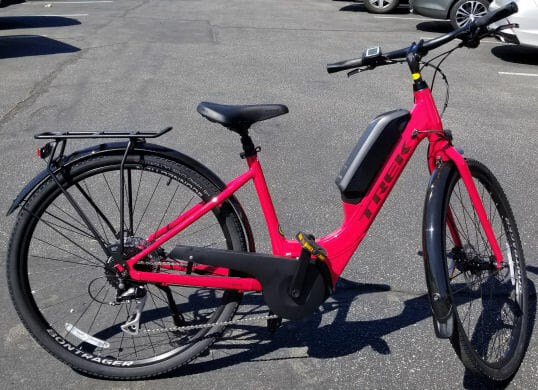
A “low-step” framed e-bike is easier to mount and dismount, and may be an excellent choice for less skilled and/or older riders.
Trek Verge+ 2 Lowstep e-bike with BOSCH mid-drive motor (courtesy Clint Sandusky)
More Bike-Handling Issues
Starting and stopping: Once again, “lurching” and/or “motor overrun” can occur, so be careful not to apply too much pressure to the pedals. “Motor overrun” occurs after pedaling hard and then stopping pedaling, as the motor may turn a few more revolutions. This will momentarily keep power to the e-bike’s drivetrain.
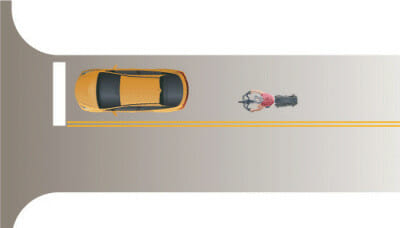
Normal distance behind a car on a conventional bike
As mentioned in the Part Two article, CSI Brian Cox, a fellow e-bike enthusiast and bike shop owner in Southern California, had excellent advice.“Leave a car length between you and the motorist in front of you,” Brian wrote. “You now have the speed to beat motorists off the line and you are responsible to not hit the motorist in front of you.“With a people-powered bicycle, you did not have the acceleration capability you now have with a motorized bicycle.”
Normal distance behind a car on an e-bike
Slow-speed maneuvering: once again, “lurching” can occur.
“Lofting” the front tire up/over various obstacles
Carrying an e-bike up a (long) flight of stairs: better to go find an ADA ramp or elevator, then dismount your e-bike first.
Manipulating the different support/assist/power modes: whether with a pedal-assist or throttle-assist e-bike, this can be distracting at first.
Technology CAN fail: always have a “plan B” to get back home.
Interaction with other Road Users on an E-Bike
The higher speed and different operation of e-bikes pose additional challenges.
Motorists may NOT recognize that you are riding a faster e-bike. This is more likely if you are in a more upright riding position and/or in street clothes. Therefore, you MUST even more so understand the traffic environment. Be aware of sight lines, door zones, hazards and conflicts associated with higher-speed riding, and blind spots. Anticipate common motorist-caused mistakes — especially, underestimating an e-cyclist’s speed.
People look to pedaling as a signal. On a throttle-assisted e-bike, people may assume you are slowing or stopping if only the motor is applying power to the e-bike. You can always offset this by pedaling instead.
Lane control and driver behavior will help reduce and/or eliminate conflicts and/or collisions!
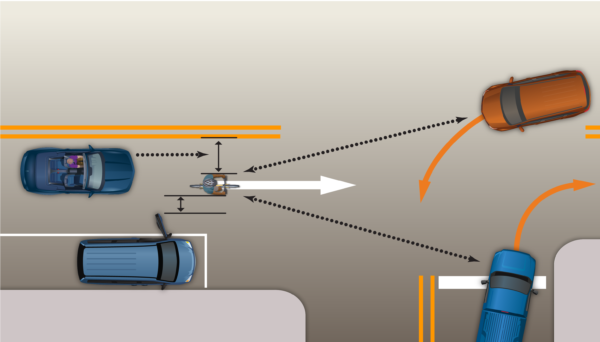
When you choose a high-vantage position, you can see potential conflicts and other drivers can see you. This position helps you avoid the side-swipe, right-hook, drive-out, left-cross – and prevents you from getting doored. For more, check out our FREE Essentials Course.
To Sum Up
Technology can be wonderful in bringing more people to bicycling. Using an e-bike is certainly FUN and COOL! However, if you are going to use an e-bike — for your safety and safety of others — you NEED to take important steps to learn how to interact with all users on-road and off to drive safely, legally, savvy, responsibly, cooperatively, and with confidence. Taking a CyclingSavvy course, online and/or in-person, will help with all of this!
Trek Bicycle Corporation has some good initial advice on “How to ride an electric bike safely” in text and video: “Start slow, brake sooner, brake lightly and evenly, ride with extra caution, and follow the rules on the road.”
Clint Sandusky is a CyclingSavvy Instructor Candidate. He is a retired law enforcement officer after a 24-year career including both the Los Angeles County Sheriff’s and Riverside Community College District Police Departments. While at RCCDPD, he was a bike officer for 23 years.
He is a 26-year active and certified California Bike Patrol Instructor and currently instructs Bike Patrol Courses for the Riverside County Sheriff’s Department. He has been an IPMBA (International Police Mountain Bike Association) member since 1994 and is a former IPMBA instructor. Clint owns two e-bikes and runs errands, commutes, races, teaches, and patrols (at his church) on them. At the 2018 and 2019 IPMBA conferences, he presented/co-presented e-bike workshops to instructors and general attendees.
He has also presented e-bike seminars and presentations for local bicycle clubs, CABDA (Chicago Area Bicycle Dealers’ Association) Expos, and the Florida Bicycle Association. He has authored several e-bike-related articles for BRAIN (Bicycle Retailer and Industry News), CyclingSavvy, and IPMBA.
https://cyclingsavvy.org/wp-content/uploads/2021/03/Haul-a-day-child.jpg429649Clint Sanduskyhttps://cyclingsavvy.org/wp-content/uploads/2021/06/CS-logo_xlong-header.pngClint Sandusky2021-04-14 11:00:012023-02-27 13:28:22Ebike Benefits and Challenges – It’s a Different Machine!
As the weather warms, thoughts turn to bicycling. CyclingSavvy spring courses are happening. Classroom sessions are being held online — which has proved to be, all in all, an advantage: people don’t have to travel, and can join from anywhere. Instructors and students can hang around longer at the end of a session.
On-bike sessions with Covid precautions are ramping up too. Here’s what we have as of now.
Savvy Cycling Now April Series
Instructors John Allen and Pamela Murray are hosting a Savvy Cycling Now online series on two Wednesday evenings, April 21 and 28. This will cover the same material as the “Truth & Techniques of Traffic Cycling” classroom session of our regular 3-part course, and qualifies students to proceed to the Train Your Bike in-person session anywhere, anytime and with any instructor. Students in this round will qualify for the Boston course described below, if space is available; we’ll arrange more sessions as needed. On-bike sessions will be discounted if you take Savvy Cycling Now to qualify for them.
Here’s a video clip from an August 11 2020 session of Savvy Cycling Now:
“Truth & Techniques of Traffic Cycling” contains a lot of information and ideas. They are easy to digest in a series of one-hour sessions, spread over four weeks. This format has proven itself.
St. Louis, April 21-25
Instructors Karen Karabell and Matthew Brown are running a full three-part course April 21-25. The classroom session is online and the on-bike sessions will be adapted with Covid precautions.
Boston area, May 14-15
Instructors John Allen, Bruce Lierman and John Brooking are runninga full three-part course May 14-15. As with the St. Louis course, the classroom session will be online. The in-person sessions will be in Waltham, 10 miles west of the Boston downtown area. Both on-bike sessions will be on the same day, May 15.
Ride Awesome! — CyclingSavvy’s premium online course — is … awesome. There’s truly nothing like it. During the pandemic, lifetime access to Ride Awesome! is half price. This is the best fifty bucks you’ll ever spend.
This too qualifies students to proceed to discounted on-bike sessions anywhere, anytime and with any instructor. With enough requests, we should be able to have on-bike sessions within driving distance for most U.S. participants. Let us know if you want to complete the course. Contact us
https://cyclingsavvy.org/wp-content/uploads/2019/05/Tour-Woodford.jpg540720John Allenhttps://cyclingsavvy.org/wp-content/uploads/2021/06/CS-logo_xlong-header.pngJohn Allen2021-03-28 21:49:442021-04-09 17:40:36Springing Forward with Spring Courses
Today we’ll look back at a man who changed the face of bicycle racing — and suffered unspeakable prejudice, innumerable indignities, and even death threats while doing so.
Meet Marshall Walter “Major” Taylor
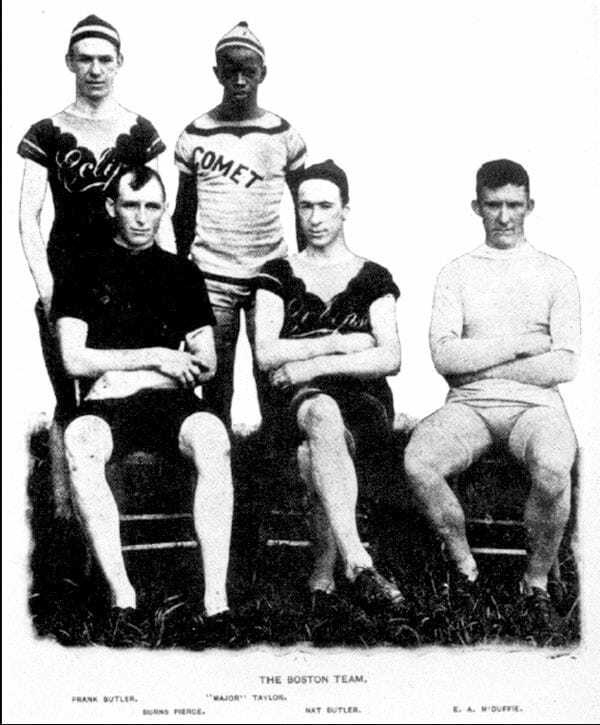
Boston Pursuit Team in 1897. This is one of the first known photographs of an integrated American sports team.
For a couple of decades around 1900, bicycle track racing was the most popular spectator sport in the United States and throughout the industrialized world. Its greatest hero was Marshall Walter “Major” Taylor, who became a professional racer in 1896 and was soon dubbed by newspapers the “most formidable racer in America.”
Major Taylor established seven world cycling records in 1898 and 1899. He toured throughout Europe and Australia, and was mobbed everywhere he went. He refused to compete on Sundays due to his religious beliefs. Even so, he consistently beat top champions on their home ground. In his 1902 European tour, Major Taylor won 40 of the 57 races he entered in Germany, England and France. His estimated net worth peaked at $100,000, or about $2.6 million in current dollars.
The World’s First Athletic Superstar
In renown and earnings, Major Taylor was the world’s first international athletic superstar. Yet as a Black man, he experienced deplorable treatment in the United States, his home country. Other racers would box him in or attempt, sometimes with success, to force him off the track or to crash.
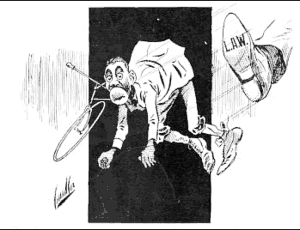
Caricature of Major Taylor in February 1894, illustrating the ban of Black people from the League of American Wheelmen.
At the conclusion of the Massachusetts Open in 1897, fellow racer William Becker tackled Taylor on the racetrack and choked him into unconsciousness.
Becker did this because he claimed Taylor had crowded him during the race. Becker received a $50 punishment for his actions and was allowed to continue racing.
Major Taylor could not race safely in the American South. While racing in Savannah in 1898, he received a written threat saying, “Clear out if you value your life.”
“Hail the Conquering Hero — A Strange Contrast”
Major Taylor’s 450-page autobiography is easy to read, and remarkably free of bitterness as he regales the reader with his life story. Upon arriving in San Francisco by ship from Australia in 1904, he matter-of-factly describes “a new epidemic of Colorphobia which made me completely revamp my plans and leave California at the earliest moment.”
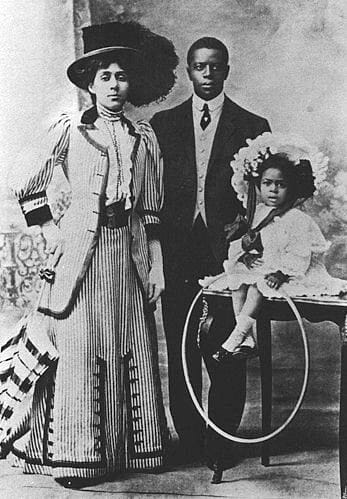
Major Taylor, wife Daisy and daughter Sydney, ca. 1907
On that trip he was with his wife and infant daughter and accompanied by the reigning Australian racing champion. “Don Walker was completely nonplussed as he observed the treatment accorded to Mrs. Taylor and myself and our infant baby.”
Walker said to Taylor: “So this is America about which you have been boasting in Australia. From what I have seen of it in the past few days, I cannot understand why you were in such a hurry to get back home here.”
Boundless Optimism
For his part, Major Taylor appears to have done his best to avoid animosity. He did not want hatred to become a cancer on his own soul. Instead, he kept hammering away at the promise of America.
“Judging by the manner in which colored athletes have repeatedly demonstrated their skill and prowess in the athletic world, it is quite obvious what might well be accomplished on a whole as a race in other pursuits of life if granted a square deal and a fair field,” Taylor wrote.
“We ask no special favor or advantage over other groups in the great game of life; we only ask for an even break.”
A Vanished Era
Track bicycle racing’s popularity declined, and the champions of its glory days faded in memory. Prejudice blocked Taylor from a second career as an engineer. He became impoverished, due to ill-advised financial investments and the 1929 stock market crash. In March, 1932, he died in Chicago at age 53.
“World’s champion bicycle racer who came up the hard way without hatred in his heart, an honest, courageous and God-fearing, clean-living gentlemanly athlete. A credit to his race who always gave out his best. Gone but not forgotten.”
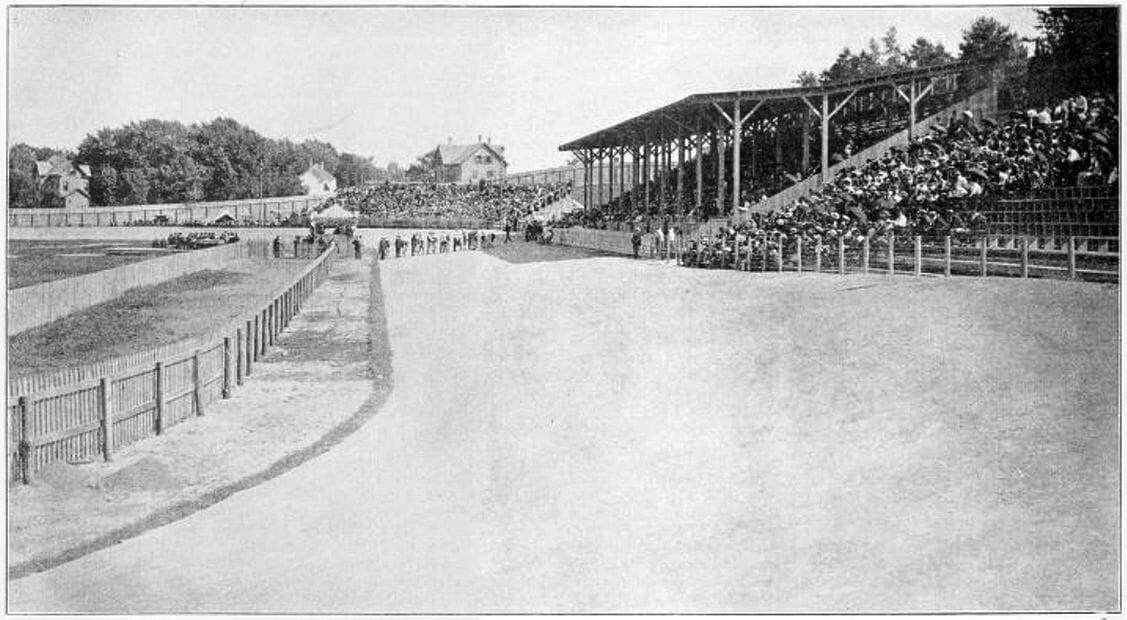
Bicycle Park, Waltham, Massachusetts, around 1900
“What we do echoes through generations.” — Barack Obama
I am reminded of Major Taylor every time I ride my bicycle past Nipper Maher Park, the Little League baseball field a few blocks from my home in Waltham, Massachusetts. In Taylor’s time, it was Bicycle Park, a racetrack with a grandstand that seated thousands. Some of the foundation pillars still stand among the trees on the hillside behind the ball field.
Taylor’s story does not reach to the present time as one of loss. History has been far kinder to Major Taylor than were many of his fellow racers over a century ago.
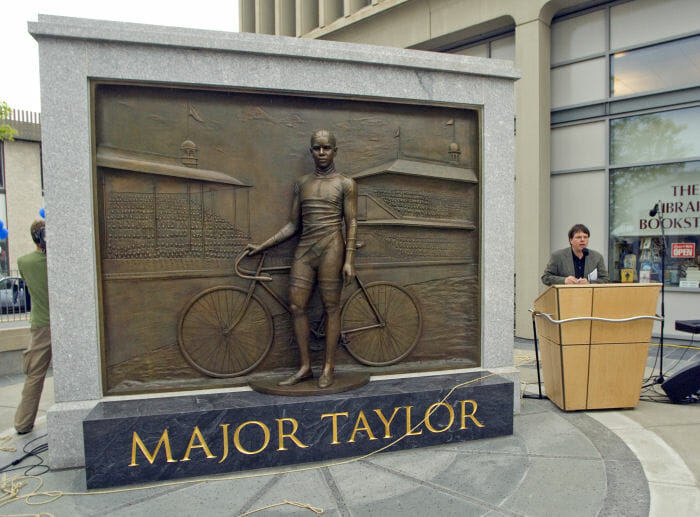
Sculptor Antonio Tobias Mendez and his Major Taylor statue. (Betty Jenewin photo for the Major Taylor Association )
A revival of interest in bicycling has thankfully revived interest in him. Bicycle historians continue to uncover more fascinating details about his life. An imposing monument to Major Taylor stands now in Worcester, Massachusetts, where the “Worcester Whirlwind” made his home. And in his birth city of Indianapolis, the Velodrome is named in Taylor’s honor.
Want to know more about Major Taylor?
Go to the Major Taylor Association for more of Taylor’s remarkable, glorious and tragic story than I can tell in these few paragraphs.
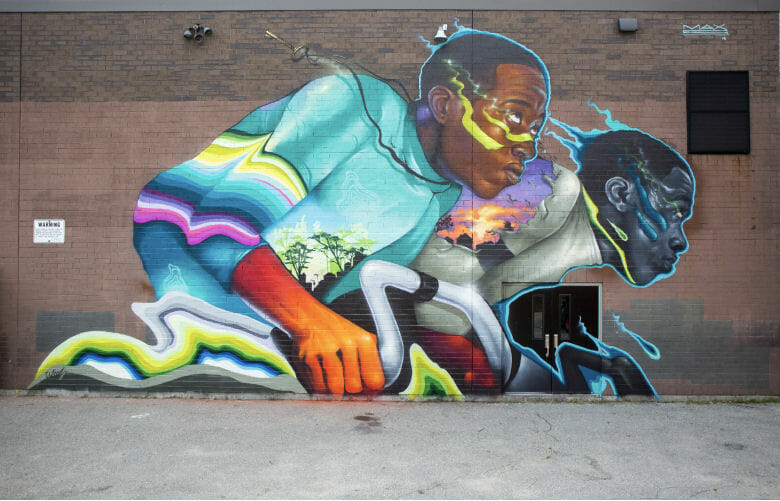
Max Sansing created this mural in Major Taylor’s adopted hometown of Worcester, MA. The “Worcester Whirlwind” is well known here, with the city’s major arterial road named in his honor.
https://cyclingsavvy.org/wp-content/uploads/2021/02/MT-monument-featured.jpg406700John Allenhttps://cyclingsavvy.org/wp-content/uploads/2021/06/CS-logo_xlong-header.pngJohn Allen2021-02-19 09:55:542021-02-21 15:46:06The World’s First Athletic Superstar