The Top Three Essential Bike-Handling Skills

This post continues our series on A Beginner’s Guide to Bike Safety. Today we cover three essential bike handling skills that will keep you safe, and enhance your enjoyment of riding.
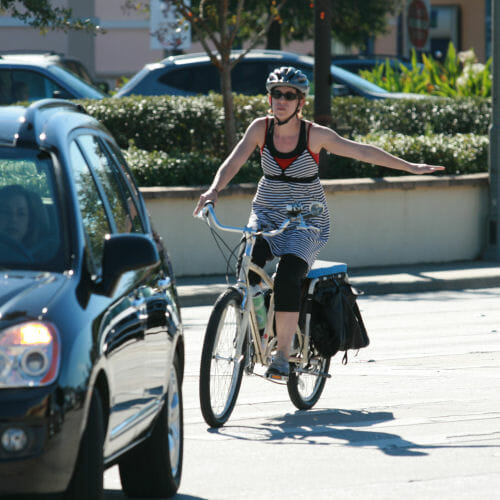
Nasic bicycling skills: hand signaling

Wherever you ride, certain bike handling skills are essential.

These bike handling skills are essential whether you are riding on a multi-use path with other bicyclists, or on a road with cars. After you know how to balance and steer, these top three bike handling skills will serve you well.

Essential Bike Handling Skill #1: Starting and Stopping

It sounds simple, but do you know the best way to start and stop on your bike? Many people don’t.

If you’re only starting out from in front of your house and rolling through stop signs in your neighborhood, not knowing the best way to start and stop might not be a problem. But what about when you get out on a trail and interact with others, or when you get to a stop sign and actually must stop for a motorist who got there first?

If you’re on the road at a red light, knowing the best way to start lets you move out faster when the light turns green. Confidence in your stopping and starting is an essential first step.

The commonly recommended start is the “power pedal” start, which CyclingSavvy Instructor and author John Allen describes in this post. Besides being the most stable way to start, it’s the only method I know of that works on an uphill grade.
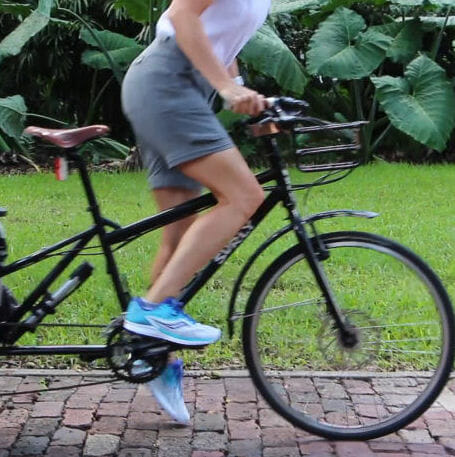
Power pedal start

Power pedal starting technique: Standing in front of the saddle, push down and release the brakes as you start pedaling and shift your butt onto your seat.

Best Way to Start

Stand over your bike. On most bikes, if you can sit on the saddle while standing over your bike, the saddle is too low. If you create or have a free Savvy Cyclist membership, look for the excellent one-minute video on starting and stopping, which includes a visual demonstration of proper saddle height.

You must create an account at CyclingSavvy — at the “Free” level or higher —  to watch this video, and all the useful videos in the free Essentials Short Course.

While you are standing over your bike, use the top of your foot to move one pedal to a “two-o’clock” position — but no higher than your bike’s down tube. This is the “Power Pedal” position.

With one foot in the “Power Pedal” position, your hands will be lightly holding your brakes. When you’re ready to start, you’ll perform three maneuvers at the same time. As you release the brakes, you’ll use your foot to start your “Power Pedal,” and you’ll lift your butt gently onto the saddle.
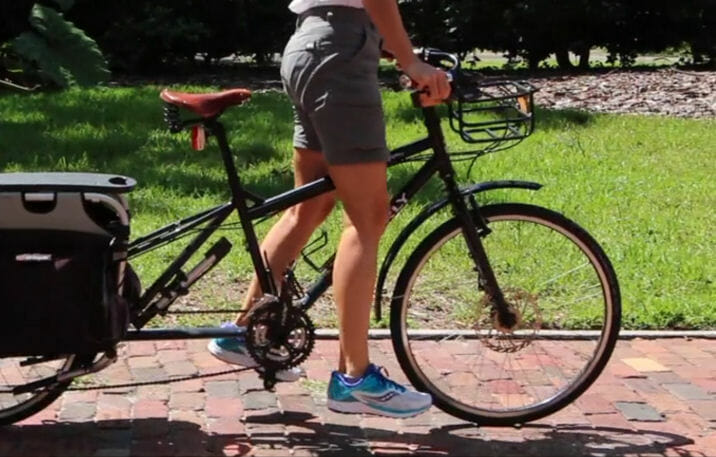
Putting a foot down for a landing

When stopping: With one foot in the “six-o’clock” position, put the other foot down to land.

Best Way to Stop

Take one foot off the pedal, put the other pedal down to the lowest “6 -clock” position, brake gently, and slide forward off the saddle, landing on the foot you took off the pedal.

Once you’re logged in to CyclingSavvy (with your free Savvy Cyclist or any membership), watch the one-minute video titled “Starting and Stopping.” This visual demonstration will speak a thousand words.

For a deep dive on this subject, see this article on Sheldon Brown’s website.

Essential Bike Handling Skill #2: Riding in a Straight Line

Do you wobble? You can practice holding a straight line in a lined parking lot, following a parking line. You’ll find it’s actually easier the faster you go.

Why is this important? Riding in a straight line is more predictable. Wobbling around makes it harder for you to control your bike. It also makes others on the road or path with you nervous, because they don’t know what you’re going to do.

Once you are okay with straight-line riding, practice riding with one hand, using the other to make a hand signal, maybe ring your bell or pick up and put back your water bottle, if you have those things.
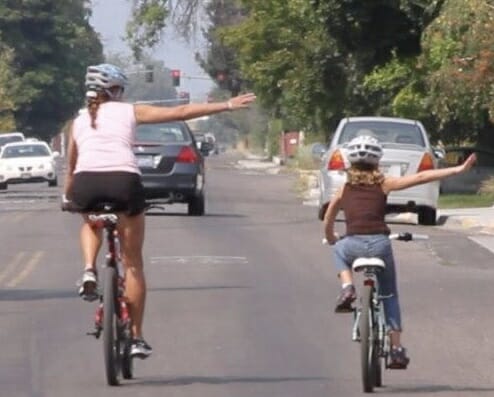
Stability and straight line riding when hand signaling is an essential skill.

Essential Bike Handling Skill #3: Turning Your Head

This is key to your safety and confidence, because obviously you must be able to see what’s going on behind you before you change your line of travel. Even with a mirror, a head turn is essential, for a couple of reasons.

Mirrors have blind spots. Also, looking over your shoulder serves as communication. A shoulder check allows you to confirm that you have the attention of drivers (or path users) behind you. You let them know that you are aware of them, and alert them that you may be about to do something different.
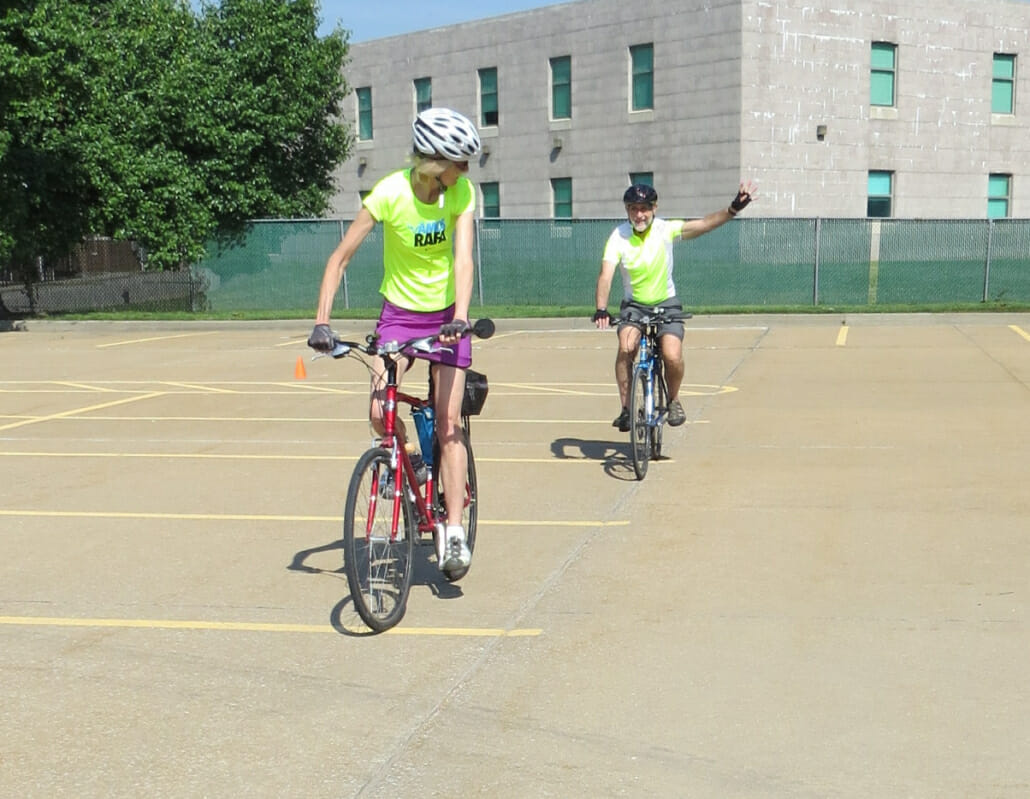
Practice “shoulder check” in a parking lot with a spouse or friend. Ride one in front of the other. The person behind can hold up fingers while the person in front looks over his/her/their shoulder, and shouts out how many fingers are held up.

Whether on a road or on a path, look back. Don’t rely on a mirror.

Turning your head without swerving can be hard to do. Maybe that’s a reason many cyclists don’t do it. Practice makes perfect!

Different people look back in different ways. It also depends on the geometry of the bike. Like most physical actions, looking back is hard to describe, and it mostly just takes practice. Here are some ways you can practice, to see what works best for you:

  • Keep both hands on the handlebar, and attend to keeping your arms straight.
  • Mentally counteract the temptation to swerve left by imagining steering slightly to the right, without actually doing it.
  • Whichever shoulder you are looking over, take your hand off that handlebar and place it on your thigh. (If you are looking over your left shoulder, you’d take your left hand off the handlebar.)
  • Instead of simply rotating your head left, lean it a bit forward and down while looking back. This works especially well with road bike geometry, when you’re already leaning forward. Some road cyclists riding in an extreme aerodynamic position even look under their armpits!
  • However you do it, you’ll be more stable and perhaps able to concentrate better if you stop pedaling momentarily.
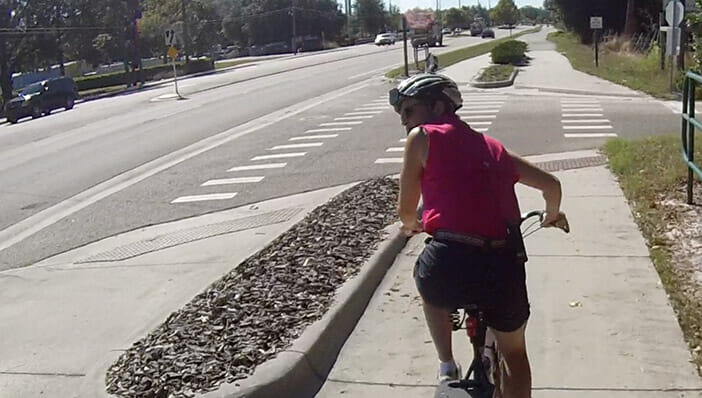
scan back on sidepath

Shoulder check is an essential skill.

As with other straight-line riding, you can practice this in a parking lot, riding along the lines. In class, we make it fun by having pairs of students ride one behind the other. The one in back holds up a certain number of fingers, and the one in front has to look back and tell the other how many fingers. Try it with a friend!

You’ll usually be looking behind to the left, but you may sometimes also need to look to the right, so practice that, too.

And onward…

Next: we’ll move on to a couple of skills which build on the basics: braking and cornering.

My All-Weather Cycling System

[Editor’s note: Pam Murray, author of this article, is too humble to mention that she rode more than  6,600 miles in 2020. She couldn’t have done that if she weren’t comfortable year-round!]

I love riding my bike year-round.

Through the years, I’ve had to figure out how to dress for all-weather cycling. I ride daily, so first I had to conquer the cold, then the wind, then the heat, then the wet. It’s been a process with lots of trial and error, and observation.
It doesn’t get as cold in the North Carolina Piedmont as in those “M” states (Maine, MichiganMassachusetts…) But we do have winters here.

No sweat.

A few years ago I bought a lot of jackets and stuff. I thought if I just piled on the clothes, I’d stay warm. Well, I got hot! I sweat when cycling, in the summer and the winter.

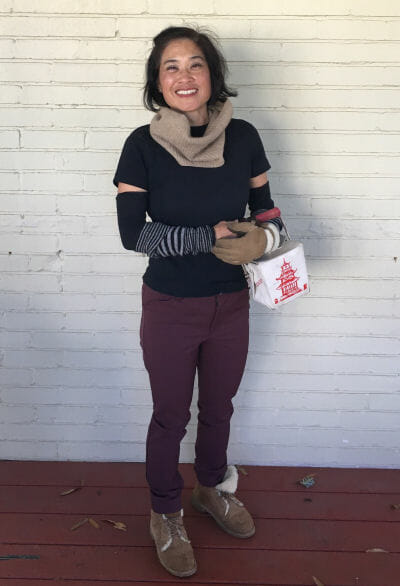
50-ish weather — T shirt (!), two pairs arm warmers, possum wool neck gaiter, trousers, sheepskin boots.

I like to be warm and dry, which is tricky. It’s easy to get too hot and sweat, or wear too little and be frigid. The sweet spot happens if I let myself be a bit cold when I first start riding, then warm up enough to just below sweating. Then it’s all good.

It takes about a mile to generate some heat. I’ve found that the choice is to either remove something once I warm up, or be cold for the first 10 minutes of my ride.

My unusual winter wardrobe.

I have an approach to all-weather cycling that may be a bit unusual. But it’s practical, combining everyday clothing items with a few special bicycling-specific ones.

My core stays pretty warm, but I do need a wind-block on the front. I like to keep my back cool so I don’t sweat, so I wear a variety of scarves.  The one that people ask about is my down-filled scarf.  A friend tied it so it’s like an infinity scarf. It stays on, and it’s easy to put on and take off.

I have another item that is part synthetic, an Enlightened Equipment Minion that I bought to use as a camp pillow, but I wear it like a down scarf. So, other than the normal pants, shirts, socks, and shoes, I use only two pairs of cyclists’ arm warmers (shirtless sleeves), the down scarves, leg warmers and a possum wool neck gaiter from Rivendell.  The gaiter is the one thing I bought just for winter biking. It’s warm, light and multi-functional. I can wear it as a neck gaiter, as I do 99 percent of the time. When it’s really cold, I use another one to cover my ears.

My “jacket.” Some assembly required.

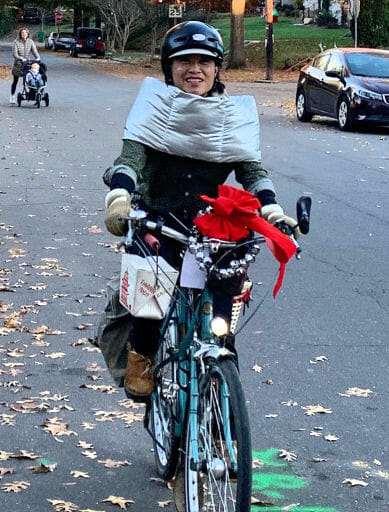
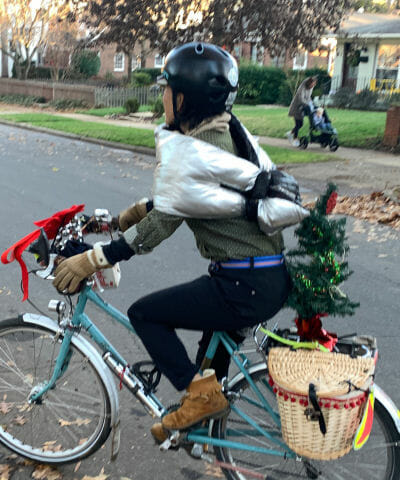
Dressed for success. What is that silvery thing?

Rule of thumb: A short-sleeved T shirt is good at mid-60’s and above, with arm warmers. When temperatures are in the low 60s, I need fingerless gloves, too. When it’s in the 50s, I wear a long-sleeved shirt, or short-sleeved with two pairs of arm warmers.

Wearing arm warmers provides an advantage. I can pull them down to my wrists as I warm up, without having to step off the bicycle or perform a worrisome no-hands-riding routine to strip off a piece of clothing.

Basically, instead of a jacket, I wear all the parts of a jacket without the back, so I don’t get sweaty and cold. If I have double layers of arm warmers, pulling one down usually dials in the perfect body temp so I don’t sweat.

If I go inside somewhere, I can easily take the arm warmers off and stow or carry them, since they’re not as big as a jacket.

Yes, these are a lot of pieces to keep up with, but I find this system worth wearing to stay warm and dry in all weather. I occasionally lose a few things, but I usually go back and find them.

When it gets below 40, I wear a jacket.

Add a layer for each 10-degree drop.

A thick layer counts as two layers. For example, I have a thick boiled-wool sweater that is as warm as a jacket, but needs a wind-block on the front.  A golf shirt or light windbreaker works well as the wind-block.

I also have a thick wool poncho I like because it has a kangaroo pocket so I can warm my hands when I get off the bike.

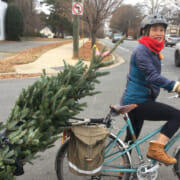
Christmas tree delivery: the silvery thing is a down-filled “infinity scarf” that ties up in the back so it stays in place.

Leg warmers.

Below 55 degrees, I need an additional layer on my legs. I have one thick and one thin pair of leg warmers. If it’s really cold, I wear both pairs, one over the other.

Leg warmers, like arm warmers, are easy to pull down if I get hot. I avoid wearing long johns. It’s a pain to take them off. If I leave them on, I sweat and get cold when I get back on my bike.

My expandable helmet.

I have a helmet with a spin dial that allows me to accommodate a thin hat underneath. I only do this when it’s really cold; otherwise it will cause me to sweat. A friend crocheted a pair of ear flaps for me that attach to the helmet liner and chin strap.

My extremities get cold, so I have fingerless gloves for temps in the 60s, leather gloves for the 50s. Glove liners offer more warmth.

In extreme cold weather, I wear overmitts. I have ski gloves, but those are useful only when temps are in the 40s or lower. I don’t like to layer them, and they’re too bulky.

Put the sweater over the jacket.

I want to be able easily to remove or pull down layers from the outside. This means wearing my sweater over my jacket. I know this sounds like it would look stupid, but it’s easier to remove the sweater than taking both off in the cold — and then getting cold.

The best way to deal with a day’s constantly-changing temps.

Ride a bike with carrying capacity. The temperature will rise during the day until the sun goes down, then get colder. Being able to stow gear easily makes it easy to adjust.

Bonus: When in doubt, it’s easy to carry something extra. If you sweat too much, you may need a dry shirt.  Carry an extra.

My all-weather cycling system:

Cold Up to 100 degrees F. 60-69F 50-59F 40-49F 30-39F 20-29F
Top Wicking top Short- sleeve T shirt T shirt amd arm warmers Short sleeve shirt, two pairs arm warmers Add Wool primaloft vest
Bottoms Wicking shorts Shorts Pants Pants, thin leg warmers on top of pants Leg warmers on top of pants Add down shorts
Shoes Vibram Five Fingers Vibram Five Fingers Uggs boots Uggs boots Add thick wool socks 2 pairs of socks
Hands May need gloves Fingerless gloves Shearling gloves Add overmitts Add overmitts
Arms Arm Warmers – add below 65
Outer Down scarf Down scarf Warm windproof jacket Warm windproof jacket
Head Wool hat w/ear flaps Down hat w/ear flaps
Neck May need neck gaiter Possum wool neck gaiter Possum wool neck gaiter Possum wool neck gaiter Possum wool neck gaiter
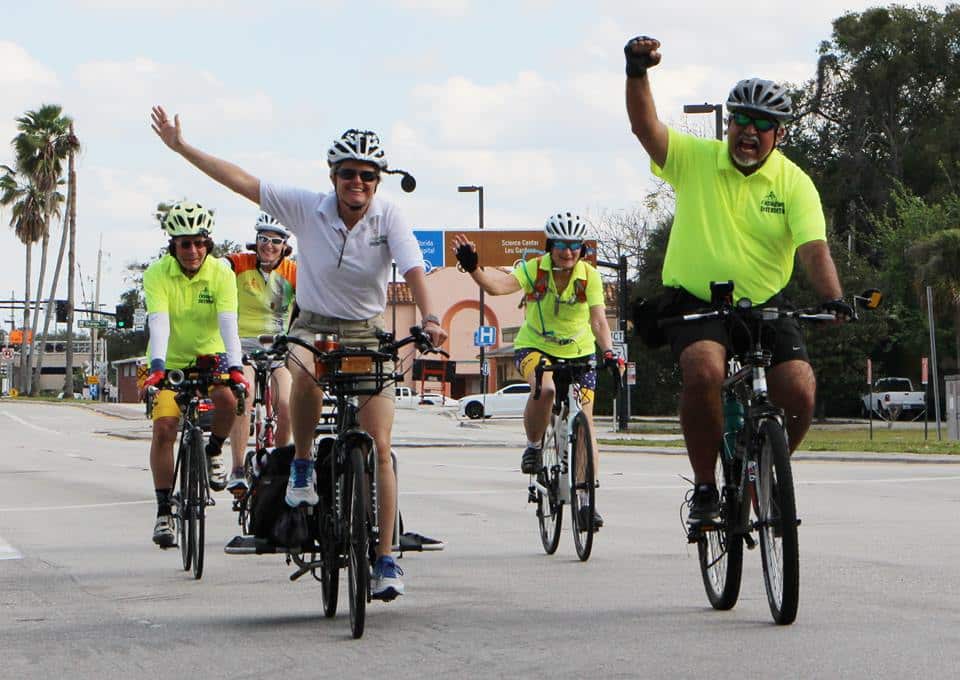
Happy cyclingSavvy group

Webinar Starts Today

In a few short hours

CyclingSavvy’s free one-hour Zoom webinar, Introduction to CyclingSavvy, starts today:

6 PM Pacific time
7 PM Mountain time
8 PM Central time
9 PM Eastern time

Because of demand, the American Bicycling Education Association has purchased lots more Zoom room.

California CyclingSavvy Instructor Gary Cziko will present. The Webinar will include live chat with three other instructors, and a Q&A session. If you can’t make it, ABEA will be posting a recording. We’ll announce where YouTube has placed it, once we know.

Bike club/organization members

Your club’s requested donation of $100 will give all club members free access to the Zoom Webinar for Bike Clubs and Group Rides, being held at the same time next Wednesday, December 16, 2020.

Club leaders, register here. Choose the Benefactor level. Include your organization’s name in the “Company” box. Note that your club is a Webinar Sponsor in the “Comments” box.

Donations will pay for work being developed exclusively for club and group cyclingHere’s a preview of the new online Group Ride Leader course currently in development:

Here are the sponsoring organizations as of December 8, 2020. Yours can still be on this list!

  • Bicycle Club of Irvine (CA)
  • Big Orange Cycling (CA)
  • Cincinnati Cycle Club (OH)
  • Coalition of Arizona Bicyclists (AZ)
  • GS Andiamo (CA)
  • Major Taylor Cycling Club Los Angeles (CA)
  • Riverside Bicycle Club (CA)
  • San Diego Bicycle Club (CA)
  • Velo Club La Grange (CA)
  • WeeklyRides.com (NC)

Two CyclingSavvy Webinars for the Holiday Season

People are cycling more than ever.

Gyms and pools are closed; countless people are staying and working at home. Many people are turning to cycling as a way to keep physically active, and to avoid exposure to the coronavirus in trains and buses. Cyclists are increasingly using e-bikes to cover longer distances in less time and with less effort.

Gary on Lincoln BulevardTraffic-cycling education — to make cycling safer and more enjoyable — has never been more important. Regardless of your level of bicycling experience, you can benefit from one or both of this month’s CyclingSavvy Zoom Webinars.

Compelling Reasons To Attend

1. If you are a cyclist.

Even if you are just thinking of getting on a bike, register for the free one-hour “Introduction to CyclingSavvy” Webinar. It’s next Wednesday, December 9, at 6 PM Pacific / 7 PM Mountain / 8 PM Central / 9 PM Eastern Time. This Facebook event listing offers more details. Free required Zoom registration is here.

2. If you know others who cycle or are interested in cycling and care about maximizing their cycling safety and enjoyment.

Invite your family (friends, neighbors, (work associates . . . ) to this webinar by forwarding this article or its link to them. Start them on their way to being able to go anywhere by bike!

3. If you are a bike club/organization member.

Are you itching to get back to group rides again? Ask leaders to make your organization a CyclingSavvy webinar sponsor. Then you and all members of your club can attend the Zoom Webinar for Bike Clubs and Group Rides on Wednesday, December 16, 2020.

For bicycle club/organization leaders:

A requested donation of $100 will give all of your club members free access to the December 16 Zoom Webinar.

Choose the “Benefactor” level at CyclingSavvy.org/support-cyclingsavvy/. Include your organization’s name and state in the “Company” box and indicate “Webinar Sponsor” in the Comments box.

Donations will pay for work being developed exclusively for club and group cycling. Here’s a sneak preview of the new online Group Ride Leader course currently in development:

Donor organizations will receive recognition and the Zoom registration link to share with members. Contact Gary Cziko to discuss other possible club-sponsor options.

Who is running the CyclingSavvy Webinars?

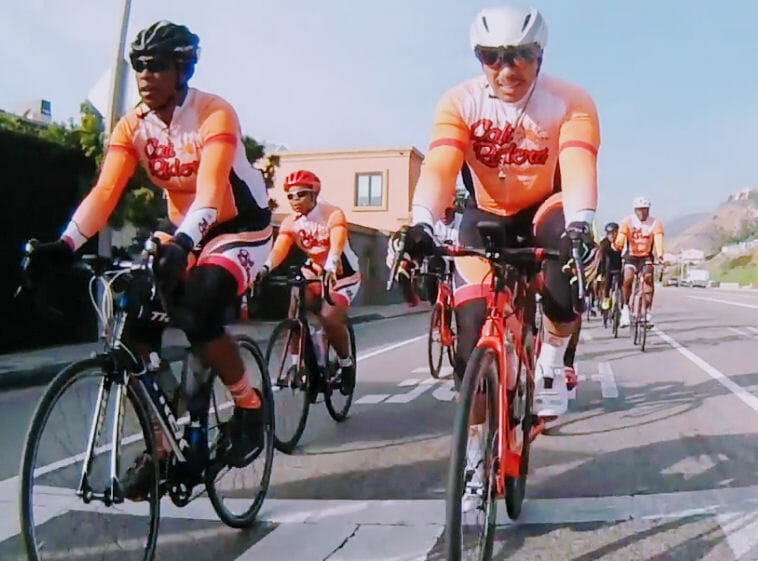
Cali Riderz on Pacific coast Highway, Los AngelesGary Cziko will host the two webinars from Los Angeles. Participating panelists from the East Coast will be CyclingSavvy Instructors Michael Burns and Nadine Ford.

Nadine, Michael and Gary are all board members of the American Bicycling Education Association. John S. Allen, chair of ABEA’s Program Committee, and author of Bicycling Street Smarts and editor of The Savvy Cyclist is the fourth panelist.

For more information about the CyclingSavvy approach to make you a safer and more confident cyclist, visit CyclingSavvy.org. For a sample of what we will cover in the first Webinar, see this lesson from the free online Essentials Short Course.

Thank You

Here are the sponsoring organizations as of December 8, 2020. Yours belongs on this list!

  • Beach Cities Cycling Club (CA)
  • Bicycle Club of Irvine (CA)
  • Big Orange Cycling (CA)
  • Cincinnati Cycle Club (OH)
  • Coalition of Arizona Bicyclists (AZ)
  • GS Andiamo (CA)
  • Major Taylor Cycling Club Los Angeles (CA)
  • Riverside Bicycle Club (CA)
  • San Diego Bicycle Club (CA)
  • Velo Club La Grange (CA)
  • WeeklyRides.com (NC)
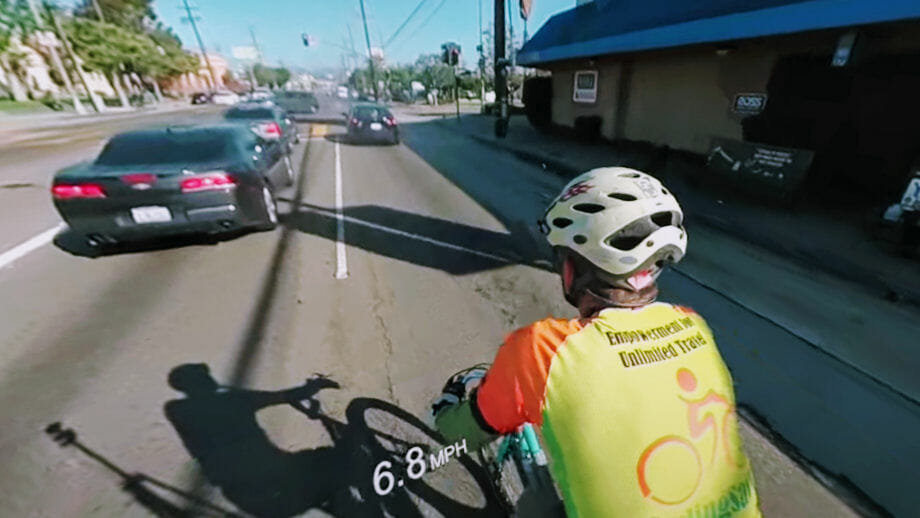
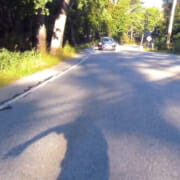
Safe passing -- you can see my hand signal in my shadow.

“Control and Release” for safe passing

Several weeks ago I posted an article with dashcam video about roads with double yellow lines. I was driving the car, and slowed to follow a bicyclist at a blind curve on a two-lane rural highway. A large dump truck with a trailer appeared, coming from the opposite direction.

If I had held my speed and passed the bicyclist, I could not have merged left far enough to pass the bicyclist safely.  Neither could the truck driver see me in time to make more room.

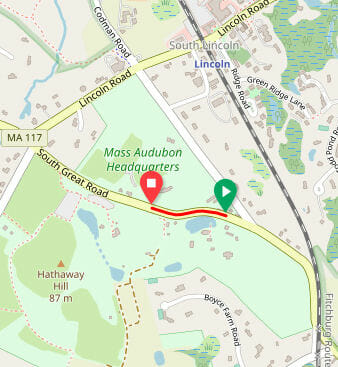
Safe passing-- the location on Route 117 in Lincoln, Massachusetts, USA

The location, in Lincoln, Massachusetts, USA

The bicyclist kept to the right as far as he could. He relied only on hope —  and my good judgment —  to avoid a close pass, or worse.

The video held a message for motorists: “What you don’t see can hurt you” — or hurt someone else (in this case, most likely the bicyclist).

Blind curves hold a message for bicyclists

To clarify this message, I later rode the same stretch on a bicycle with front and rear video cameras.

As this video shows, I mostly rode on the shoulder. Several cars and a pickup truck passed me —  no problem. No oncoming traffic prevented safe passing clearance.

But as I approached the blind curve, the shoulder narrowed to almost nothing. A big truck or other large vehicle could be approaching ahead. Who knew? Who could know? Neither I nor the driver of the car approaching from behind me could see around that curve.

Here’s what I did — what I always do — to protect myself:

I checked in my rearview mirror and took a look over my shoulder. If vehicles had been closer behind, I would have have used a hand signal to negotiate my way into line.

This car was far enough back that I simply merged to lane-control position. Then I made a hand signal: “Slow.”safe passing: the car's slowing confirmed that the driver had seen me and was acting safely.

The driver slowed to follow me for a few seconds. Once I had rounded the curve and could see far enough ahead, I released to the right and give a friendly wave. The driver accelerated and passed me.

How control and release promotes safe passing

What did my actions achieve?

  • They indicated that I was aware of the driver’s vehicle behind me.
  • They indicated that I knew it was unsafe to pass. Maybe I knew something the driver didn’t know!
  • In case the driver was impatient, they made it clear that passing would have to wait until we could both see far enough ahead.
  • The car’s slowing confirmed to me that the driver was aware of me and acting safely.
  • And by releasing as soon as it was safe, I demonstrated courtesy. No motorist wants to be “stuck” behind a cyclist.

As it turned out, there was no large truck, or not even a small car, approaching from the front.

But that isn’t the point. One could have been.

Might the driver behind me have passed, unable to see far enough ahead, if I had hugged the right edge of the road? I don’t know, and it doesn’t matter, because I took active control of my safety in a potentially dangerous situation.

When my safety is at stake, I choose not to rely on others to do the right thing. As we say in CyclingSavvy courses, drivers get smarter when we lead the dance.

Optional equipment for safety’s sake

Editor’s note: This is the fourth article in a series directed mostly toward beginners. The introductory article covered checking the bicycle for safety,  and each article links to the next. So far we’ve covered lights, rear-view mirrors, and bells. Lights are required by law at night. Mirrors, and in most places, bells, are optional equipment.

Optional Equipment: Policy and Good Sense

The American Bicycling Education Association requires that everyone wear a helmet in its on-bike sessions, but makes no policy statements about any legally-optional equipment. Such statements can do as much harm as good. Convenience (“just hop on the bike”) can be at odds with having to manage equipment and change in and out of special clothing. Expense may be a concern.

So: You decide what measures you will adopt to improve your comfort and safety, beyond what the law requires. Generally, longer rides merit more preparation, as comfort takes on more importance. The special clothing that recreational and racing cyclists wear isn’t just for show. But some options apply to any ride.

Bright & Tight

There’s no doubt that some colors show up better than others. Although bright-colored clothing is optional — and no substitute for lights at night — it can’t hurt. Retroreflective surfaces on your clothing or on accessories such as panniers are even more helpful to a driver whose headlights are shining on you.

Dorky, or super practical? You decide.

When I talk to kids about bike safety, I sometimes ask for a show of hands: “How many of you have ever gotten your shoelace caught in the chain?” There are always a few.

This is the meaning of “tight”: Make sure you don’t have any loose straps or clothing dangling, especially if your bicycle doesn’t have a chainguard. I like to take care of long shoelaces by tucking the extra length into the sides of my shoes.

You can roll up long pant legs, or secure them with rubber bands or straps, or tuck them into your socks. You must wear long socks to allow this. Some people think this is dorky, but it is super convenient, and only the socks ever get chain stains.

Many pedals lack retroreflectors. Reflectorized legbands not only substitute for these, but also are visible from the sides.

reflectorized legbands: optional equipment but can substitute for pedal reflectors

Reflectorized legbands: bright and tight.

Secure any hanging strings or straps from backpacks or panniers. Do not dangle baggage from the handlebar, where it risks getting caught in the spokes of the front wheel.

Those who wear dresses can tuck extra material under the saddle, or use this cool trick to make the skirt into faux pants with a penny and a rubber band. Some European-style bikes eliminate this issue with a full chainguard as well as a “skirt guard” over the rear wheel, but these are not common in North America.

Wear a helmet?

In the Five Layers bike safety model, a helmet is included in the last layer, “Injury Reduction.” Protective equipment helps only when all the previous safety layers have failed.

Your chances of needing a helmet are pretty low on any given trip, especially if you follow all the other safety advice. But the consequences can be dire if you hit your head without a helmet. Many cyclists have stories of crashes in which they feel their helmet saved their life. I have had less severe crashes, thankfully, but I have had a few solo falls in which my helmet tapped the ground. It happens.

In North America, most states require a helmet for children and younger teens, but it is optional for adults. Should you choose to wear a helmet, make sure that it’s certified by the U. S. Consumer Protection Safety Commission, CPSC. (If you want a deep dive into geekiness, here’s the CPSC’s technical document on the subject.) Replace your helmet every few years, when it has begun to deteriorate, and of course whenever it’s involved in a crash. There is little difference in effectiveness between the better inexpensive helmets and a $200 helmet with all the latest features — though weight, ventilation and appearance vary. For comparisons, check out the Bicycle Helmet Safety Institute’s reviews.

Helmet fit and adjustment

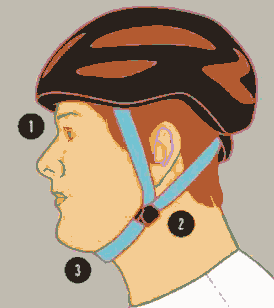
A helmet needs to be snug on your head. It must be level on your forehead, not pushed back. The strap must be snug under your chin. The ear straps should come together just under your earlobes.

Two easy ways to remember helmet fit are the “two finger test”, and the “eyes, ears, and mouth” test.

  1. Eyes: Your helmet should come down on your forehead about two fingers’ width above your eyebrows.
  2. Ears: Each ear strap should come together just under and slightly in front of your ear, as if you were making a letter V with your fingers under it.
  3. Mouth: The strap should be just tight enough to fit a finger (or two side-by- side) between the strap and your chin. When you open your mouth, you should feel the strap tighten.

A helmet may have a visor — helpful when the sun is low, and at night. Even without one, your helmet can help block glare if you tilt your head down. And as described in a previous article, a helmet is a convenient place to hang a rear-view mirror.

Footwear: So many options

Open-toed shoes can really mess up your toes in a crash. Insecure footwear like flip-flops can also impair your control of the bike, if they slip around or fall off while you’re riding.

Different shoes work best with different kinds of pedals:

  • Rubber soles are slippery when wet on pedals with smooth metal platforms, but fine on pedals with teeth that grip.
  • Leather and hard plastic soles slide around on anything other than rubber-block pedals.
  • Toeclips and straps work well with most athletic shoes, but can leave marks on the uppers — not good for your fancy shoes.
  • Clipless pedals need special shoes with cleats. Beginner cyclists do better to postpone foot retention. Learning how to safely use clipless pedals on roads and trails is a skill in itself.
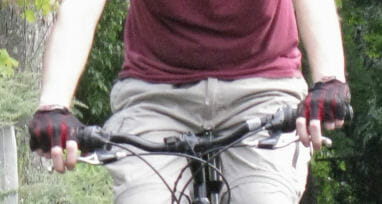
Bicycling gloves: optional equipment but they can prevent injury

Fingerless cycling gloves are a wise option in warm weather.

Gloves

Gloves increase comfort and avoid injury if you break a fall with your hand — and not only injury to the hand. You’ll be more willing to put your palm down if you know that the pavement will not sandpaper it.

Gloves are not only last-resort passive safety equipment, either.  At night, a glove with a reflectorized back makes a super blinking turn signal for drivers behind you. Just stick out your arm and turn your wrist back and forth. Many gloves and mittens have reflectorized patches; few fingerless bicycling gloves do, though you can add reflective tape yourself.

Next…

In the next post in this series, we move on from equipment to riding technique.

Cyclist safely passing large truck

The View from the Cab of a Turning Truck

I’ve written a lot about what bicyclists need to know about trucks. Why? Because every year, bicyclists are killed by turning trucks.

Truck drivers have a lot working against their seeing and avoiding a cyclist who rides into a bad spot. Yet trucks are big and easy for cyclists to see and avoid. Cyclists just need to know what to do to stay safe.

Getting out the word about turning trucks

Most of the lessons I’ve produced about turning trucks involve illustrations and animation. But last fall, I had a wonderful opportunity to stage real-world scenarios with a semitrailer truck, a professional driver, and a crew of support staff and extras. The following video is the product of a lot of other people’s work, and my very enjoyable morning in the cab of a truck.

Here’s the finished product, a four-minute video:

What about technology?

Many cycling advocates insist that the problem of truck blind spots can be solved with technology. I asked driver Bob Dolan: What kind of video camera technology is out there? Is it helpful? Does it make things harder or easier?

Here is his response:

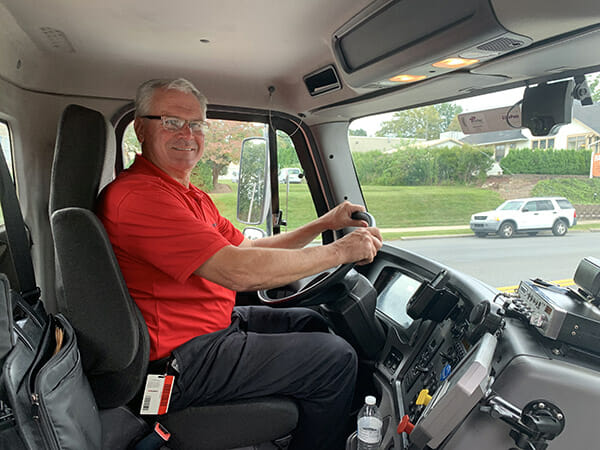
Bob Dolan in truck

We have side-mounted cameras on our tractors that will shoot out both sides and look at traffic on either side. Some trucks have rear-facing cameras. The issue you’re going to see with some of those cameras is you’re looking at a lot of information to process… you have all these screens in front of you and you’re trying to drive a truck… that becomes a distraction. So no matter what you’re adding to the vehicle, you’re adding more distractions to the driver.

A lot of the advanced warning devices on a tractor trailer — because of the size and complexity of the truck being able to bend — a lot of signals don’t come into us as real signals… it might be going off that there is something to one side, but it might be a false signal because of the height of the vehicle or the length of the vehicle.

So the technology is there, but it’s not as reliable as it would be in a car.

Here’s what you should take away from Bob’s comments:

Don’t ride in the blindspot and rely on truck driver vigilance and technology to rescue you. Instead, ride where YOU are in control of your safety.

It took a lot of people to make this happen.

We have another post about how we made the video. It’s quite a story.

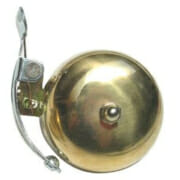
bicycle bell

Should you use a bicycle bell, or your voice?

Bringing up bicycle bells raises the large issue of messages that bicyclists need should send out, and attend to.

For one thing, the bicycle makes a variety of sounds, some normal, others indicating mechanical problems. Understanding these sounds extends your pre-ride safety check into your ride —  especially important then!

Sounds alert you to other road users, and you to them. As is true with so much about bicycling, you have choices.

Voice or bicycle bell?

Voice or bell: does it matter? This is largely a cultural issue.

According to information which we have, bicycle bell is required  by law in some US states: New York, South Carolina, Georgia, and New Jersey. Local jurisdictions also may require one. Besides being useful to alert pedestrians and other cyclists, a bell can just be fun, especially in a group. Definitely consider it, especially where required by law.

Most bicycle bells can do no more than warn people of your approach, and are only loud enough reliably to alert people in the open air, that is, other bicyclists and pedestrians. (Bicycle air horns are a separate topic. Many of these are as loud as car horns.)

Bells tend to be prevalent where bicycle use for transportation is common. There, most people understand the sound of the bell to mean, “I’m approaching, be predictable so I can pass.”

No bell? Almost anyone can signal with the voice, and it works without lifting a hand from a brake lever. On the other hand, the voice does not identify the speaker as riding a bicycle. It can also be misunderstood or carry an emotional burden (for example, if the person you’re intending to alert feels like you’re “yelling” at them).

Predictable/Unpredictable?

In the US, recreational cyclists commonly call out “passing on your left” or “behind you” rather than use a bell. Your safety is confirmed not through your message but through the response.

Your safety is confirmed not through the signal but through the response. Make your announcement early enough to allow the intended recipient(s) to react. Then check for the reaction, and go slowly and pass wide in case someone suddenly changes direction.

John Allen reports that he often calls out “heads up” to alert pedestrians headed toward him as they stare into their cell phones on university campus paths.

Civility in context

Have you seen the video circulating on YouTube that was recorded by a cyclist riding full-bore on the narrow promenade deck of the Brooklyn Bridge? He’s honking an ear-splitting air horn at anyone who might be in his way.

Can I talk about a sense of entitlement?

The deck, about 8 feet wide, has a painted stripe down the middle. Bicyclists are supposed to stay on one side, pedestrians on the other. That doesn’t work well in practice. (Don’t blame the City of New York for the narrow deck. The bridge opened in 1883, a century before design standards for shared-use paths were developed.)

On the Brooklyn Bridge promenade, or in similar conditions, a ding-ding bell and moderate speeds are more appropriate. Your cycling behavior should never frighten slower path users as you go past them.

Scaring people is rude, yet an imminent threat may bring on a loud yell or scream, unprompted. It can sometimes freeze a charging dog or wayward pedestrian.

Only a loud air horn and the like — or a loud shout — are likely (by no means certain) to be audible inside motor vehicles. Riding to be visible (we’ll get to that) and using lights (see previous section) are also effective to get the attention of motorists, before it becomes a problem.

Next Up

We began this series of beginner “need to know” articles with checking to make sure your bike is ready to ride, and have now concluded a 3-part series on safety equipment: lights, mirrors, and bells. The next article will discuss clothing options for safety.

Jerry campbell with mirror

What kinds of rear-view mirrors work for bicyclists?

This post about rear-view mirrors is third in a series about basic equipment and skills.

Should a bicyclist use a rear-view mirror? My answer is a qualified “yes”.

shannon martin with large mirror

CyclingSavvy Instructor Shannon Martin is wearing a large mirror, the EVT Safe Zone. She covered the non-mirror side with retroreflective smiley faces.

No law that I have been able to find requires a bicyclist to use a rear-view mirror in any North American state or province. And, unlike a motorist, a bicyclist has nothing blocking the view to the rear.

CyclingSavvy has no official position on legally optional equipment. Still, I personally feel that a rear-view mirror is a good option for a beginner, and convenient in certain situations for everyone. If you are unable to turn your head without swerving (more on this in an upcoming Beginner Skills article), you definitely need some way to see behind yourself. Hearing a vehicle approaching from behind without easily being able to check on its position is disturbing. This is a main reason that people hug the edge of the road, or avoid riding on roads.

You still need to turn your head!

With a rear-view mirror, it is convenient to take a quick glance to the rear — without turning your head, and without losing sight of what’s in front of you. Be aware, however, that all mirrors have blind spots.

Just as when changing lanes in a car, you should always turn your head to look before moving to a different road position — though you may not need to turn your head as far. There could be a car, or a bicyclist, about to pass you, in your mirror’s blind spot. So again, you should definitely learn to look behind you without swerving!

You can purchase a rear-view mirror that attaches to the handlebar, to your helmet, or to eyeglasses. Any of these takes some getting used to.

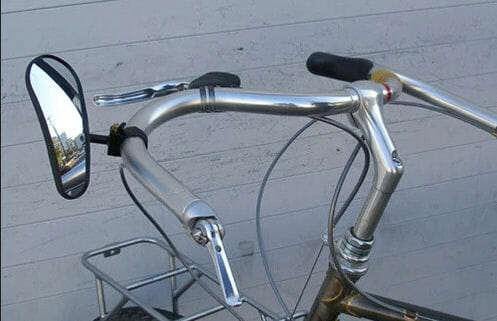
A handlebar mirror

A handlebar mirror.With a bar-end shifter, the mirror must clamp onto the handlebar. (Shopify)

Choosing a handlebar mirror

Handlebar mirrors vary. Some mount with a clamp around the handlebar and others with an expander plug at the handlebar end. Which model works depends on the type of handlebar and the other hardware mounted on it.

Many handlebar mirrors are convex, and as the saying goes, objects are closer than they appear. Unless the mirror extends vertically like the one in the photo, it works best from a single riding position. Your body blocks the view to the opposite side of the bicycle and so, in right-side driving countries, mount the mirror on the left.

Some handlebar-mounted rear-view mirrors, including the one shown, have a ball joint and are adjustable while riding if the joint is left a little loose. That can be useful if the road curves or you change position on the bicycle.

Can a helmet or eyeglass rear-view mirror work for you?

Getting a helmet or eyeglass mirror to work well requires some attention to detail.

These are flat mirrors. You focus on the view in the mirror, not on the mirror itself. You look into it with one eye.

To varying degrees, people are either right- or left-eye dominant. If you point a finger at a distant object and alternate closing one eye, then the other, the finger still points at the distant object when the dominant eye is open.  If one eye is strongly dominant, place the mirror on that side so your brain will show rather than hide the view in the mirror.

Mirror positioning

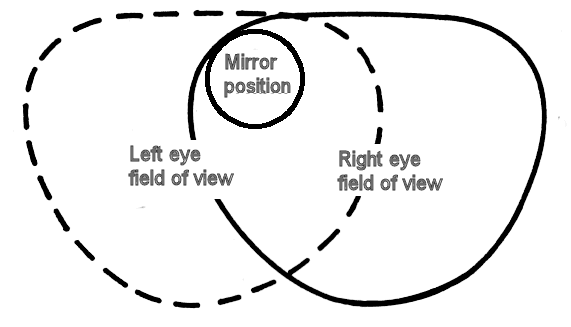
The mirror should be placed high and as far to the side as possible where the opposite eye still can see ahead. Check by closing one eye, then the other.

The mirror should be placed as far to the side as possible where the opposite eye still can see ahead. Check by closing one eye, then the other. John Allen has more detail on this topic. Larger helmet mirrors can be placed farther from the eye; only these are compatible with big hair.

The mirror should look directly to the rear or nearly so. Tilting the head can bring the road behind you into view in any riding position other than a racer’s low aerodynamic crouch. You scan right and left by turning the head while continuing to look into the mirror.

Expect to take a couple of weeks to figure out which way it is looking. This is  easier if the ear, helmet strap or hair is just visible at the edge of the mirror as a point of reference.

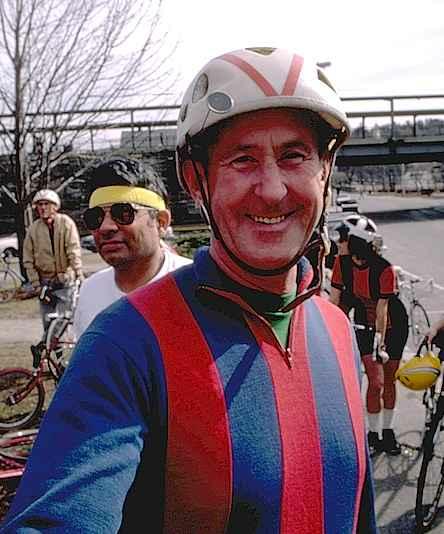
Jerry Campbell

Cyclist Jerry Campbell is right-eye dominant and wears his rear-view mirror on the right side (1982 photo).  This seems strange? Brian Watson uses two mirrors!

Different rear-view mirrors have different advantages.

A helmet mirror is always there when you put on your helmet, but take care that it attaches securely. A hot melt glue gun can be useful to secure some helmet mirrors.

An eyeglass mirror is easy to misplace, unless you leave it attached to eyeglasses you use only for riding. The mirror can pull your glasses down on your nose, but it works if you wear different helmets or none, not that we recommend that!

A handlebar mirror can break if the bike falls over. No mirror is perfect, but they all can work well.

Our next article is about bells and other options to alert people with sound.

Thanks to John Allen, Pamela Murray and Karen Karabell for their assistance with this article.

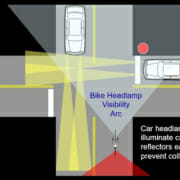
Diagram of light beams from cars and bicycle

Bicycle Lights: To See and Be Seen By

This post about bicycle lights is the second in a series about basic equipment and skills.

In October, as this post is published, hours of daylight grow shorter where most of our readers live and ride. My previous post explains how to check out your bicycle and determine that it is safe to ride.

But, is it safe to ride during hours of darkness?

Laws require lights for night riding, and lights are crucial for safety. Even if you don’t think you’re going to ride at night, it’s a good idea to have lights. Someday you may get caught out after dark unprepared. Besides, night riding can be quite enjoyable with the proper bicycle lights. There is often less traffic, so it can be very relaxing, if you can be confident that people can see you.

There are too many different lights to get into in much detail here, but I’ll try to help you make a choice.

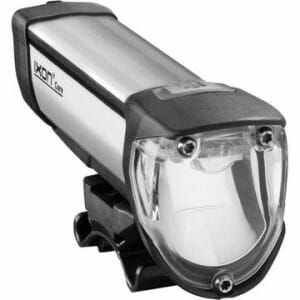
a shaped-beam headlight. Note the scoop-shaped internal mirror.

A shaped-beam battery-powered headlight. Note the scoop-shaped internal mirror.

How Bright the Light?

Any taillight sold at a bike shop will do. Many bicycle lights are sold in packs of one headlight and one taillight.

Bicycle headlights come in a wide range of brightness. If you will be riding only in town with streetlights, you can get by with a headlight just bright enough to alert people to your approach. But, on rural roads or on trails at night, much brighter headlights are necessary — and available.

The better bright headlights have a shaped beam pattern like that of a car headlight to spare input power and avoid blinding people. You can identify the beam pattern quickly by shining the light at a wall. Brightness is most often measured in lumens — total light output. But many very bright headlights (up to 1000 lumens) have a round beam pattern. These lights are preferable only for riding off road, or for additional visibility in daytime.

Shaped headlight beam throws a long beam without blinding people.

Shaped pattern throws a long beam without blinding people.

Round beam glares into people's eyes unless aimed low

Round beam glares into people’s eyes unless aimed low.

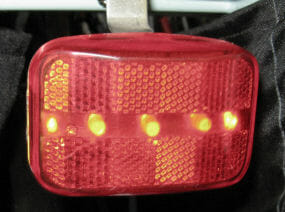
For many years, the most common taillight in the USA was the “blinky,” pioneered by Vistalite. It attaches to the standard US two-hole reflector bracket.

A"blinky"

A “blinky” as pioneered by Vistalite

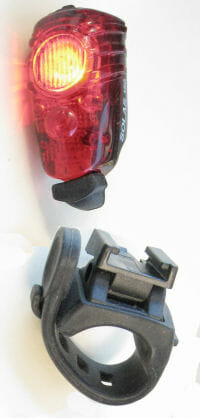
A common type of taillight these days attaches in a variety of locations with a stretchy rubber strap. Unlike the Vistalite, these lights do not include retroreflective panels.

Solastaillight

This taillight slips out of its bracket for security or to charge the battery. It does not include retroreflective panels.

Reflectors: useful, but no substitute for lights

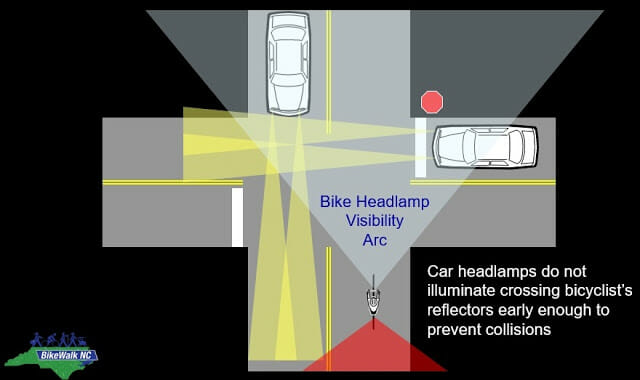
Why should you use lights in town with streetlights? Because without your own lights, you are surprisingly invisible whenever you are not directly under a streetlight. And car headlights do not necessarily reveal you.

Now, your bicycle probably has — or had, when new — reflectors, those plastic, jewel-like pieces attached at the rear, the front, to the pedals and the spokes. Some bicycle tires have retroreflective strips on the sidewalls, and you can buy retroreflective stick-on tape and clothing.

Reflectors use optical trickery to send light back in a narrow beam in the direction it came from. When the headlights of a car point at a reflector, it will shine brightly for the driver.

But, more often than you may realize:

  • A motorist is planning to cross in front of you: worse yet if the car is backing out of a driveway!
  • A motorist opposite you at an intersection is preparing to turn left, and you are all the way over on the other side of the road from the light source;
  • You are approaching someone who has no headlight — pedestrians, especially.
Diagram of light beams from cars and bicycle

Without a bicycle headlight, these motorists would have a hard time seeing the bicyclist soon enough. Reflectors won’t help.

Rear- and side-facing reflectors can help make you visible. Laws sometimes require them too, but they don’t substitute for bicycle lights. Though the headlights of a vehicle approaching from behind point toward you, drivers of some large vehicles sit high above the headlights. Fog, rain, dust, or water on a bicycle reflector’s surface can reduce its effectiveness. Also, the standard rear-facing reflector is rather small. Still, your taillight could go out without your noticing, and you wouldn’t want to be without rear-facing reflectors then. Even if your taillight includes reflector panels, it’s smart to use additional rear-facing reflective items. Many people run two taillights, in case one fails.

How Bicycle Lights Are Powered

Bicycle lights have any of three sources of electrical power:

Power Source Brightness Run Time Price
Replaceable alkaline batteries Least bright (some only to alert people, not to see by) Longest (50-100 hours) Cheapest (under $50)
Integrated rechargeable batteries (by wall plug or USB) Moderately to blindingly bright 2-6 hours; longer for taillights Moderate to expensive (up to $200)
Generator Moderate to bright (may go dark at a stop but not all do) Unlimited :-) Moderate to expensive ($20-$800)

Most battery-powered bicycle lights are easy to install and remove. Generator lights are permanently attached to the bicycle. The generator may be of the old “bottle” variety, mounted near the wheel and driven by the tire when engaged. Newer generators are built into the hub of the wheel. We strongly recommend purpose-built bicycle lights, as opposed to jury-rigged flashlights, or lights attached to clothing or backpacks. Bicycle lights attached to the bicycle stay attached and aligned better.

Bicycle Light Settings and Modes

Many lights have different power settings and modes, which can also affect the run time. Modes include steady, blinking, or other kinds of fancier blink patterns. Many cyclists use a blink pattern to get people’s attention better, but blinking makes it harder to track motion, and may also induce seizures in some people. My personal preference is for a steady light front and back after dark, but blinking when there is still some daylight: dawn/dusk, rain, fog, heavy cloud cover.

Generators supply power only when the bicycle is moving, but many generator lights have “standlight” energy storage, and shine at reduced brightness for a few minutes when the bicycle has stopped.

Also see my original FreeBikeHelp post.

Next: use a rear-view mirror?