
Bicycle Lights: To See and Be Seen By
This post about bicycle lights is the second in a series about basic equipment and skills.
In October, as this post is published, hours of daylight grow shorter where most of our readers live and ride. My previous post explains how to check out your bicycle and determine that it is safe to ride.
But, is it safe to ride during hours of darkness?
Laws require lights for night riding, and lights are crucial for safety. Even if you don’t think you’re going to ride at night, it’s a good idea to have lights. Someday you may get caught out after dark unprepared. Besides, night riding can be quite enjoyable with the proper bicycle lights. There is often less traffic, so it can be very relaxing, if you can be confident that people can see you.
There are too many different lights to get into in much detail here, but I’ll try to help you make a choice.
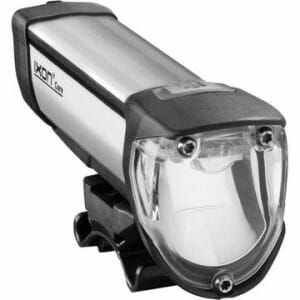
A shaped-beam battery-powered headlight. Note the scoop-shaped internal mirror.
How Bright the Light?
Any taillight sold at a bike shop will do. Many bicycle lights are sold in packs of one headlight and one taillight.
Bicycle headlights come in a wide range of brightness. If you will be riding only in town with streetlights, you can get by with a headlight just bright enough to alert people to your approach. But, on rural roads or on trails at night, much brighter headlights are necessary — and available.
The better bright headlights have a shaped beam pattern like that of a car headlight to spare input power and avoid blinding people. You can identify the beam pattern quickly by shining the light at a wall. Brightness is most often measured in lumens — total light output. But many very bright headlights (up to 1000 lumens) have a round beam pattern. These lights are preferable only for riding off road, or for additional visibility in daytime.

Shaped pattern throws a long beam without blinding people.

Round beam glares into people’s eyes unless aimed low.
For many years, the most common taillight in the USA was the “blinky,” pioneered by Vistalite. It attaches to the standard US two-hole reflector bracket.
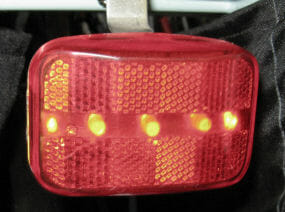
A “blinky” as pioneered by Vistalite
A common type of taillight these days attaches in a variety of locations with a stretchy rubber strap. Unlike the Vistalite, these lights do not include retroreflective panels.
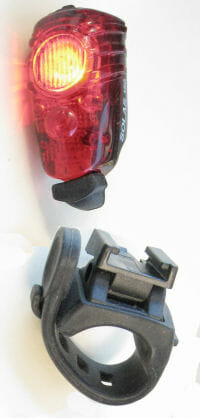
This taillight slips out of its bracket for security or to charge the battery. It does not include retroreflective panels.
Reflectors: useful, but no substitute for lights
Why should you use lights in town with streetlights? Because without your own lights, you are surprisingly invisible whenever you are not directly under a streetlight. And car headlights do not necessarily reveal you.
Now, your bicycle probably has — or had, when new — reflectors, those plastic, jewel-like pieces attached at the rear, the front, to the pedals and the spokes. Some bicycle tires have retroreflective strips on the sidewalls, and you can buy retroreflective stick-on tape and clothing.
Reflectors use optical trickery to send light back in a narrow beam in the direction it came from. When the headlights of a car point at a reflector, it will shine brightly for the driver.
But, more often than you may realize:
- A motorist is planning to cross in front of you: worse yet if the car is backing out of a driveway!
- A motorist opposite you at an intersection is preparing to turn left, and you are all the way over on the other side of the road from the light source;
- You are approaching someone who has no headlight — pedestrians, especially.
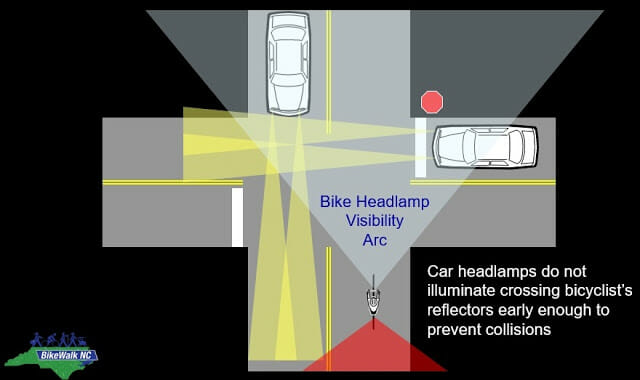
Without a bicycle headlight, these motorists would have a hard time seeing the bicyclist soon enough. Reflectors won’t help.
Rear- and side-facing reflectors can help make you visible. Laws sometimes require them too, but they don’t substitute for bicycle lights. Though the headlights of a vehicle approaching from behind point toward you, drivers of some large vehicles sit high above the headlights. Fog, rain, dust, or water on a bicycle reflector’s surface can reduce its effectiveness. Also, the standard rear-facing reflector is rather small. Still, your taillight could go out without your noticing, and you wouldn’t want to be without rear-facing reflectors then. Even if your taillight includes reflector panels, it’s smart to use additional rear-facing reflective items. Many people run two taillights, in case one fails.
How Bicycle Lights Are Powered
Bicycle lights have any of three sources of electrical power:
| Power Source | Brightness | Run Time | Price |
| Replaceable alkaline batteries | Least bright (some only to alert people, not to see by) | Longest (50-100 hours) | Cheapest (under $50) |
| Integrated rechargeable batteries (by wall plug or USB) | Moderately to blindingly bright | 2-6 hours; longer for taillights | Moderate to expensive (up to $200) |
| Generator | Moderate to bright (may go dark at a stop but not all do) | Unlimited :-) | Moderate to expensive ($20-$800) |
Most battery-powered bicycle lights are easy to install and remove. Generator lights are permanently attached to the bicycle. The generator may be of the old “bottle” variety, mounted near the wheel and driven by the tire when engaged. Newer generators are built into the hub of the wheel. We strongly recommend purpose-built bicycle lights, as opposed to jury-rigged flashlights, or lights attached to clothing or backpacks. Bicycle lights attached to the bicycle stay attached and aligned better.
Bicycle Light Settings and Modes
Many lights have different power settings and modes, which can also affect the run time. Modes include steady, blinking, or other kinds of fancier blink patterns. Many cyclists use a blink pattern to get people’s attention better, but blinking makes it harder to track motion, and may also induce seizures in some people. My personal preference is for a steady light front and back after dark, but blinking when there is still some daylight: dawn/dusk, rain, fog, heavy cloud cover.
Generators supply power only when the bicycle is moving, but many generator lights have “standlight” energy storage, and shine at reduced brightness for a few minutes when the bicycle has stopped.
Also see my original FreeBikeHelp post.
Next: use a rear-view mirror?